HP Color LaserJet Pro M252 User Guide - Page 97
Visually inspect the toner cartridge, Check paper and the printing environment
 |
View all HP Color LaserJet Pro M252 manuals
Add to My Manuals
Save this manual to your list of manuals |
Page 97 highlights
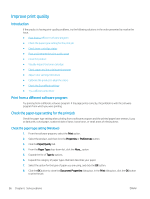
Print a cleaning page 2-line control panels 1. From the product control panel, press the OK button. 2. Open the Service menu. 3. Use the arrow keys to select the Cleaning mode option, and then press the OK button. The product prints the first side and then prompts you to remove the page from the output bin and reload it in Tray 1, keeping the same orientation. Wait until the process is complete. Discard the page that prints. Touchscreen control panels 1. From the Home screen on the product control panel, touch the Setup button. 2. Touch the Service menu. 3. Touch the Cleaning Page button. 4. Load plain letter or A4 paper when you are prompted. 5. Touch the OK button to begin the cleaning process. The product prints the first side and then prompts you to remove the page from the output bin and reload it in Tray 1, keeping the same orientation. Wait until the process is complete. Discard the page that prints. Visually inspect the toner cartridge Follow these steps to inspect each toner cartridge. 1. Remove the toner cartridge from the product. 2. Check the memory chip for damage. 3. Examine the surface of the green imaging drum. CAUTION: Do not touch the imaging drum. Fingerprints on the imaging drum can cause print-quality problems. 4. If you see any scratches, fingerprints, or other damage on the imaging drum, replace the toner cartridge. 5. Reinstall the toner cartridge, and print a few pages to see if the problem has resolved. Check paper and the printing environment Step one: Use paper that meets HP specifications Some print-quality problems arise from using paper that does not meet HP specifications. ● Always use a paper type and weight that this product supports. ● Use paper that is of good quality and free of cuts, nicks, tears, spots, loose particles, dust, wrinkles, voids, staples, and curled or bent edges. ● Use paper that has not been previously printed on. ● Use paper that does not contain metallic material, such as glitter. ENWW Improve print quality 89
-
 1
1 -
2
-
3
-
4
-
5
-
6
-
7
-
8
-
9
-
10
-
11
-
12
-
13
-
14
-
15
-
16
-
17
-
18
-
19
-
20
-
21
-
22
-
23
-
24
-
25
-
26
-
27
-
28
-
29
-
30
-
31
-
32
-
33
-
34
-
35
-
36
-
37
-
38
-
39
-
40
-
41
-
42
-
43
-
44
-
45
-
46
-
47
-
48
-
49
-
50
-
51
-
52
-
53
-
54
-
55
-
56
-
57
-
58
-
59
-
60
-
61
-
62
-
63
-
64
-
65
-
66
-
67
-
68
-
69
-
70
-
71
-
72
-
73
-
74
-
75
-
76
-
77
-
78
-
79
-
80
-
81
-
82
-
83
-
84
-
85
-
86
-
87
-
88
-
89
-
90
-
91
-
 92
92 -
 93
93 -
 94
94 -
 95
95 -
 96
96 -
 97
97 -
 98
98 -
 99
99 -
 100
100 -
 101
101 -
 102
102 -
103
-
104
-
105
-
106
-
107
-
108
-
109
-
110
-
111
-
112
 |
 |
