HP Designjet Z6200 HP Designjet Z6200 Photo Printer series - User's Guide: Eng - Page 163
Print the same HP-GL/2 file, The output is completely blank, The output contains only a partial print
 |
View all HP Designjet Z6200 manuals
Add to My Manuals
Save this manual to your list of manuals |
Page 163 highlights
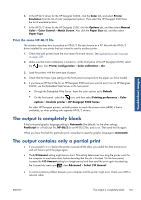
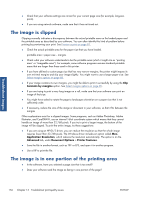
Troubleshoot images 6. In the HP-GL/2 driver for the HP Designjet Z6200, click the Color tab, and select Printer Emulation from the list of color management options. Then select the HP Designjet 5500 from the list of emulated printers. 7. In the HP-GL/2 driver for the HP Designjet 5500, click the Options tab, and then select Manual Color > Color Control > Match Screen. Also click the Paper Size tab, and then select Paper Type. Print the same HP-GL/2 file The situation describes how to produce an HP-GL/2 file (also known as a PLT file) with the HP-GL/2 driver installed for one printer that you intend to send to another printer. 1. Check that both printers have the most recent firmware version. See Update the printer firmware on page 138. 2. Make sure that Color Calibration is turned on. At the front panel of the HP Designjet Z6200, select the icon, then Printer configuration > Color calibration > On. 3. Load the printers with the same type of paper. 4. Check that the Paper Type setting on the front panel corresponds to the paper you have loaded. 5. If you have an HP-GL/2 file for an HP Designjet 5500 and you want to print it on an HP Designjet Z6200, use the Embedded Web Server or the front panel. ● Through the Embedded Web Server: leave the color options set to Default. ● On the front panel: select the icon, and then select Printing preferences > Color options > Emulate printer > HP Designjet 5500 Series. For other HP Designjet printers, set both printers to match the screen colors (sRGB, if that is available), as when printing with separate HP-GL/2 drivers. The output is completely blank If the front-panel graphic language setting is Automatic (the default), try the other settings: PostScript for a PostScript file, HP-GL/2 for an HP-GL/2 file, and so on. Then send the file again. When you have finished this particular print, remember to reset the graphic language to Automatic. The output contains only a partial print ● If you pressed Cancel before the printer received all the data, you ended the data transmission and will have to print the page again. ● The I/O timeout setting might be too short. This setting determines how long the printer waits for the computer to send more data, before deciding that the job is finished. On the front panel, increase the I/O timeout setting to a longer period and then send the print again by selecting the Connectivity menu icon , then Advanced > Select I/O timeout. ● A communications problem between your computer and the printer might exist. Check your USB or network cable. ENWW The output is completely blank 155
-
 1
1 -
2
-
3
-
4
-
5
-
6
-
7
-
8
-
9
-
10
-
11
-
12
-
13
-
14
-
15
-
16
-
17
-
18
-
19
-
20
-
21
-
22
-
23
-
24
-
25
-
26
-
27
-
28
-
29
-
30
-
31
-
32
-
33
-
34
-
35
-
36
-
37
-
38
-
39
-
40
-
41
-
42
-
43
-
44
-
45
-
46
-
47
-
48
-
49
-
50
-
51
-
52
-
53
-
54
-
55
-
56
-
57
-
58
-
59
-
60
-
61
-
62
-
63
-
64
-
65
-
66
-
67
-
68
-
69
-
70
-
71
-
72
-
73
-
74
-
75
-
76
-
77
-
78
-
79
-
80
-
81
-
82
-
83
-
84
-
85
-
86
-
87
-
88
-
89
-
90
-
91
-
92
-
93
-
94
-
95
-
96
-
97
-
98
-
99
-
100
-
101
-
102
-
103
-
104
-
105
-
106
-
107
-
108
-
109
-
110
-
111
-
112
-
113
-
114
-
115
-
116
-
117
-
118
-
119
-
120
-
121
-
122
-
123
-
124
-
125
-
126
-
127
-
128
-
129
-
130
-
131
-
132
-
133
-
134
-
135
-
136
-
137
-
138
-
139
-
140
-
141
-
142
-
143
-
144
-
145
-
146
-
147
-
148
-
149
-
150
-
151
-
152
-
153
-
154
-
155
-
156
-
157
-
 158
158 -
 159
159 -
 160
160 -
 161
161 -
 162
162 -
 163
163 -
 164
164 -
 165
165 -
 166
166 -
 167
167 -
 168
168 -
169
-
170
-
171
-
172
-
173
-
174
-
175
-
176
-
177
-
178
-
179
-
180
-
181
-
182
-
183
-
184
-
185
-
186
-
187
-
188
-
189
-
190
-
191
-
192
-
193
-
194
-
195
-
196
-
197
-
198
-
199
-
200
-
201
-
202
-
203
-
204
-
205
-
206
-
207
-
208
-
209
-
210
-
211
-
212
-
213
-
214
-
215
-
216
-
217
-
218
-
219
-
220
 |
 |