HP Deskjet 450 HP Deskjet 450 mobile printer - (English) User Guide - Page 12
Step 6: Install the software, Step 7: Connect the printer cable if required, Step 8: Load paper - windows 7
 |
UPC - 844844844303
View all HP Deskjet 450 manuals
Add to My Manuals
Save this manual to your list of manuals |
Page 12 highlights
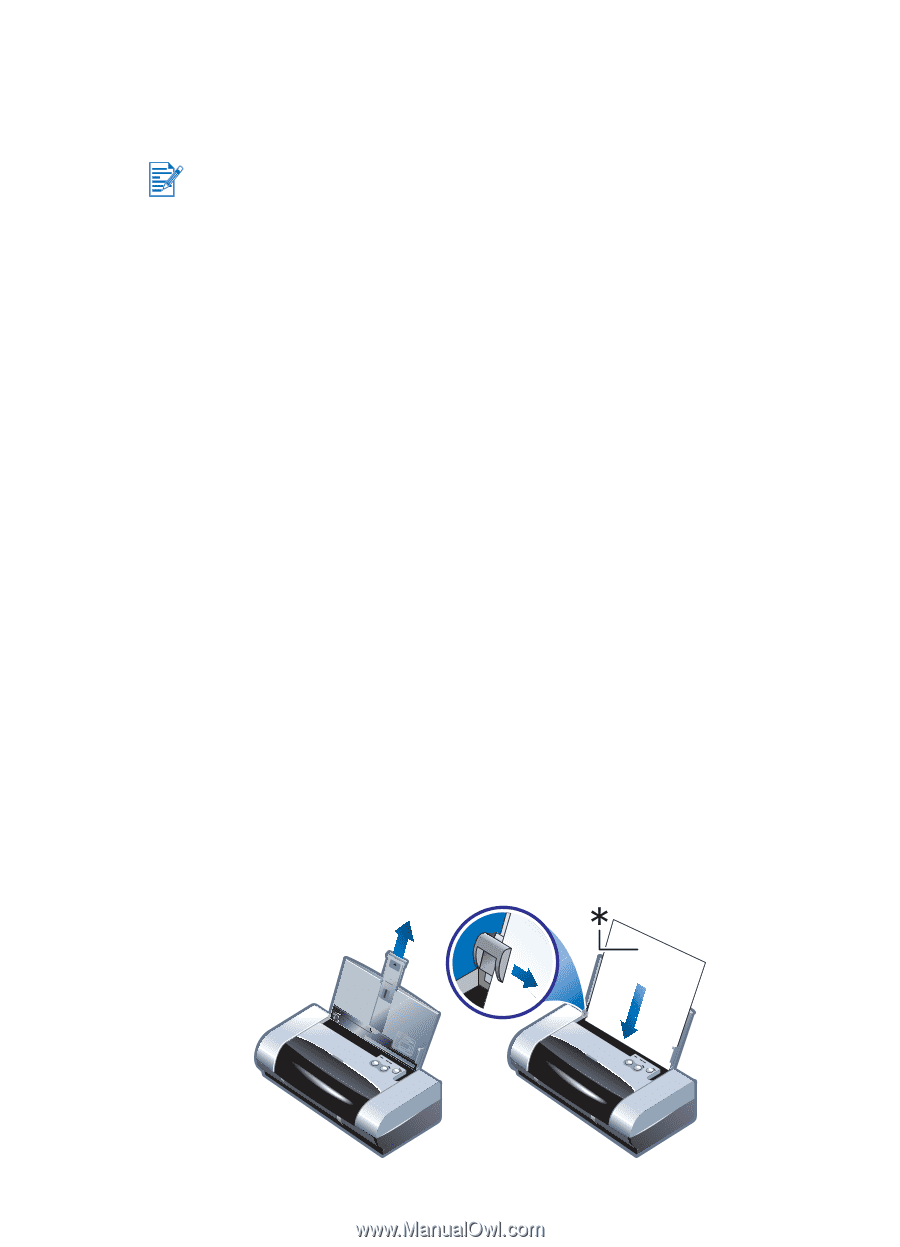
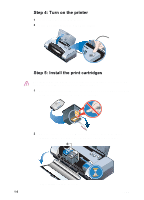
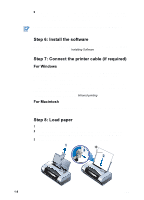
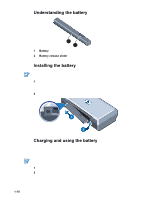
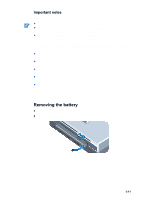
6 Close the front access cover. Wait for the carriage to complete the print cartridge initialization routine and return to the home position at the right side of the printer before using the printer. Do not open the front access cover until the print cartridge initialization is complete. Step 6: Install the software Install the printer software from the Starter CD before you connect the parallel or USB cable. For details, see Installing Software. Step 7: Connect the printer cable (if required) For Windows If your computer has a USB port and is using Microsoft® Windows® 98, Windows Me, Windows 2000, or Windows XP, you can connect the printer to the computer using a USB cable. If your computer is using Windows NT® version 4.0 or if your computer is not configured to use USB, you can connect the printer to your computer with the parallel cable that is provided with the printer. For infrared connection, please see Infrared printing. For Macintosh If your computer has a USB port, you can connect the printer to the computer using a USB cable. Step 8: Load paper 1 Slide up the input tray extension. 2 Load media into the input tray. The input tray supports up to 45 sheets of plain paper or a stack of media no more than 0.18 in (4.5 mm) thick. 3 Slide the paper guide snugly against the edge of the media. 1 3 2 1-8 ENWW
-
 1
1 -
2
-
3
-
4
-
5
-
6
-
 7
7 -
 8
8 -
 9
9 -
 10
10 -
 11
11 -
 12
12 -
 13
13 -
 14
14 -
 15
15 -
 16
16 -
 17
17 -
18
-
19
-
20
-
21
-
22
-
23
-
24
-
25
-
26
-
27
-
28
-
29
-
30
-
31
-
32
-
33
-
34
-
35
-
36
-
37
-
38
-
39
-
40
-
41
-
42
-
43
-
44
-
45
-
46
-
47
-
48
-
49
-
50
-
51
-
52
-
53
-
54
-
55
-
56
-
57
-
58
-
59
-
60
-
61
-
62
-
63
-
64
-
65
-
66
-
67
-
68
-
69
-
70
-
71
-
72
-
73
-
74
-
75
-
76
-
77
-
78
-
79
-
80
-
81
-
82
-
83
-
84
-
85
-
86
 |
 |