HP Deskjet 450 HP Deskjet 450 mobile printer - (English) User Guide - Page 9
Setting up the printer, Step 1: Check the box contents, Step 2: Unpack the printer - deskjet 450cbi
 |
UPC - 844844844303
View all HP Deskjet 450 manuals
Add to My Manuals
Save this manual to your list of manuals |
Page 9 highlights
Setting up the printer Step 1: Check the box contents Refer to the Setup Poster for an illustrated guide to all the parts that should come in the box. 1 HP Deskjet 450 printer 2 2 print cartridges - 1 black (HP No. 56) and 1 tri-color (HP No. 57) 3 Power adapter 4 Power cord 5 Parallel cable 6 Battery (optional, comes with the HP Deskjet 450CBi printer) 7 Starter CD 8 Setup poster 9 Reference Guide 10 Regulatory Booklet Step 2: Unpack the printer Unpack the printer and remove the packing tape and shipping materials from inside the printer. Step 3: Connect the power cord Connect the power adapter to the power cord and to the printer. Plug in the power cord and make sure the power supply is turned on. ENWW 3 1 2 1-5
-
 1
1 -
2
-
3
-
 4
4 -
 5
5 -
 6
6 -
 7
7 -
 8
8 -
 9
9 -
 10
10 -
 11
11 -
 12
12 -
 13
13 -
 14
14 -
15
-
16
-
17
-
18
-
19
-
20
-
21
-
22
-
23
-
24
-
25
-
26
-
27
-
28
-
29
-
30
-
31
-
32
-
33
-
34
-
35
-
36
-
37
-
38
-
39
-
40
-
41
-
42
-
43
-
44
-
45
-
46
-
47
-
48
-
49
-
50
-
51
-
52
-
53
-
54
-
55
-
56
-
57
-
58
-
59
-
60
-
61
-
62
-
63
-
64
-
65
-
66
-
67
-
68
-
69
-
70
-
71
-
72
-
73
-
74
-
75
-
76
-
77
-
78
-
79
-
80
-
81
-
82
-
83
-
84
-
85
-
86
 |
 |
ENWW
1-5
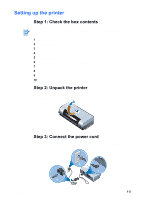
Setting up the printer
Step 1: Check the box contents
1
HP Deskjet 450 printer
2
2 print cartridges – 1 black (HP No. 56) and 1 tri-color (HP No. 57)
3
Power adapter
4
Power cord
5
Parallel cable
6
Battery (optional, comes with the HP Deskjet 450CBi printer)
7
Starter CD
8
Setup poster
9
Reference Guide
10
Regulatory Booklet
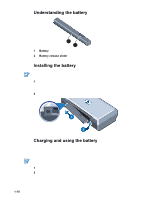
Step 2: Unpack the printer
Unpack the printer and remove the packing tape and shipping materials from
inside the printer.
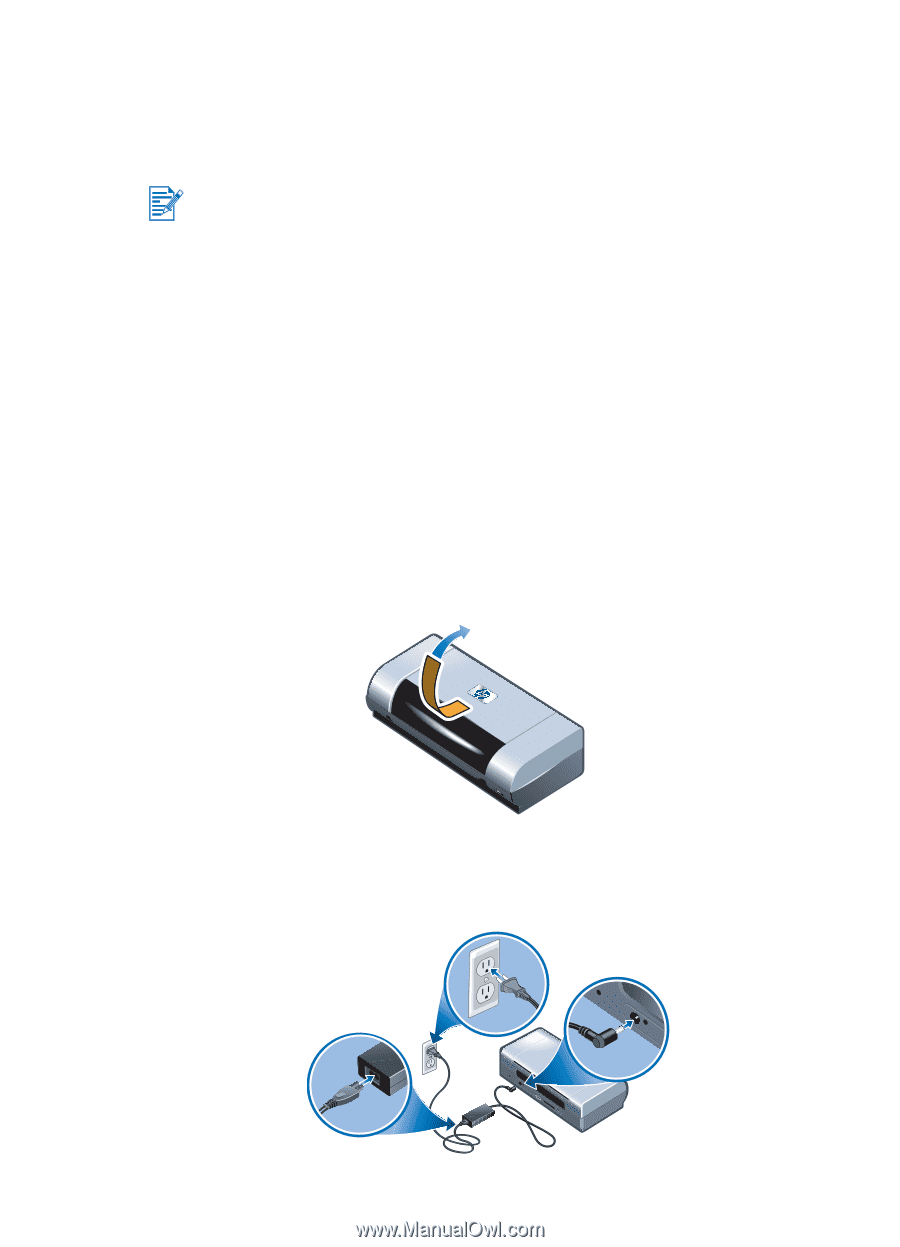
Step 3: Connect the power cord
Connect the power adapter to the power cord and to the printer. Plug in the
power cord and make sure the power supply is turned on.
Refer to the Setup Poster for an illustrated guide to all the parts that should
come in the box.
3
2
1