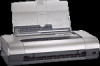
HP Deskjet 450 HP Deskjet 450 mobile printer - (English) User Guide - Page 14
Installing the battery, Battery, Battery release slider - power supply
 |
UPC - 844844844303
View all HP Deskjet 450 manuals
Add to My Manuals
Save this manual to your list of manuals |
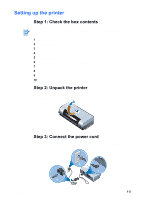
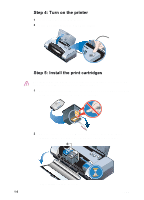
Page 14 highlights
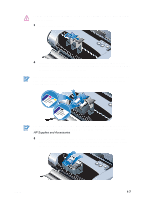
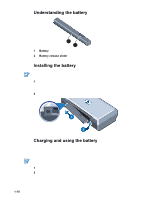
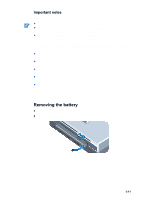
Understanding the battery 1 2 1 Battery - Supplies power to the printer. 2 Battery release slider - Slides to release the battery. Installing the battery You can install the battery with the printer turned on or off. 1 Slide the battery into the battery slot at an angle as shown in the following illustration, until the battery is flushed with the contacts. This also slides the battery contact cover open. 2 Push the battery into the battery slot until the battery clicks into place. Charging and using the battery Fully recharge the battery before using. The battery is normally warm while it is charging. Do not charge it in a briefcase or other confined space as this may cause the battery to overheat. The AC adapter is normally warm to the touch when plugged into an AC outlet. 1-10 1 Install the battery. 2 Plug in the AC adapter and turn on the printer. The Battery charge LED is green while charging, and turns off when the battery is fully charged. After the battery is fully charged, you can use the printer without connecting to the AC power supply. ENWW
-
 1
1 -
2
-
3
-
4
-
5
-
6
-
7
-
8
-
 9
9 -
 10
10 -
 11
11 -
 12
12 -
 13
13 -
 14
14 -
 15
15 -
 16
16 -
 17
17 -
 18
18 -
 19
19 -
20
-
21
-
22
-
23
-
24
-
25
-
26
-
27
-
28
-
29
-
30
-
31
-
32
-
33
-
34
-
35
-
36
-
37
-
38
-
39
-
40
-
41
-
42
-
43
-
44
-
45
-
46
-
47
-
48
-
49
-
50
-
51
-
52
-
53
-
54
-
55
-
56
-
57
-
58
-
59
-
60
-
61
-
62
-
63
-
64
-
65
-
66
-
67
-
68
-
69
-
70
-
71
-
72
-
73
-
74
-
75
-
76
-
77
-
78
-
79
-
80
-
81
-
82
-
83
-
84
-
85
-
86
 |
 |
