HP Integrity rx2620 Installation (Smart Setup) Guide, Windows Server 2003, v5. - Page 45
Specify server settings, attached to the server.
 |
View all HP Integrity rx2620 manuals
Add to My Manuals
Save this manual to your list of manuals |
Page 45 highlights
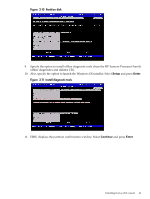
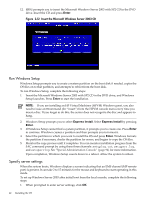
12. Select the desired partition size (33 GB is recommended). The maximum partition size is limited to the size of the drive. Select Y to continue. NOTE: The installation process copies files to the hard disk. Do not power off the server during the installation. 13. When the installation process completes, press any key to reboot the server. 14. The local console displays a screen indicating that the EMS was detected. When prompted to use the local console, do not click OK. 15. Return to the headless console and perform system setup as indicated in the following section. Specify server settings To set up Windows Server 2003 after initial boot from a headless console, complete the following steps: 1. At the SAC> prompt, switch to channel one by pressing Esc+Tab. The system displays the following screen: Name: Unattended Setup Channel Description: Provide parameters to automate Setup Type: VT-UTF8 Channel GUID: 0cfc0ee2-3a27-11d7-8484-806e6f6e6963 Application Type GUID: 00000000-0000-0000-0000-000000000000 Press for next channel. Press 0 to return to the SAC channel. Use any other key to view this channel 2. Press any key and then press Page Down. 3. Accept the license agreement by pressing F8. On the Windows default terminal emulator, F8 is 8. Press 8 within 2 seconds after pressing Esc. Otherwise, the system registers only the Esc key and reboots. 4. Enter the product key. The product key is located on the Microsoft Certificate of Authenticity attached to the server. 5. Enter the administrator password and reenter to confirm. The mini-setup process continues automatically and after completion, it reboots the system. Wait for the SAC> prompt to reappear. 6. Open a terminal server client and connect to the IP address of the server. Change the computer name and IP address, if needed. 7. On the desktop, open the Online Reference page, scroll to the bottom, and click the link to c:\hputils\usercompanyname.cmd. 8. When prompted, enter company and user name, and click OK. 9. Login as the system administrator. 10. At the prompt, Please mount HP Smart Setup media on the Server's DVD drive to install utilities, do one of the following: • If you want to update the drivers and install the online utilities, mount the HP Smart Setup media shipped with your system and click Yes to continue. • If you do not want to update the drivers and install the online utilities at this time, click No to continue. Reinstalling from a headless console 45
-
 1
1 -
2
-
3
-
4
-
5
-
6
-
7
-
8
-
9
-
10
-
11
-
12
-
13
-
14
-
15
-
16
-
17
-
18
-
19
-
20
-
21
-
22
-
23
-
24
-
25
-
26
-
27
-
28
-
29
-
30
-
31
-
32
-
33
-
34
-
35
-
36
-
37
-
38
-
39
-
 40
40 -
 41
41 -
 42
42 -
 43
43 -
 44
44 -
 45
45 -
 46
46 -
 47
47 -
 48
48 -
 49
49 -
 50
50 -
51
-
52
-
53
-
54
-
55
-
56
-
57
-
58
-
59
-
60
-
61
-
62
-
63
-
64
-
65
-
66
-
67
-
68
-
69
-
70
-
71
-
72
-
73
-
74
-
75
-
76
-
77
-
78
-
79
-
80
-
81
-
82
-
83
-
84
-
85
-
86
-
87
-
88
-
89
-
90
-
91
-
92
-
93
-
94
-
95
-
96
 |
 |