HP Integrity rx2620 Installation (Smart Setup) Guide, Windows Server 2003, v5. - Page 66
Installing partition management tools, SNMP Service, Add to List
 |
View all HP Integrity rx2620 manuals
Add to My Manuals
Save this manual to your list of manuals |
Page 66 highlights
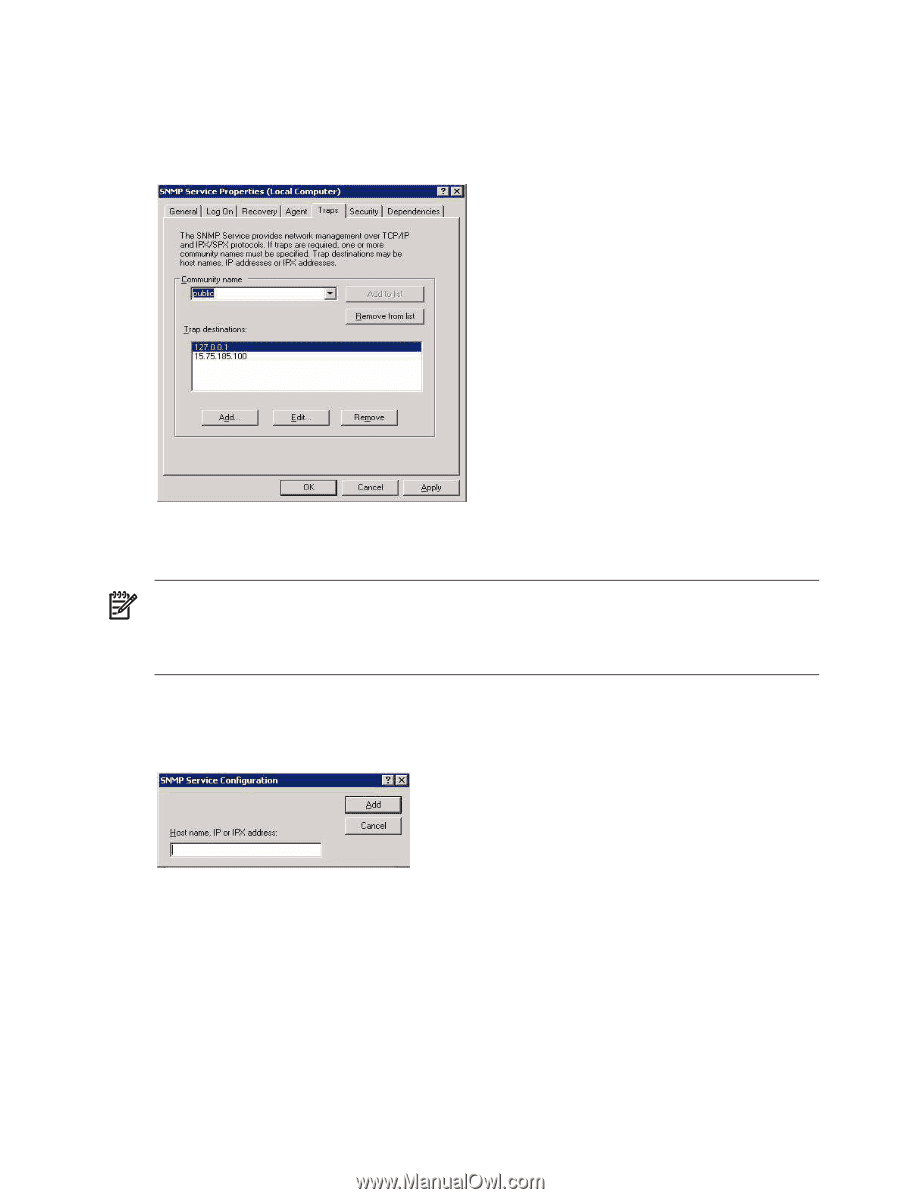
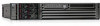
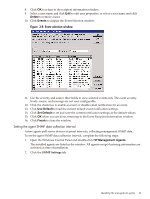
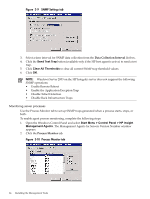
3. From the list of services, double-click SNMP Service. The SNMP Service Properties (Local Computer) window appears. 4. Click the Security tab. 5. Click the Traps tab. Figure 3-12 SNMP traps tab 6. In the Community name field, if a community name already exists, select it. If one does not exist, enter a community name and click Add to List. NOTE: The default community string for HP Insight Manager is public. If you enter a different community string here, enter the same string on the management console that is responsible for the system. HP recommends not using the string public because it is the default value, commonly used, and can present a security risk. 7. Under the Traps Destinations list, click Add. The SNMP Service Configuration window appears. Figure 3-13 SNMP service configuration 8. In the Host name, IP or IPX Address field, enter the IP address of the management console. This address identifies the management console to receive the alert when the server agents detect a significant event. 9. Add 127.0.0.1 as a trap destination if it is not already listed. You must do this to enable the loopback service. 10. Click Add, then OK. Installing partition management tools This section is an overview of the installation and use of the nPartition Commands Bundle and nPartition Manager Bundle. You must install the nPartition Commands Bundle before the 66 Installing the Management Tools
-
 1
1 -
2
-
3
-
4
-
5
-
6
-
7
-
8
-
9
-
10
-
11
-
12
-
13
-
14
-
15
-
16
-
17
-
18
-
19
-
20
-
21
-
22
-
23
-
24
-
25
-
26
-
27
-
28
-
29
-
30
-
31
-
32
-
33
-
34
-
35
-
36
-
37
-
38
-
39
-
40
-
41
-
42
-
43
-
44
-
45
-
46
-
47
-
48
-
49
-
50
-
51
-
52
-
53
-
54
-
55
-
56
-
57
-
58
-
59
-
60
-
 61
61 -
 62
62 -
 63
63 -
 64
64 -
 65
65 -
 66
66 -
 67
67 -
 68
68 -
 69
69 -
 70
70 -
 71
71 -
72
-
73
-
74
-
75
-
76
-
77
-
78
-
79
-
80
-
81
-
82
-
83
-
84
-
85
-
86
-
87
-
88
-
89
-
90
-
91
-
92
-
93
-
94
-
95
-
96
 |
 |