HP Integrity rx2620 Installation (Smart Setup) Guide, Windows Server 2003, v5. - Page 60
Con management agents after Support Pack installation
 |
View all HP Integrity rx2620 manuals
Add to My Manuals
Save this manual to your list of manuals |
Page 60 highlights
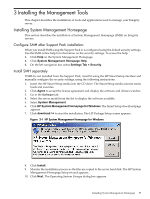
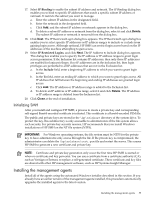
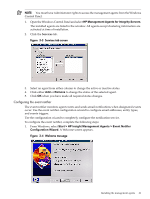
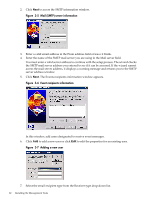
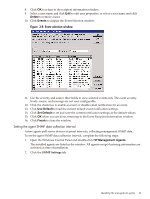
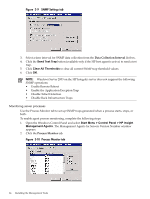
NOTE: Do not install any HP management agents until you have installed and configured the TCP/IP and SNMP protocols. Configure management agents after Support Pack installation Agents are automatically activated when they are installed (except for the Clustering Information agents). Inactive agents remain installed but are dormant until you activate them again. For instructions on configuring an agent or making it inactive, see "Activating and configuring agents" (page 60). Install management agents from Smart Setup media To install the HP management agents using the Windows installer, complete the following steps: 1. Insert the HP Smart Setup media into the CD drive. The Smart Setup media autorun menu loads and executes. 2. Click Agree to accept the license agreement and display the software and drivers window. 3. Go to the Software tab. 4. Select the server model from the list, to display the software available. 5. Select System Management. 6. Click HP Insight Management Agents (Windows Server 2003 on Itanium-based systems. The Smart Setup download page appears. 7. Click download >> to start the installation. The HP Package Setup page appears. Figure 3-2 HP Insight Management Agents for Windows Server 2003 on Itanium-based systems 8. Click Install. The HP Setup screen appears. 9. Monitor the installation process as the files are copied to the server hard disk. After the files are copied, the installation wizard prompts you to start the agents. 10. Click Close at the end of the installation. 11. Open the Windows Control Panel and verify that the HP management applet has been installed. 12. Open Windows Services and verify that the agent services are installed and running. Activating and configuring agents Configuring and activating agents comprises the following tasks: Activating agents Activate and deactivate selected agents from the Windows Control Panel. To activate or deactivate an agent, complete the following steps: 60 Installing the Management Tools
-
 1
1 -
2
-
3
-
4
-
5
-
6
-
7
-
8
-
9
-
10
-
11
-
12
-
13
-
14
-
15
-
16
-
17
-
18
-
19
-
20
-
21
-
22
-
23
-
24
-
25
-
26
-
27
-
28
-
29
-
30
-
31
-
32
-
33
-
34
-
35
-
36
-
37
-
38
-
39
-
40
-
41
-
42
-
43
-
44
-
45
-
46
-
47
-
48
-
49
-
50
-
51
-
52
-
53
-
54
-
 55
55 -
 56
56 -
 57
57 -
 58
58 -
 59
59 -
 60
60 -
 61
61 -
 62
62 -
 63
63 -
 64
64 -
 65
65 -
66
-
67
-
68
-
69
-
70
-
71
-
72
-
73
-
74
-
75
-
76
-
77
-
78
-
79
-
80
-
81
-
82
-
83
-
84
-
85
-
86
-
87
-
88
-
89
-
90
-
91
-
92
-
93
-
94
-
95
-
96
 |
 |