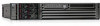
HP Integrity rx2620 Installation (Smart Setup) Guide, Windows Server 2003, v5. - Page 79
SQL Server Authentication, Reporting Services, Install, Finish, Server installation. Click
 |
View all HP Integrity rx2620 manuals
Add to My Manuals
Save this manual to your list of manuals |
Page 79 highlights
For more information about this page, click Help at the bottom of the page. When you are finished, click Next. 15. If you selected SQL Server Authentication, you must provide a user name and password with administrative privileges for that instance. Confirm the Report Server Database Name. Click Next. 16. If you selected Reporting Services as a feature, the Report Server Delivery Settings page displays. Specify an SMTP server address and an email address to be used as the sender of email messages from Report Server. When you are through, click Next. 17. On the Error Reporting page, optionally clear the check box to disable error reporting. For more information about error reporting functionality, click Help at the bottom of the page. When you are through, click Next. 18. On the Ready to Install page, review the summary of features and components for your SQL Server installation. Click Install. 19. On the Installation Progress page, you can monitor installation progress as setup proceeds. To view the log file for a component during installation, click the product or status name on the Installation Progress page. 20. On the Completing the Microsoft SQL Server Installation Wizard page, you can view the setup summary log by clicking the link provided. To exit the SQL Server Installation Wizard, click Finish. 21. If prompted, restart the computer. It is important to read the message from the setup program when you are done with installation. Failure to restart the computer can cause failures when you run the setup program in the future. SQL Server 2005 installation 79
-
 1
1 -
2
-
3
-
4
-
5
-
6
-
7
-
8
-
9
-
10
-
11
-
12
-
13
-
14
-
15
-
16
-
17
-
18
-
19
-
20
-
21
-
22
-
23
-
24
-
25
-
26
-
27
-
28
-
29
-
30
-
31
-
32
-
33
-
34
-
35
-
36
-
37
-
38
-
39
-
40
-
41
-
42
-
43
-
44
-
45
-
46
-
47
-
48
-
49
-
50
-
51
-
52
-
53
-
54
-
55
-
56
-
57
-
58
-
59
-
60
-
61
-
62
-
63
-
64
-
65
-
66
-
67
-
68
-
69
-
70
-
71
-
72
-
73
-
 74
74 -
 75
75 -
 76
76 -
 77
77 -
 78
78 -
 79
79 -
 80
80 -
 81
81 -
 82
82 -
 83
83 -
 84
84 -
85
-
86
-
87
-
88
-
89
-
90
-
91
-
92
-
93
-
94
-
95
-
96
 |
 |
