HP Integrity rx2620 Installation (Smart Setup) Guide, Windows Server 2003, v5. - Page 65
Sending SNMP traps to management applications via IP
 |
View all HP Integrity rx2620 manuals
Add to My Manuals
Save this manual to your list of manuals |
Page 65 highlights
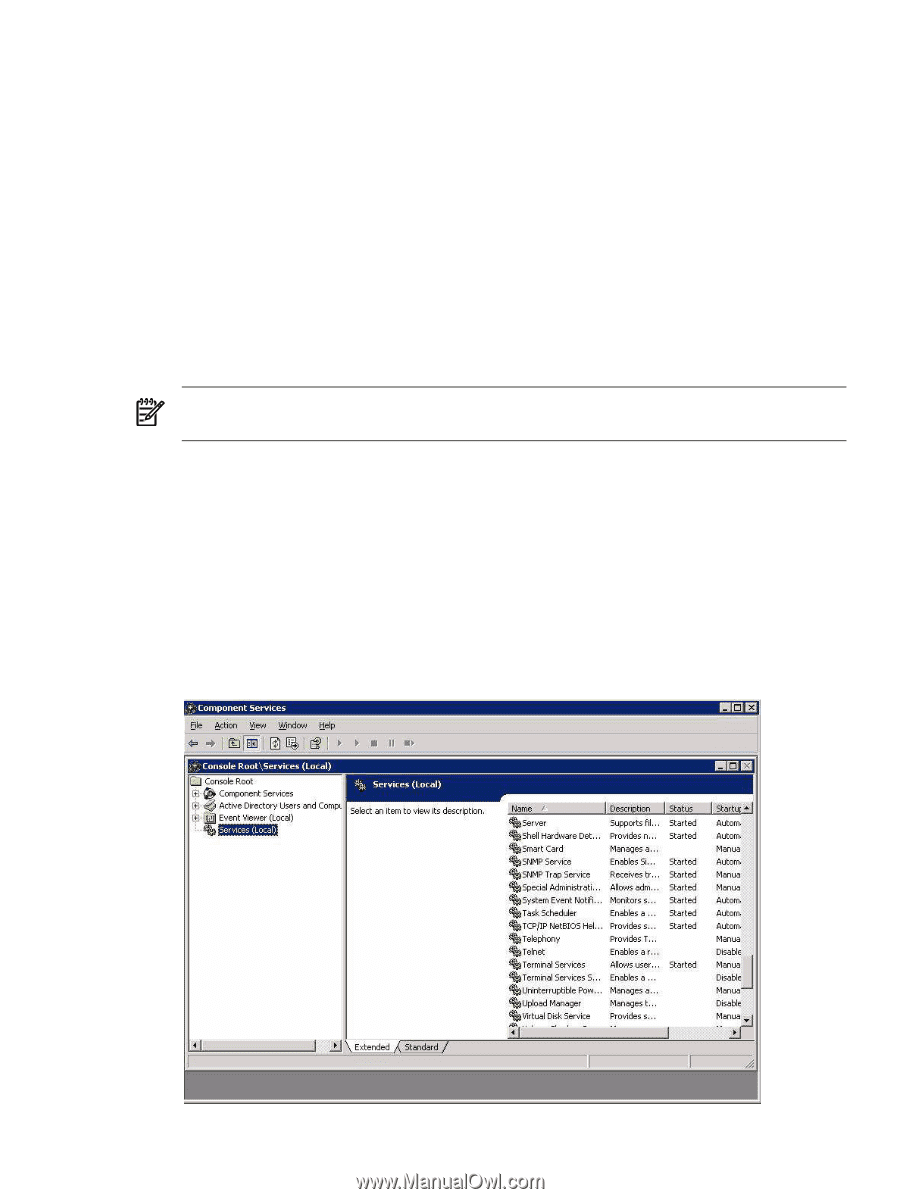
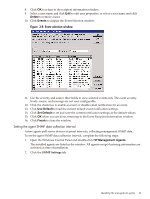
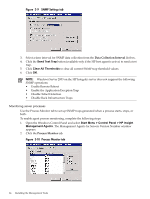
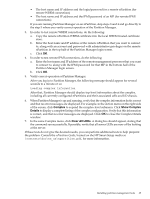
This tab displays all currently active (running) server processes. The Monitor Option column displays the current monitoring status for each process listed. 3. Select the process you want to change the monitoring status for. 4. Change monitoring status by clicking one of these radio buttons: • None - No SNMP traps are generated for this process. • Start - An SNMP trap is generated when this process starts. • Stop - An SNMP trap is generated when this process stops. • Start & Stop - An SNMP trap is generated when this process starts or stops. • Add - Add a new process to the monitor. Enter the name of the new process, then click Apply to add the process. • Delete - Highlight a process in the list, and select Delete to delete the process. 5. Click Add to add a new process, then enter the name of the process. 6. Click Delete to delete a process selected from the list. 7. Click OK to confirm. NOTE: You can only delete processes that a user has created. The Delete button is disabled for system default processes. 8. Click OK when you are done configuring process monitoring. Sending SNMP traps to management applications via IP Configure SNMP services with a specific IP addresses to send SNMP traps to an SNMP management application with an IP address. To configure management agents with a management console IP, complete the following steps: 1. From the Start menu, select Start > Settings > Control Panel > Administrative Tools > Component Services. The Component Services window appears. 2. Click Services (Local). Figure 3-11 Component Services window Installing the management agents 65
-
 1
1 -
2
-
3
-
4
-
5
-
6
-
7
-
8
-
9
-
10
-
11
-
12
-
13
-
14
-
15
-
16
-
17
-
18
-
19
-
20
-
21
-
22
-
23
-
24
-
25
-
26
-
27
-
28
-
29
-
30
-
31
-
32
-
33
-
34
-
35
-
36
-
37
-
38
-
39
-
40
-
41
-
42
-
43
-
44
-
45
-
46
-
47
-
48
-
49
-
50
-
51
-
52
-
53
-
54
-
55
-
56
-
57
-
58
-
59
-
 60
60 -
 61
61 -
 62
62 -
 63
63 -
 64
64 -
 65
65 -
 66
66 -
 67
67 -
 68
68 -
 69
69 -
 70
70 -
71
-
72
-
73
-
74
-
75
-
76
-
77
-
78
-
79
-
80
-
81
-
82
-
83
-
84
-
85
-
86
-
87
-
88
-
89
-
90
-
91
-
92
-
93
-
94
-
95
-
96
 |
 |