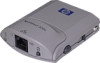
HP Jetdirect 200m HP Jetdirect 200m Print Server (English) User Guide - Page 142
Scan the image to e-mail, Problems
 |
View all HP Jetdirect 200m manuals
Add to My Manuals
Save this manual to your list of manuals |
Page 142 highlights
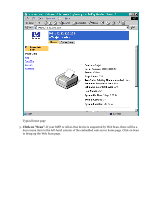
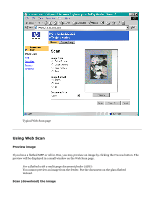
Follow these easy steps to scan the document placed in the scanner: Note: Do not press the scan button on the MFP; use buttons on the screen as follows. 1. Select the type of image you are scanning using the Image Type buttons. Available document settings. 2. Select the file format you want using the Image Format buttons. Available formats. 3. Select your paper size in the Document Size list box. Available document sizes. 4. Click the Scan button to scan the document and download it to your computer. Depending on the image format, you may view the scanned image (in an appropriate plug-in or application, inside or outside of your browser) or save it to your hard disk. For a multi-page document feeder (ADF): Click Scan only once. (The same is true for Email To...; see Email below.) For a PDF image, one file will be created from all the pages in the feeder. For a TIFF or JPEG image, a separate file will be created for (and a separate window will be used to display) each page in the feeder. Scan the image to e-mail Instead of downloading the image to your computer or viewing it on your computer, you can e-mail the file containing the image as an attachment. 1. The network administrator must configure an outgoing e-mail server for the print server that connects the scanner, before any users can succeed at this procedure. You'll find out if this was done as soon as you do step 5 below. Click here for information on configuring the e-mail server. 2. Select the type of image you are scanning using the Image Type buttons. Available document settings. 3. Select the file format you want using the Image Format buttons. Available formats. 4. Select your paper size in the Document Size list box. Available document sizes. 5. Click the Email To... button. The Email page will appear. Problems: If the Email To... button does not appear... If the Email To... button works, but then an error message appears... For a multi-page document feeder (ADF): Click Email To... only once. For a PDF image, one file will be created from all the pages in the feeder. For a TIFF or JPEG image, separate files will be created for each page in the feeder. Each file will be contained in a separate attachment to the message. 6. Complete the form with the From, To, and Subject information. You also may enter a short message introducing the scanned image. 7. Click the Send button on the Email page.
-
 1
1 -
2
-
3
-
4
-
5
-
6
-
7
-
8
-
9
-
10
-
11
-
12
-
13
-
14
-
15
-
16
-
17
-
18
-
19
-
20
-
21
-
22
-
23
-
24
-
25
-
26
-
27
-
28
-
29
-
30
-
31
-
32
-
33
-
34
-
35
-
36
-
37
-
38
-
39
-
40
-
41
-
42
-
43
-
44
-
45
-
46
-
47
-
48
-
49
-
50
-
51
-
52
-
53
-
54
-
55
-
56
-
57
-
58
-
59
-
60
-
61
-
62
-
63
-
64
-
65
-
66
-
67
-
68
-
69
-
70
-
71
-
72
-
73
-
74
-
75
-
76
-
77
-
78
-
79
-
80
-
81
-
82
-
83
-
84
-
85
-
86
-
87
-
88
-
89
-
90
-
91
-
92
-
93
-
94
-
95
-
96
-
97
-
98
-
99
-
100
-
101
-
102
-
103
-
104
-
105
-
106
-
107
-
108
-
109
-
110
-
111
-
112
-
113
-
114
-
115
-
116
-
117
-
118
-
119
-
120
-
121
-
122
-
123
-
124
-
125
-
126
-
127
-
128
-
129
-
130
-
131
-
132
-
133
-
134
-
135
-
136
-
 137
137 -
 138
138 -
 139
139 -
 140
140 -
 141
141 -
 142
142 -
 143
143 -
 144
144 -
 145
145 -
 146
146 -
 147
147 -
148
-
149
-
150
-
151
-
152
-
153
-
154
-
155
-
156
-
157
-
158
-
159
-
160
-
161
-
162
-
163
-
164
-
165
-
166
-
167
-
168
-
169
-
170
-
171
-
172
-
173
-
174
-
175
-
176
-
177
-
178
-
179
-
180
-
181
 |
 |