HP Jetdirect 200m HP Jetdirect 200m Print Server (English) User Guide - Page 38
Setting up the, hardware, Set up the printer hardware, Connect the print server - print server manual
 |
View all HP Jetdirect 200m manuals
Add to My Manuals
Save this manual to your list of manuals |
Page 38 highlights
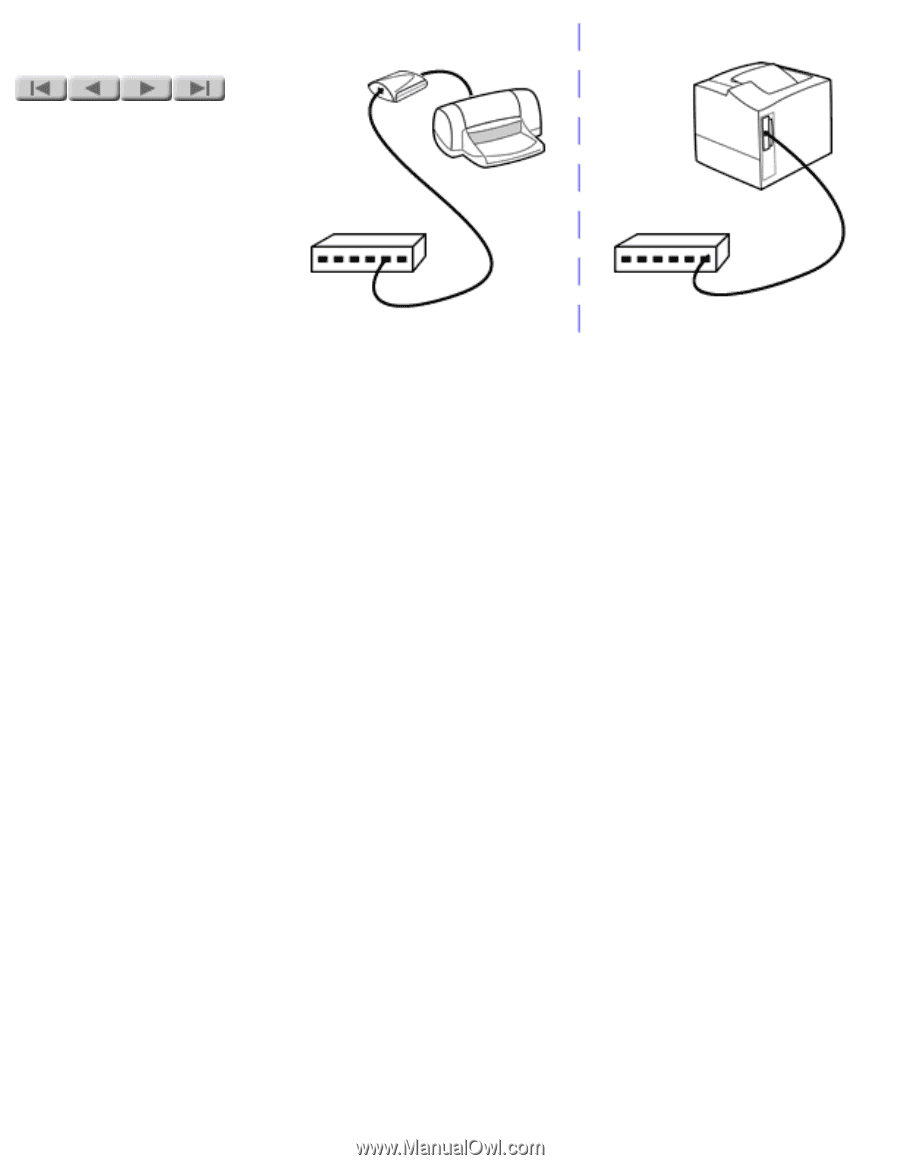
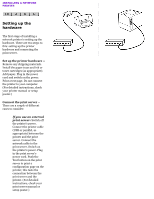
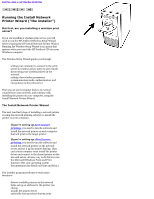
INSTALLING A NETWORK PRINTER Setting up the hardware The first stage of installing a network printer is setting up the hardware. There are two steps to this: setting up the printer hardware and connecting the print server. Set up the printer hardware -Remove any shipping materials. Install the paper trays and ink or toner cartridges (as appropriate). Add paper. Plug in the power cord and switch on the power. Print a test page. Do not connect the printer to your computer. (For detailed instructions, check your printer manual or setup poster.) Connect the print server -There are a couple of different cases to consider: q If you use an external print server: Switch off the printer's power. Connect the printer cable (USB or parallel, as appropriate) between the printer and the print server. Connect the network cable to the print server. Switch on the printer's power. Plug in the print server's power cord. Push the Test button on the print server to print a configuration page on the printer; this tests the connection between the print server and the printer. (For detailed instructions, check your print server manual or setup poster.)
-
 1
1 -
2
-
3
-
4
-
5
-
6
-
7
-
8
-
9
-
10
-
11
-
12
-
13
-
14
-
15
-
16
-
17
-
18
-
19
-
20
-
21
-
22
-
23
-
24
-
25
-
26
-
27
-
28
-
29
-
30
-
31
-
32
-
 33
33 -
 34
34 -
 35
35 -
 36
36 -
 37
37 -
 38
38 -
 39
39 -
 40
40 -
 41
41 -
 42
42 -
 43
43 -
44
-
45
-
46
-
47
-
48
-
49
-
50
-
51
-
52
-
53
-
54
-
55
-
56
-
57
-
58
-
59
-
60
-
61
-
62
-
63
-
64
-
65
-
66
-
67
-
68
-
69
-
70
-
71
-
72
-
73
-
74
-
75
-
76
-
77
-
78
-
79
-
80
-
81
-
82
-
83
-
84
-
85
-
86
-
87
-
88
-
89
-
90
-
91
-
92
-
93
-
94
-
95
-
96
-
97
-
98
-
99
-
100
-
101
-
102
-
103
-
104
-
105
-
106
-
107
-
108
-
109
-
110
-
111
-
112
-
113
-
114
-
115
-
116
-
117
-
118
-
119
-
120
-
121
-
122
-
123
-
124
-
125
-
126
-
127
-
128
-
129
-
130
-
131
-
132
-
133
-
134
-
135
-
136
-
137
-
138
-
139
-
140
-
141
-
142
-
143
-
144
-
145
-
146
-
147
-
148
-
149
-
150
-
151
-
152
-
153
-
154
-
155
-
156
-
157
-
158
-
159
-
160
-
161
-
162
-
163
-
164
-
165
-
166
-
167
-
168
-
169
-
170
-
171
-
172
-
173
-
174
-
175
-
176
-
177
-
178
-
179
-
180
-
181
 |
 |