HP Jetdirect 200m HP Jetdirect 200m Print Server (English) User Guide - Page 62
External print server setup, Connections to wall outlets, Get the right printer driver.
 |
View all HP Jetdirect 200m manuals
Add to My Manuals
Save this manual to your list of manuals |
Page 62 highlights
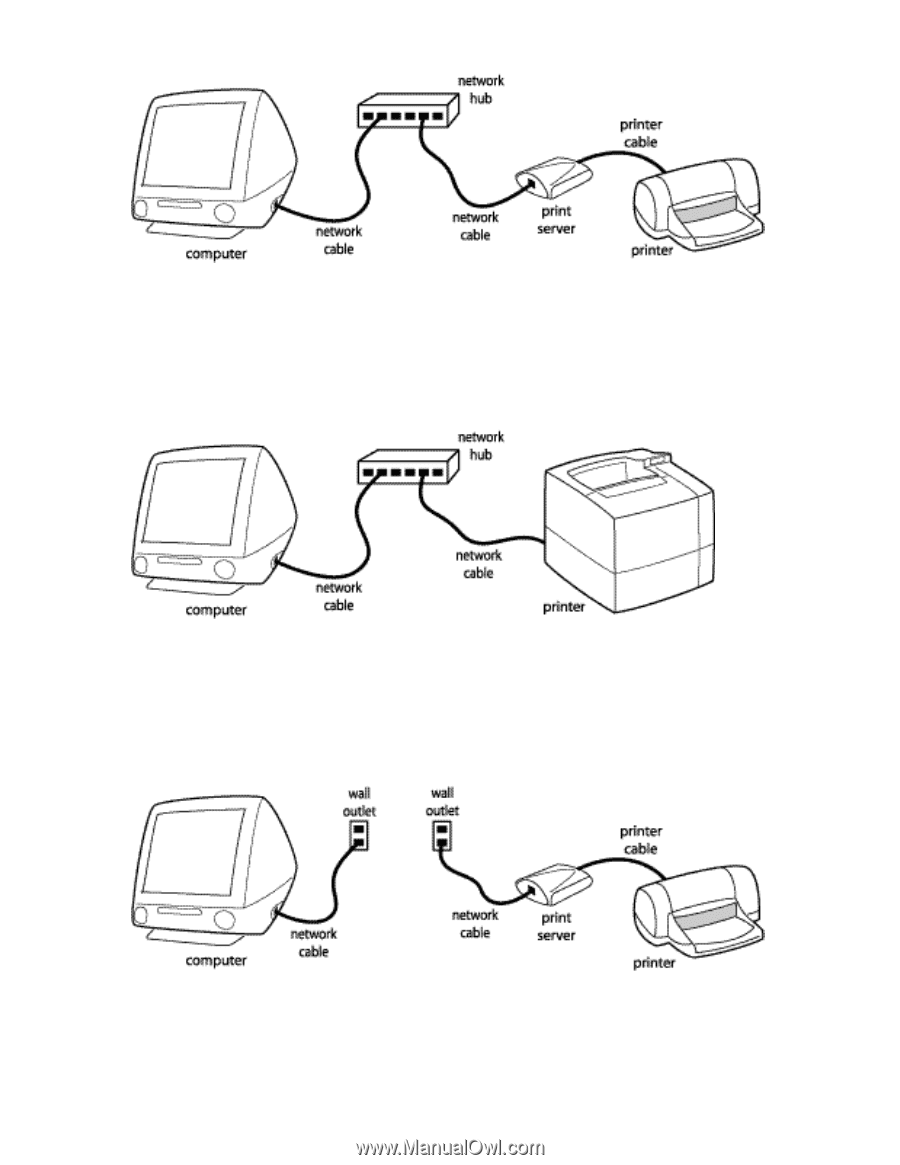
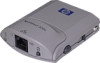
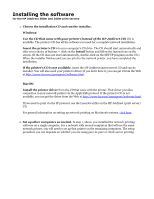
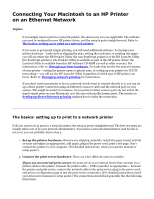
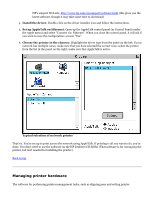
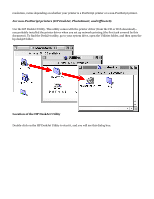
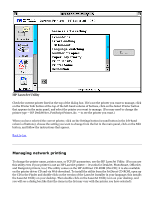
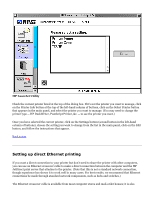
External print server setup If you use an internal print server, the print server is a module that plugs into a slot in the printer. Many printers come with the print server module installed. If your print server module is not already installed, plug it into its slot in the printer. Then connect the network cable directly to the print server. Finally, print a configuration page to test the print server connection. (For detailed instructions, check your print server manual or setup poster.) The connections should look like this: Internal print server setup If your network wiring is hidden -- In many network installations, the network components (hubs, switches, &c.) are stored in a wiring closet and the network wiring is hidden in the walls. The only sign of the network that you see in such an installation is a wall outlet that has one or two network connectors. In this case, just use network cables to plug the computer and the print server into the wall outlets. (If you have any questions about such an installation, check with your network administrator.) The connections will look generally like the following illustration. Connections to wall outlets Note that in the drawings above we have omitted the power cords to keep things simple. 3. Get the right printer driver. You can get the driver from: r the CD-ROM that came with the printer (this is quick, if you have the CD), or
-
 1
1 -
2
-
3
-
4
-
5
-
6
-
7
-
8
-
9
-
10
-
11
-
12
-
13
-
14
-
15
-
16
-
17
-
18
-
19
-
20
-
21
-
22
-
23
-
24
-
25
-
26
-
27
-
28
-
29
-
30
-
31
-
32
-
33
-
34
-
35
-
36
-
37
-
38
-
39
-
40
-
41
-
42
-
43
-
44
-
45
-
46
-
47
-
48
-
49
-
50
-
51
-
52
-
53
-
54
-
55
-
56
-
 57
57 -
 58
58 -
 59
59 -
 60
60 -
 61
61 -
 62
62 -
 63
63 -
 64
64 -
 65
65 -
 66
66 -
 67
67 -
68
-
69
-
70
-
71
-
72
-
73
-
74
-
75
-
76
-
77
-
78
-
79
-
80
-
81
-
82
-
83
-
84
-
85
-
86
-
87
-
88
-
89
-
90
-
91
-
92
-
93
-
94
-
95
-
96
-
97
-
98
-
99
-
100
-
101
-
102
-
103
-
104
-
105
-
106
-
107
-
108
-
109
-
110
-
111
-
112
-
113
-
114
-
115
-
116
-
117
-
118
-
119
-
120
-
121
-
122
-
123
-
124
-
125
-
126
-
127
-
128
-
129
-
130
-
131
-
132
-
133
-
134
-
135
-
136
-
137
-
138
-
139
-
140
-
141
-
142
-
143
-
144
-
145
-
146
-
147
-
148
-
149
-
150
-
151
-
152
-
153
-
154
-
155
-
156
-
157
-
158
-
159
-
160
-
161
-
162
-
163
-
164
-
165
-
166
-
167
-
168
-
169
-
170
-
171
-
172
-
173
-
174
-
175
-
176
-
177
-
178
-
179
-
180
-
181
 |
 |