HP Kayak XU 03xx HP Kayak XU Series 03xx, User's Guide - Page 139
Using Express Setup
 |
View all HP Kayak XU 03xx manuals
Add to My Manuals
Save this manual to your list of manuals |
Page 139 highlights
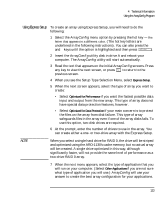
4 Technical Information Using the ArrayConfig Program Using Express Setup To create an array using Express Setup, you will need to do the following: 1 Select the ArrayConfig menu option by pressing the hot key - the letter that appears in a different color. (The hot key letters are underlined in the following instructions). You can also press the ↑ and ↓ keys until the option is highlighted and then press . 2 Insert the ArrayConfig utility disk in drive A and reboot your computer. The ArrayConfig utility will start automatically. 3 Read the text that appears on the initial ArrayConfig screens. Press any key to view the next screen, or press to return to the previous screen. 4 When you see the Setup Type Selection Menu, select Express Setup. 5 When the next screen appears, select the type of array you want to create: • Select Optimized for Performance if you want the fastest possible data input and output from the new array. This type of array does not have special data protection features, however. • Select Optimized for Data Protection if your main concern is to protect the files on the array from disk failure. This type of array safeguards files in the array even if one of the array disks fails. To use this option, two disk drives are required. 6 At the prompt, enter the number of drives to use in the array. You can create either a one- or two-drive array with the Express Setup. NOTE When you select a single hard drive for RAID 0, the drive will be striped and optimized using the ARO-1130's cache memory, but no actual array will be created. A single drive optimized in this way, although significantly faster, will not provide the same level of performance as a two-drive RAID 0 array. 7 When the next menu appears, select the type of application that you will run on your computer. (Select Other Applications if you are not sure what type of application you will use.) ArrayConfig will use your answer to create the best array configuration for your applications. English 123
-
 1
1 -
2
-
3
-
4
-
5
-
6
-
7
-
8
-
9
-
10
-
11
-
12
-
13
-
14
-
15
-
16
-
17
-
18
-
19
-
20
-
21
-
22
-
23
-
24
-
25
-
26
-
27
-
28
-
29
-
30
-
31
-
32
-
33
-
34
-
35
-
36
-
37
-
38
-
39
-
40
-
41
-
42
-
43
-
44
-
45
-
46
-
47
-
48
-
49
-
50
-
51
-
52
-
53
-
54
-
55
-
56
-
57
-
58
-
59
-
60
-
61
-
62
-
63
-
64
-
65
-
66
-
67
-
68
-
69
-
70
-
71
-
72
-
73
-
74
-
75
-
76
-
77
-
78
-
79
-
80
-
81
-
82
-
83
-
84
-
85
-
86
-
87
-
88
-
89
-
90
-
91
-
92
-
93
-
94
-
95
-
96
-
97
-
98
-
99
-
100
-
101
-
102
-
103
-
104
-
105
-
106
-
107
-
108
-
109
-
110
-
111
-
112
-
113
-
114
-
115
-
116
-
117
-
118
-
119
-
120
-
121
-
122
-
123
-
124
-
125
-
126
-
127
-
128
-
129
-
130
-
131
-
132
-
133
-
 134
134 -
 135
135 -
 136
136 -
 137
137 -
 138
138 -
 139
139 -
 140
140 -
 141
141 -
 142
142 -
 143
143 -
 144
144 -
145
-
146
-
147
-
148
-
149
-
150
-
151
-
152
-
153
-
154
-
155
-
156
-
157
-
158
-
159
-
160
-
161
-
162
-
163
-
164
-
165
-
166
-
167
-
168
-
169
-
170
-
171
-
172
-
173
-
174
-
175
-
176
-
177
-
178
-
179
-
180
-
181
-
182
-
183
-
184
-
185
-
186
-
187
-
188
-
189
-
190
 |
 |