HP Kayak XU 03xx HP Kayak XU Series 03xx, User's Guide - Page 47
Installing Memory
 |
View all HP Kayak XU 03xx manuals
Add to My Manuals
Save this manual to your list of manuals |
Page 47 highlights
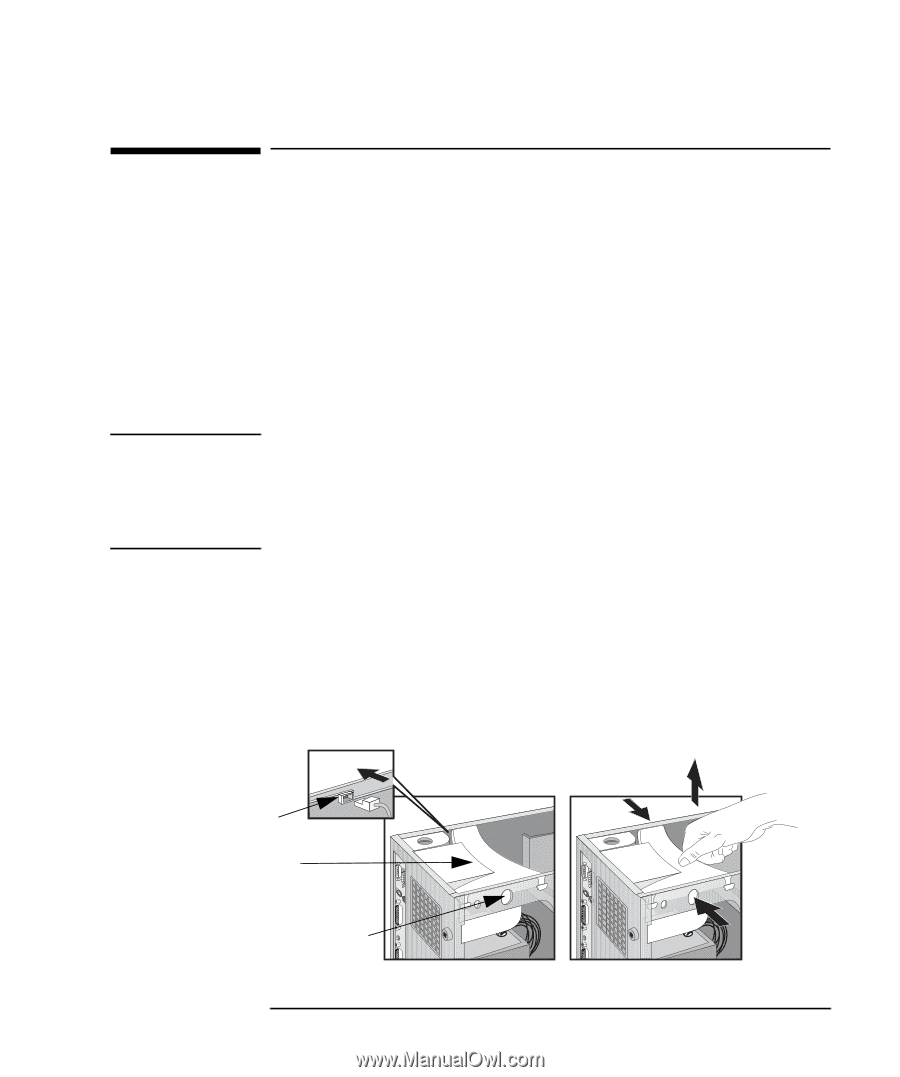
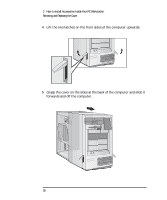
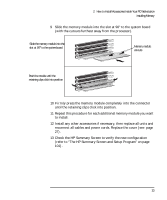
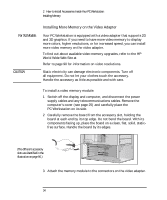
2 How to Install Accessories Inside Your PC Workstation Installing Memory CAUTION Installing Memory Main Memory Modules If you need more main memory to run your application software, you can install up to 1GB of memory in four DIMM slots. Main memory upgrades are available in single 32 MB, 64 MB and 128 MB Non-Buffered ECC SDRAM or 256 MB Registered ECC SDRAM memory modules. You should note that Registered ECC SDRAM cannot be used with Non-Buffered memory modules. Do not attempt to combine these two types of memory. Static electricity can damage electronic components. Turn off all equipment. Do not let your clothes touch the accessory. To equalize the static electricity, rest the accessory bag on top of the power supply while you are removing the accessory from the bag. Handle the accessory as little as possible and with care. To install a main memory module: 1 Disconnect the computer's power cord and any LAN or telecommunications cable. 2 Remove the computer's cover (see page 25). 3 Press the retaining buttons on each side of the HP UltraFlow airflow guide and lift it partly out of the PC Workstation's case. Fan connection to system board HP UltraFlow Airflow Guide Retaining button English 31
-
 1
1 -
2
-
3
-
4
-
5
-
6
-
7
-
8
-
9
-
10
-
11
-
12
-
13
-
14
-
15
-
16
-
17
-
18
-
19
-
20
-
21
-
22
-
23
-
24
-
25
-
26
-
27
-
28
-
29
-
30
-
31
-
32
-
33
-
34
-
35
-
36
-
37
-
38
-
39
-
40
-
41
-
 42
42 -
 43
43 -
 44
44 -
 45
45 -
 46
46 -
 47
47 -
 48
48 -
 49
49 -
 50
50 -
 51
51 -
 52
52 -
53
-
54
-
55
-
56
-
57
-
58
-
59
-
60
-
61
-
62
-
63
-
64
-
65
-
66
-
67
-
68
-
69
-
70
-
71
-
72
-
73
-
74
-
75
-
76
-
77
-
78
-
79
-
80
-
81
-
82
-
83
-
84
-
85
-
86
-
87
-
88
-
89
-
90
-
91
-
92
-
93
-
94
-
95
-
96
-
97
-
98
-
99
-
100
-
101
-
102
-
103
-
104
-
105
-
106
-
107
-
108
-
109
-
110
-
111
-
112
-
113
-
114
-
115
-
116
-
117
-
118
-
119
-
120
-
121
-
122
-
123
-
124
-
125
-
126
-
127
-
128
-
129
-
130
-
131
-
132
-
133
-
134
-
135
-
136
-
137
-
138
-
139
-
140
-
141
-
142
-
143
-
144
-
145
-
146
-
147
-
148
-
149
-
150
-
151
-
152
-
153
-
154
-
155
-
156
-
157
-
158
-
159
-
160
-
161
-
162
-
163
-
164
-
165
-
166
-
167
-
168
-
169
-
170
-
171
-
172
-
173
-
174
-
175
-
176
-
177
-
178
-
179
-
180
-
181
-
182
-
183
-
184
-
185
-
186
-
187
-
188
-
189
-
190
 |
 |