HP OmniBook 6100 HP Omnibook 6100 - Corporate Evaluators Guide - Page 101
Using Windows XP, Corporate Evaluator's Guide
 |
View all HP OmniBook 6100 manuals
Add to My Manuals
Save this manual to your list of manuals |
Page 101 highlights
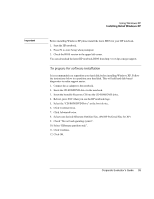
Using Windows XP Installing Retail Windows XP 10. Choose installation partition. The first partition is listed as FAT and is quite small, this is your diagnostic partition (if you created one in earlier steps). The second listing will either be listed as UNPARTITIONED SPACE or will be listed as one or more partitions depending on if you erased your hard drive or have chosen to install over another operating system. Using the arrow keys highlight the UNPARTITIONED SPACE and press ENTER to use all available space, otherwise you can press C to create a partition that is smaller than the available space if you wish to have a separate data partition. 11. Choose the format for your installation partition. Select FORMAT USING NTFS (QUICK) or FORMAT USING FAT (QUICK) depending on needs, and press ENTER. Hewlett-Packard suggests that you select NTFS at this point if you intend to convert to NTFS at a later time, this will make a higher performance file system and appropriate security settings. Setup will examine the hard disks and begin to copy files after the format is complete. At the end of file copy the system will restart automatically. 12. Upon restart, the graphical (GUI) portion of the install will begin. There is still about 10-15 minutes available to you before you will be asked for input; the total process takes about 40 minutes from this point. 13. Select your regional information and your language settings. For U.S. installations you will not need to make any changes. Press NEXT. 14. Enter you name and organization information and press NEXT. 15. Enter your product license key and press NEXT. 16. Provide a computer name and a password for the administrator account. You may accept the default computer name and/or leave the administrator password blank. Press NEXT. 17. You will be asked to provide TAPI (telephone settings) if your system has a modem that XP already has drivers for. Provide your area code and any special dialing needs like a 9 to access an outside line. Press NEXT. 18. Define your time zone to XP and set the appropriate date and time. Failure to define the proper time zone may cause odd problems later with programs like Outlook that rely upon this setting. 19. At the Network Settings screen, allow the default of TYPICAL SETTINGS unless you have some special needs. Press NEXT. 20. At the Domain and Workgroup Settings screen, input any needed settings for your LAN. Keep in mind that you will need to have rights to add this PC to a domain if you try to. Press NEXT. Corporate Evaluator's Guide 101
-
 1
1 -
2
-
3
-
4
-
5
-
6
-
7
-
8
-
9
-
10
-
11
-
12
-
13
-
14
-
15
-
16
-
17
-
18
-
19
-
20
-
21
-
22
-
23
-
24
-
25
-
26
-
27
-
28
-
29
-
30
-
31
-
32
-
33
-
34
-
35
-
36
-
37
-
38
-
39
-
40
-
41
-
42
-
43
-
44
-
45
-
46
-
47
-
48
-
49
-
50
-
51
-
52
-
53
-
54
-
55
-
56
-
57
-
58
-
59
-
60
-
61
-
62
-
63
-
64
-
65
-
66
-
67
-
68
-
69
-
70
-
71
-
72
-
73
-
74
-
75
-
76
-
77
-
78
-
79
-
80
-
81
-
82
-
83
-
84
-
85
-
86
-
87
-
88
-
89
-
90
-
91
-
92
-
93
-
94
-
95
-
 96
96 -
 97
97 -
 98
98 -
 99
99 -
 100
100 -
 101
101 -
 102
102 -
 103
103 -
 104
104 -
 105
105 -
 106
106 -
107
-
108
-
109
-
110
-
111
-
112
-
113
-
114
-
115
-
116
-
117
-
118
-
119
-
120
-
121
-
122
-
123
-
124
-
125
-
126
-
127
-
128
-
129
-
130
-
131
-
132
-
133
-
134
-
135
-
136
-
137
-
138
-
139
-
140
-
141
-
142
-
143
-
144
-
145
-
146
-
147
-
148
-
149
-
150
-
151
-
152
-
153
-
154
-
155
-
156
-
157
-
158
-
159
-
160
-
161
-
162
-
163
-
164
-
165
-
166
-
167
-
168
-
169
-
170
-
171
-
172
-
173
-
174
-
175
-
176
-
177
-
178
-
179
-
180
-
181
-
182
-
183
-
184
-
185
-
186
-
187
-
188
-
189
-
190
-
191
-
192
-
193
-
194
-
195
-
196
-
197
-
198
-
199
-
200
-
201
-
202
-
203
-
204
-
205
-
206
-
207
-
208
-
209
-
210
-
211
-
212
-
213
-
214
-
215
-
216
-
217
-
218
-
219
-
220
-
221
-
222
-
223
-
224
-
225
 |
 |
