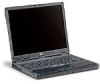
HP OmniBook 6100 HP Omnibook 6100 - Corporate Evaluators Guide - Page 95
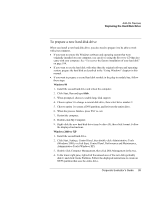
To prepare a new hard disk drive - windows xp installation disk
 |
View all HP OmniBook 6100 manuals
Add to My Manuals
Save this manual to your list of manuals |
Page 95 highlights
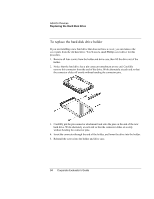
Add-On Devices Replacing the Hard Disk Drive To prepare a new hard disk drive When you install a new hard disk drive, you also need to prepare it to be able to work with your computer. • If you want to restore the Windows software and operating system that were originally installed on your computer, you can do so using the Recovery CD that also came with your computer. See "To recover the factory installation of your hard disk" on page 184. • If you want to use the hard disk with other than the original software and operating system, prepare the hard disk as described in the "Using Windows" chapters in this manual. • If you want to prepare a second hard disk module in the plug-in module bay, follow these steps. Windows 98 1. Install the second hard drive and reboot the computer. 2. Click Start, Run and type fdisk. 3. When prompted, choose to enable large disk support. 4. Choose option 5 to change a current disk drive, then select drive number 2. 5. Choose option 1 to create a DOS partition, and let it use the entire drive. 6. When the process finishes, press ESC to exit. 7. Restart the computer. 8. Double-click My Computer. 9. Right-click the new hard disk drive (may be drive D), then click Format. Follow the displayed instructions. Windows 2000 or XP 1. Install the second hard drive. 2. Click Start, Settings, Control Panel, then double-click Administrative Tools (Windows 2000), or click Start, Control Panel, Performance and Maintenance, Administrative Tools (Windows XP). 3. Double-click Computer Management, then click Disk Management in the tree. 4. In the lower-right pane, right-click the unused area of the new disk (probably disk 1) and click Create Partition. Follow the displayed instructions to create an NTFS partition that uses the entire drive. Corporate Evaluator's Guide 95
-
 1
1 -
2
-
3
-
4
-
5
-
6
-
7
-
8
-
9
-
10
-
11
-
12
-
13
-
14
-
15
-
16
-
17
-
18
-
19
-
20
-
21
-
22
-
23
-
24
-
25
-
26
-
27
-
28
-
29
-
30
-
31
-
32
-
33
-
34
-
35
-
36
-
37
-
38
-
39
-
40
-
41
-
42
-
43
-
44
-
45
-
46
-
47
-
48
-
49
-
50
-
51
-
52
-
53
-
54
-
55
-
56
-
57
-
58
-
59
-
60
-
61
-
62
-
63
-
64
-
65
-
66
-
67
-
68
-
69
-
70
-
71
-
72
-
73
-
74
-
75
-
76
-
77
-
78
-
79
-
80
-
81
-
82
-
83
-
84
-
85
-
86
-
87
-
88
-
89
-
 90
90 -
 91
91 -
 92
92 -
 93
93 -
 94
94 -
 95
95 -
 96
96 -
 97
97 -
 98
98 -
 99
99 -
 100
100 -
101
-
102
-
103
-
104
-
105
-
106
-
107
-
108
-
109
-
110
-
111
-
112
-
113
-
114
-
115
-
116
-
117
-
118
-
119
-
120
-
121
-
122
-
123
-
124
-
125
-
126
-
127
-
128
-
129
-
130
-
131
-
132
-
133
-
134
-
135
-
136
-
137
-
138
-
139
-
140
-
141
-
142
-
143
-
144
-
145
-
146
-
147
-
148
-
149
-
150
-
151
-
152
-
153
-
154
-
155
-
156
-
157
-
158
-
159
-
160
-
161
-
162
-
163
-
164
-
165
-
166
-
167
-
168
-
169
-
170
-
171
-
172
-
173
-
174
-
175
-
176
-
177
-
178
-
179
-
180
-
181
-
182
-
183
-
184
-
185
-
186
-
187
-
188
-
189
-
190
-
191
-
192
-
193
-
194
-
195
-
196
-
197
-
198
-
199
-
200
-
201
-
202
-
203
-
204
-
205
-
206
-
207
-
208
-
209
-
210
-
211
-
212
-
213
-
214
-
215
-
216
-
217
-
218
-
219
-
220
-
221
-
222
-
223
-
224
-
225
 |
 |
