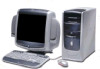
HP Pavilion 900 HP Pavilion Desktop PCs - DVDRW - (English) Technical Support - Page 62
Adding Data Files to a Music Disc
 |
View all HP Pavilion 900 manuals
Add to My Manuals
Save this manual to your list of manuals |
Page 62 highlights
Product Information Drive Operation Troubleshooting Drive Specifications Tips and Techniques Warranty and Support Interfaces Software Release Notes Installation and Configuration Maintenance Discontinued Products Or, I Click No if you do not wish to overwrite that data. HP RecordNow then asks if you want to erase all data on your disc. • Click No to insert another blank or appendable disc. • Click Yes to erase all the data on your media. Selecting Audio Files When making a music disc from audio files or making a disc for an MP3 player, clicking the Scan for Music button causes RecordNow to automatically search your hard disk for correctly formatted MP3 and WAV files. Once your audio files appear in the Music on System window on the left, sort them by selecting a category from the View drop-down menu. You can then add individual audio files or entire folders to the playlist window on the right. Previewing Audio Files Highlighting a track then clicking the Preview button allows you to listen to that track. This can be helpful when arranging a play list of songs. Renaming Audio Tracks To rename an audio track: 1. Select the track you wish to change. 2. Single click twice on the track name in the playlist window on the right (or press on your keyboard. 3. Type the new name for the track. NOTE: To have your disc display the new name, your CD recorder must support CD text. Check the device documentation to see if your device offers this feature. Troubleshooting HP RecordNow makes recording CDs as simple as clicking a few buttons. However, you may still have some questions as you make your recordings. This section tries to answer those questions. Recordings Fail Disc recording is a resource-sensitive process. Having other applications running while recording to a disc can deprive your system of required resources and cause the recording to fail. Most of these errors can be avoided by following these steps: I Enable Direct Memory Access (DMA) on your system. See your operating system's documentation for information on enabling DMA. I Close all other applications during the recording process. This includes any screen savers and anti-virus software that may be running on your computer. I Reduce your maximum recorder speed. See Options for more details. I Use your recorder to both read your source disc and to write to your blank disc. RecordNow will create a temporary image of the source disc on your hard drive, which may read faster than your computer's read-only drive. Adding Data Files to a Music Disc Data cannot be added to a music disc created by HP RecordNow. When HP RecordNow creates a music disc, it creates a closed session disc, which prevents the addition of data. Unreadable Media Your optical drive uses a laser beam to read the information on your disc. Fingerprints, scratches, or any kind of dirt on your disc can cause the drive to misread your disc. To avoid this, be sure your disc is clean by taking a clean cloth and wiping off any dirt or fingerprints. Also be sure to take care when handling your disc to avoid touching the shiny surface. Optical Drive Unavailable There are two basic types of optical drives: a read-only drive and a recorder drive. Though a recorder drive can be used to read read-only media, a read-only drive cannot be used to record to media. Check to make sure that your recording device is properly attached to your system and that it is functional, then try your recording again. hp dvd-writer dvd100i Technical Support Solutions Guide 10/25/01 HP RecordNow 3.0 ⇐ ⇒ 62
-
 1
1 -
2
-
3
-
4
-
5
-
6
-
7
-
8
-
9
-
10
-
11
-
12
-
13
-
14
-
15
-
16
-
17
-
18
-
19
-
20
-
21
-
22
-
23
-
24
-
25
-
26
-
27
-
28
-
29
-
30
-
31
-
32
-
33
-
34
-
35
-
36
-
37
-
38
-
39
-
40
-
41
-
42
-
43
-
44
-
45
-
46
-
47
-
48
-
49
-
50
-
51
-
52
-
53
-
54
-
55
-
56
-
 57
57 -
 58
58 -
 59
59 -
 60
60 -
 61
61 -
 62
62 -
 63
63 -
 64
64 -
 65
65 -
 66
66 -
 67
67 -
68
-
69
-
70
-
71
-
72
-
73
-
74
-
75
-
76
-
77
-
78
-
79
-
80
-
81
-
82
-
83
-
84
-
85
-
86
-
87
-
88
-
89
-
90
-
91
-
92
-
93
-
94
-
95
-
96
-
97
-
98
-
99
-
100
-
101
-
102
-
103
-
104
 |
 |