HP Pavilion 900 HP Pavilion Desktop PCs - DVDRW - (English) Technical Support - Page 82

Enabling DMA on HP IDE CD/DVD Drives and Windows 98/Me

Page 82 highlights

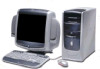
Product Information Drive Operation Troubleshooting Drive Specifications Tips and Techniques Warranty and Support Interfaces Software Release Notes Installation and Configuration Maintenance Discontinued Products you decrease the amount of time it takes to create your CD or DVD and increase system performance. Enabling DMA also reduces disc-writing failures. HP recommends enabling DMA on all internal IDE CD/DVD Writers and all hard drives. DMA is not available on external HP drives; however, you can still improve performance when using an HP external drive by enabling DMA on your hard drive(s). To enable DMA on HP CD/DVD drives and your computer's hard drives, follow the procedures for your version of Windows. Enabling DMA on HP IDE CD/DVD Drives and Windows 98/Me 1. Click the Start button, select Settings, and click Control Panel. 2. Double-click the System icon. 3. Click the Device Manager tab. 4. Double-click the CDROM icon. 5. Double-click the HP CD/DVD drive listed. 6. Click the Settings tab. 7. Check the box next to DMA. If the box is already checked, then DMA is already enabled for the HP CD/DVD drive. NOTE: USB CD Writers do not have the DMA feature available Enabling DMA on hard drives and Windows 98/Me 1. Click the Start button, select Settings, and click Control Panel. 2. Double-click the System icon. 3. Click the Device Manager tab. 4. Double-click Disk Drives. 5. Double-click on the IDE hard drive listed. 6. Click the Settings tab. 7. Check the box next to DMA. If the box is already checked, then DMA is already enabled for the HP CD/DVD drive. Enabling DMA on HP IDE CD/DVD Drives and Windows 2000 Professional 1. Click the Start button, select Settings, and click Control Panel. 2. Double-click the System icon. 3. Click the Hardware tab. 4. Click the Device Manager button. 5. In the list of devices, double-click IDE ATA/ATAPI Controllers. 6. Double-click the controller (normally the Secondary IDE Channel) that connects the HP CD/DVD drive to the motherboard. 7. Click the Advanced Settings tab. 8. Next to Transfer Mode select DMA if available for the correct IDE device. If you're unsure which device to enable DMA on, try setting DMA on both master (device 0) and slave (device 1). 9. Click OK. Enabling DMA on hard drives and Windows 2000 Professional 1. Click the Start button, select Settings, and click Control Panel. 2. Double-click the System icon. 3. Click the Hardware tab. 4. Click the Device Manager button. 5. In the list of devices, double-click IDE ATA/ATAPI Controllers. 6. Double-click the controller (normally the Primary IDE Channel that connects the hard drive to the motherboard. 7. Next to Transfer Mode select DMA if available for each hard drive. 8. Click OK. hp dvd-writer dvd100i Technical Support Solutions Guide 10/25/01 Improving Drive Performance and Reducing Errors ⇐ ⇒ 82

  • 1
  • 2
  • 3
  • 4
  • 5
  • 6
  • 7
  • 8
  • 9
  • 10
  • 11
  • 12
  • 13
  • 14
  • 15
  • 16
  • 17
  • 18
  • 19
  • 20
  • 21
  • 22
  • 23
  • 24
  • 25
  • 26
  • 27
  • 28
  • 29
  • 30
  • 31
  • 32
  • 33
  • 34
  • 35
  • 36
  • 37
  • 38
  • 39
  • 40
  • 41
  • 42
  • 43
  • 44
  • 45
  • 46
  • 47
  • 48
  • 49
  • 50
  • 51
  • 52
  • 53
  • 54
  • 55
  • 56
  • 57
  • 58
  • 59
  • 60
  • 61
  • 62
  • 63
  • 64
  • 65
  • 66
  • 67
  • 68
  • 69
  • 70
  • 71
  • 72
  • 73
  • 74
  • 75
  • 76
  • 77
  • 78
  • 79
  • 80
  • 81
  • 82
  • 83
  • 84
  • 85
  • 86
  • 87
  • 88
  • 89
  • 90
  • 91
  • 92
  • 93
  • 94
  • 95
  • 96
  • 97
  • 98
  • 99
  • 100
  • 101
  • 102
  • 103
  • 104

hp dvd-writer
hp dvd-writer
hp dvd-writer
hp dvd-writer
dvd100i
dvd100i
dvd100i
dvd100i
Technical Support Solutions Guide 10/25/01
Improving Drive Performance and Reducing Errors
82
82
82
82
you decrease the amount of time it takes to create your CD or DVD and increase
system performance. Enabling DMA also reduces disc-writing failures.
HP recommends enabling DMA on all internal IDE CD/DVD Writers and all hard
drives. DMA is not available on external HP drives; however, you can still improve
performance when using an HP external drive by enabling DMA on your hard
drive(s).
To enable DMA on HP CD/DVD drives and your computer's hard drives, follow the
procedures for your version of Windows.
Enabling DMA on HP IDE CD/DVD Drives and Windows 98/Me
1.
1.
1.
1.
Click the
Start
Start
Start
Start
button, select
Settings
Settings
Settings
Settings
, and click
Control Panel
Control Panel
Control Panel
Control Panel
.
2.
2.
2.
2.
Double-click the
System
System
System
System
icon.
3.
3.
3.
3.
Click the
Device Manager
Device Manager
Device Manager
Device Manager
tab.
4.
4.
4.
4.
Double-click the
CDROM
CDROM
CDROM
CDROM
icon.
5.
5.
5.
5.
Double-click the HP CD/DVD drive listed.
6.
6.
6.
6.
Click the
Settings
Settings
Settings
Settings
tab.
7.
7.
7.
7.
Check the box next to DMA. If the box is already checked, then DMA is already
enabled for the HP CD/DVD drive.
NOTE:
NOTE:
NOTE:
NOTE:
USB CD Writers do not have the DMA feature available
Enabling DMA on hard drives and Windows 98/Me
1.
1.
1.
1.
Click the
Start
Start
Start
Start
button, select
Settings
Settings
Settings
Settings
, and click
Control Panel
Control Panel
Control Panel
Control Panel
.
2.
2.
2.
2.
Double-click the
System
System
System
System
icon.
3.
3.
3.
3.
Click the
Device Manager
Device Manager
Device Manager
Device Manager
tab.
4.
4.
4.
4.
Double-click
Disk Drives
Disk Drives
Disk Drives
Disk Drives
.
5.
5.
5.
5.
Double-click on the IDE hard drive listed.
6.
6.
6.
6.
Click the
Settings
Settings
Settings
Settings
tab.
7.
7.
7.
7.
Check the box next to DMA. If the box is already checked, then DMA is already
enabled for the HP CD/DVD drive.
Enabling DMA on HP IDE CD/DVD Drives and Windows 2000
Professional
Professional
Professional
Professional
1.
1.
1.
1.
Click the
Start
Start
Start
Start
button, select
Settings
Settings
Settings
Settings
, and click
Control Panel
Control Panel
Control Panel
Control Panel
.
2.
2.
2.
2.
Double-click the
System
System
System
System
icon.
3.
3.
3.
3.
Click the
Hardware
Hardware
Hardware
Hardware
tab.
4.
4.
4.
4.
Click the
Device Manager
Device Manager
Device Manager
Device Manager
button.
5.
5.
5.
5.
In the list of devices, double-click
IDE ATA/ATAPI Controllers
.
6.
6.
6.
6.
Double-click the controller (normally the
Secondary IDE Channel
) that
connects the HP CD/DVD drive to the motherboard.
7.
7.
7.
7.
Click the
Advanced Settings
Advanced Settings
Advanced Settings
Advanced Settings
tab.
8.
8.
8.
8.
Next to
Transfer Mode
Transfer Mode
Transfer Mode
Transfer Mode
select
DMA if available
DMA if available
DMA if available
DMA if available
for the correct IDE device. If
you're unsure which device to enable DMA on, try setting DMA on both master
(device 0) and slave (device 1).
9.
9.
9.
9.
Click
OK
OK
OK
OK
.
Enabling DMA on hard drives and Windows 2000 Professional
1.
1.
1.
1.
Click the
Start
Start
Start
Start
button, select
Settings
Settings
Settings
Settings
, and click
Control Panel
Control Panel
Control Panel
Control Panel
.
2.
2.
2.
2.
Double-click the
System
System
System
System
icon.
3.
3.
3.
3.
Click the
Hardware
Hardware
Hardware
Hardware
tab.
4.
4.
4.
4.
Click the
Device Manager
Device Manager
Device Manager
Device Manager
button.
5.
5.
5.
5.
In the list of devices, double-click
IDE ATA/ATAPI Controllers
.
6.
6.
6.
6.
Double-click the controller (normally the
Primary IDE Channel
Primary IDE Channel
Primary IDE Channel
Primary IDE Channel
that connects
the hard drive to the motherboard.
7.
7.
7.
7.
Next to
Transfer Mode
Transfer Mode
Transfer Mode
Transfer Mode
select
DMA if available
DMA if available
DMA if available
DMA if available
for each hard drive.
8.
8.
8.
8.
Click
OK
OK
OK
OK
.
Product Information
Drive Specifications
Interfaces
Installation and Configuration
Drive Operation
Tips and Techniques
Software
Maintenance
Troubleshooting
Warranty and Support
Release Notes
Discontinued Products