HP Pavilion 900 HP Pavilion Desktop PCs - DVDRW - (English) Technical Support - Page 71

Uninstalling HP DLA

Page 71 highlights

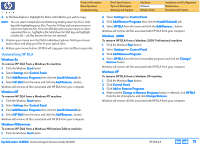
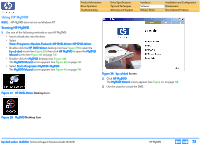
Product Information Drive Operation Troubleshooting Drive Specifications Tips and Techniques Warranty and Support Interfaces Software Release Notes Installation and Configuration Maintenance Discontinued Products 2. In Windows Explorer, highlight the file(s) and folder(s) you wish to copy. NOTE: You can select multiple files and folders by holding down the Ctrl or Shift key while highlighting your files. Press the Ctrl key and use your mouse to select non-adjacent files. Press the Shift key and use your mouse to select sequential files (i.e., highlight a file, hold down the Shift key and highlight another file -- all files between the two are selected). 3. Position your mouse over the file(s) in Windows Explorer. Hold your mouse button down and drag your files to your optical drive. 4. Release your mouse button. HP DLA will copy your selected files to your disc. Uninstalling HP DLA Windows 9x To remove HP DLA from a Windows 9x machine 1. Click the Windows Start button. 2. Select Settings then Control Panel. 3. Click Add/Remove Programs then click the Install/Uninstall tab. 4. Select HP DLA from the menu and click the Add/Remove... button. Windows will remove all files associated with HP DLA from your computer. Windows NT To remove HP DLA from a Windows NT machine 1. Click the Windows Start button. 2. Select Settings then Control Panel. 3. Click Add/Remove Programs then click the Install/Uninstall tab. 4. Select HP DLA from the menu and click the Add/Remove... button. Windows will remove all files associated with HP DLA from your computer. Windows Millennium To remove HP DLA from a Windows Millennium Edition machine 1. Click the Windows Start button. 2. Select Settings then Control Panel. 3. Click Add/Remove Programs then click the Install/Uninstall tab. 4. Select HP DLA from the menu and click the Add/Remove... button. Windows will remove all files associated with HP DLA from your computer. Windows 2000 To remove HP DLA from a Windows 2000 Professional machine 1. Click the Windows Start button. 2. Select Settings then Control Panel. 3. Click Add/Remove Programs. 4. Select HP DLA from the list of removable programs and click the Change/ Remove button. Windows will remove all files associated with HP DLA from your computer. Windows XP To remove HP DLA from a Windows XP machine 1. Click the Windows Start button. 2. Click Control Panel. 3. Click Add or Remove Programs. 4. Make sure the Change or Remove Programs button is selected, click HP DLA from the list of programs, and click Change/Remove. Windows will remove all files associated with HP DLA from your computer. hp dvd-writer dvd100i Technical Support Solutions Guide 10/25/01 HP DLA 2.5 ⇐ ⇒ 71

  • 1
  • 2
  • 3
  • 4
  • 5
  • 6
  • 7
  • 8
  • 9
  • 10
  • 11
  • 12
  • 13
  • 14
  • 15
  • 16
  • 17
  • 18
  • 19
  • 20
  • 21
  • 22
  • 23
  • 24
  • 25
  • 26
  • 27
  • 28
  • 29
  • 30
  • 31
  • 32
  • 33
  • 34
  • 35
  • 36
  • 37
  • 38
  • 39
  • 40
  • 41
  • 42
  • 43
  • 44
  • 45
  • 46
  • 47
  • 48
  • 49
  • 50
  • 51
  • 52
  • 53
  • 54
  • 55
  • 56
  • 57
  • 58
  • 59
  • 60
  • 61
  • 62
  • 63
  • 64
  • 65
  • 66
  • 67
  • 68
  • 69
  • 70
  • 71
  • 72
  • 73
  • 74
  • 75
  • 76
  • 77
  • 78
  • 79
  • 80
  • 81
  • 82
  • 83
  • 84
  • 85
  • 86
  • 87
  • 88
  • 89
  • 90
  • 91
  • 92
  • 93
  • 94
  • 95
  • 96
  • 97
  • 98
  • 99
  • 100
  • 101
  • 102
  • 103
  • 104

hp dvd-writer
hp dvd-writer
hp dvd-writer
hp dvd-writer
dvd100i
dvd100i
dvd100i
dvd100i
Technical Support Solutions Guide 10/25/01
HP DLA 2.5
71
71
71
71
2.
2.
2.
2.
In Windows Explorer, highlight the file(s) and folder(s) you wish to copy.
NOTE:
NOTE:
NOTE:
NOTE:
You can select multiple files and folders by holding down the Ctrl or Shift
key while highlighting your files. Press the Ctrl key and use your mouse to
select non-adjacent files. Press the Shift key and use your mouse to select
sequential files (i.e., highlight a file, hold down the Shift key and highlight
another file -- all files between the two are selected).
3.
3.
3.
3.
Position your mouse over the file(s) in Windows Explorer. Hold your mouse
button down and drag your files to your optical drive.
4.
4.
4.
4.
Release your mouse button. HP DLA will copy your selected files to your disc.
Uninstalling HP DLA
Windows 9x
Windows 9x
Windows 9x
Windows 9x
To remove HP DLA from a Windows 9x machine
1.
1.
1.
1.
Click the Windows
Start
Start
Start
Start
button.
2.
2.
2.
2.
Select
Settings
Settings
Settings
Settings
then
Control Panel
Control Panel
Control Panel
Control Panel
.
3.
3.
3.
3.
Click
Add/Remove Programs
Add/Remove Programs
Add/Remove Programs
Add/Remove Programs
then click the
Install/Uninstall
Install/Uninstall
Install/Uninstall
Install/Uninstall
tab.
4.
4.
4.
4.
Select
HP DLA
HP DLA
HP DLA
HP DLA
from the menu and click the
Add/Remove...
Add/Remove...
Add/Remove...
Add/Remove...
button.
Windows will remove all files associated with HP DLA from your computer.
Windows NT
Windows NT
Windows NT
Windows NT
To remove HP DLA from a Windows NT machine
1.
1.
1.
1.
Click the Windows
Start
Start
Start
Start
button.
2.
2.
2.
2.
Select
Settings
Settings
Settings
Settings
then
Control Panel
Control Panel
Control Panel
Control Panel
.
3.
3.
3.
3.
Click
Add/Remove Programs
Add/Remove Programs
Add/Remove Programs
Add/Remove Programs
then click the
Install/Uninstall
Install/Uninstall
Install/Uninstall
Install/Uninstall
tab.
4.
4.
4.
4.
Select
HP DLA
HP DLA
HP DLA
HP DLA
from the menu and click the
Add/Remove...
Add/Remove...
Add/Remove...
Add/Remove...
button.
Windows will remove all files associated with HP DLA from your computer.
Windows Millennium
Windows Millennium
Windows Millennium
Windows Millennium
To remove HP DLA from a Windows Millennium Edition machine
1.
1.
1.
1.
Click the Windows
Start
Start
Start
Start
button.
2.
2.
2.
2.
Select
Settings
Settings
Settings
Settings
then
Control Panel
Control Panel
Control Panel
Control Panel
.
3.
3.
3.
3.
Click
Add/Remove Programs
Add/Remove Programs
Add/Remove Programs
Add/Remove Programs
then click the
Install/Uninstall
Install/Uninstall
Install/Uninstall
Install/Uninstall
tab.
4.
4.
4.
4.
Select
HP DLA
HP DLA
HP DLA
HP DLA
from the menu and click the
Add/Remove...
Add/Remove...
Add/Remove...
Add/Remove...
button.
Windows will remove all files associated with HP DLA from your computer.
Windows
2000
Windows
2000
Windows
2000
Windows
2000
To remove HP DLA from a Windows 2000 Professional machine
1.
1.
1.
1.
Click the Windows
Start
Start
Start
Start
button.
2.
2.
2.
2.
Select
Settings
Settings
Settings
Settings
then
Control Panel
Control Panel
Control Panel
Control Panel
.
3.
3.
3.
3.
Click
Add/Remove Programs
Add/Remove Programs
Add/Remove Programs
Add/Remove Programs
.
4.
4.
4.
4.
Select
HP DLA
HP DLA
HP DLA
HP DLA
from the list of removable programs and click the
Change/
Change/
Change/
Change/
Remove
Remove
Remove
Remove
button.
Windows will remove all files associated with HP DLA from your computer.
Windows XP
Windows XP
Windows XP
Windows XP
To remove HP DLA from a Windows XP machine
1.
1.
1.
1.
Click the Windows
Start
Start
Start
Start
button.
2.
2.
2.
2.
Click
Control Panel
Control Panel
Control Panel
Control Panel
.
3.
3.
3.
3.
Click
Add or Remove Programs
.
4.
4.
4.
4.
Make sure the
Change or Remove Programs
button is selected, click
HP DLA
HP DLA
HP DLA
HP DLA
from the list of programs, and click
Change/Remove
Change/Remove
Change/Remove
Change/Remove
.
Windows will remove all files associated with HP DLA from your computer.
Product Information
Drive Specifications
Interfaces
Installation and Configuration
Drive Operation
Tips and Techniques
Software
Maintenance
Troubleshooting
Warranty and Support
Release Notes
Discontinued Products