HP Pavilion a400 HP Pavilion Destkop PCs - (English) Users Guide PAV NA/CTO 59 - Page 109
Breplacing the front panel
 |
View all HP Pavilion a400 manuals
Add to My Manuals
Save this manual to your list of manuals |
Page 109 highlights
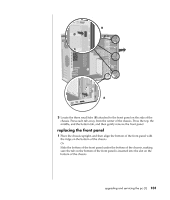
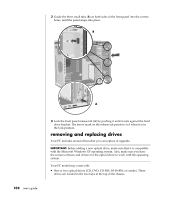
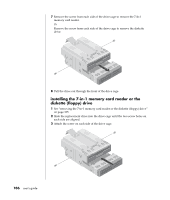
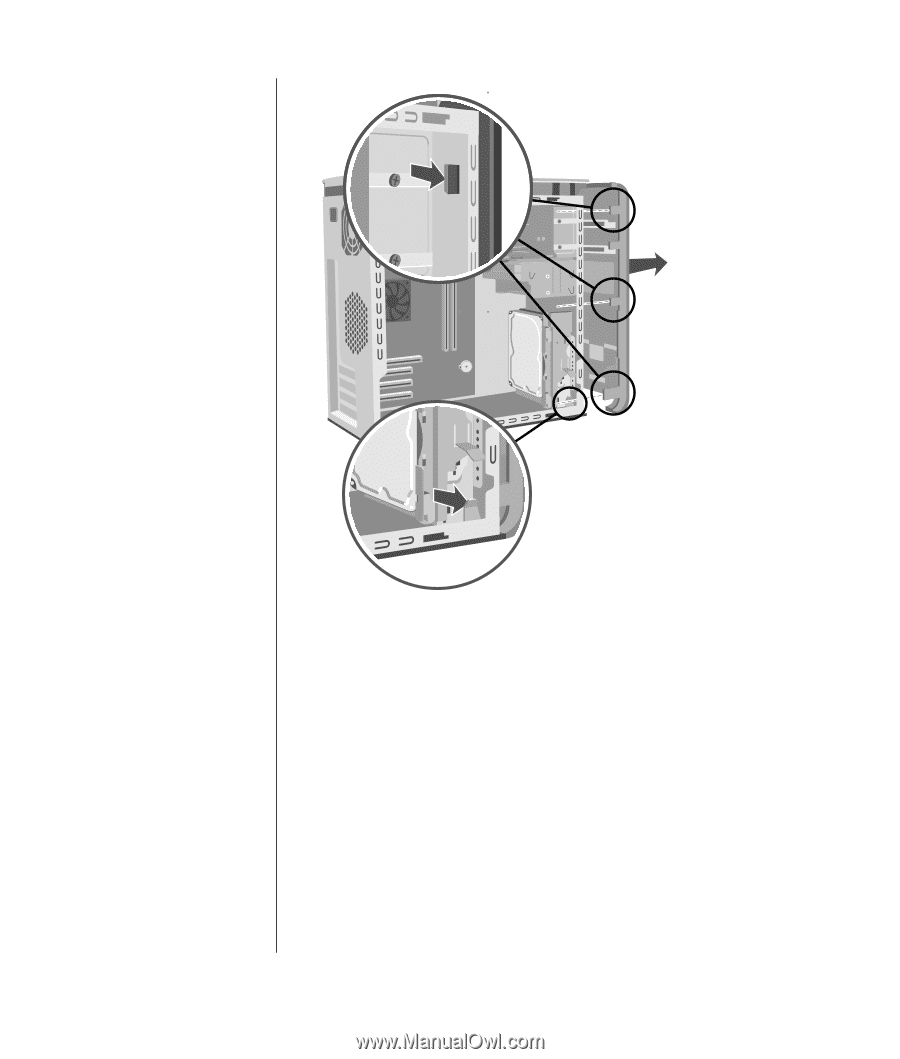
B A 3 Locate the three small tabs (B) attached to the front panel on the side of the chassis. Press each tab away from the center of the chassis. Press the top, the middle, and the bottom tab, and then gently remove the front panel. replacing the front panel 1 Place the chassis upright, and then align the bottom of the front panel with the ridge on the bottom of the chassis. Or Slide the bottom of the front panel under the bottom of the chassis, making sure the tab on the bottom of the front panel is inserted into the slot on the bottom of the chassis. upgrading and servicing the pc (1) 101
-
 1
1 -
2
-
3
-
4
-
5
-
6
-
7
-
8
-
9
-
10
-
11
-
12
-
13
-
14
-
15
-
16
-
17
-
18
-
19
-
20
-
21
-
22
-
23
-
24
-
25
-
26
-
27
-
28
-
29
-
30
-
31
-
32
-
33
-
34
-
35
-
36
-
37
-
38
-
39
-
40
-
41
-
42
-
43
-
44
-
45
-
46
-
47
-
48
-
49
-
50
-
51
-
52
-
53
-
54
-
55
-
56
-
57
-
58
-
59
-
60
-
61
-
62
-
63
-
64
-
65
-
66
-
67
-
68
-
69
-
70
-
71
-
72
-
73
-
74
-
75
-
76
-
77
-
78
-
79
-
80
-
81
-
82
-
83
-
84
-
85
-
86
-
87
-
88
-
89
-
90
-
91
-
92
-
93
-
94
-
95
-
96
-
97
-
98
-
99
-
100
-
101
-
102
-
103
-
 104
104 -
 105
105 -
 106
106 -
 107
107 -
 108
108 -
 109
109 -
 110
110 -
 111
111 -
 112
112 -
 113
113 -
 114
114 -
115
-
116
-
117
-
118
-
119
-
120
-
121
-
122
-
123
-
124
-
125
-
126
-
127
-
128
-
129
-
130
-
131
-
132
-
133
-
134
-
135
-
136
-
137
-
138
-
139
-
140
-
141
-
142
-
143
-
144
-
145
-
146
-
147
-
148
-
149
-
150
-
151
-
152
-
153
-
154
-
155
-
156
-
157
-
158
 |
 |
upgrading and servicing the pc (1)
101
A
B
3
Locate the three small tabs (
B
) attached to the front panel on the side of the
chassis. Press each tab away from the center of the chassis. Press the top, the
middle, and the bottom tab, and then gently remove the front panel.
replacing the front panel
1
Place the chassis upright, and then align the bottom of the front panel with
the ridge on the bottom of the chassis.
Or
Slide the bottom of the front panel under the bottom of the chassis, making
sure the tab on the bottom of the front panel is inserted into the slot on the
bottom of the chassis.