HP Pavilion a400 HP Pavilion Destkop PCs - (English) Users Guide PAV NA/CTO 59 - Page 140
removing the preinstalled hard drive, replacing the diskette drive
 |
View all HP Pavilion a400 manuals
Add to My Manuals
Save this manual to your list of manuals |
Page 140 highlights
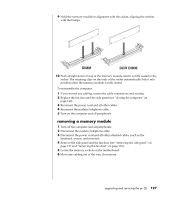
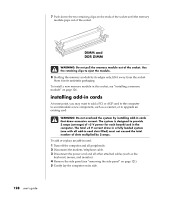
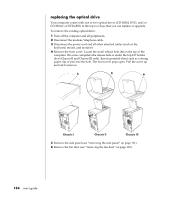
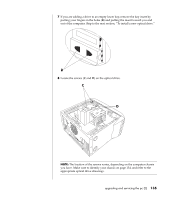
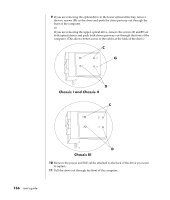
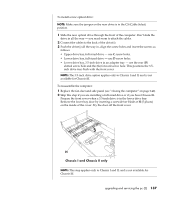
removing the preinstalled hard drive You need to remove the hard drive from the chassis if you want to replace it with a higher-capacity drive or if you want to safeguard your data when sending the computer out to be repaired. To remove the preinstalled hard drive: 1 Turn off the computer and all peripherals. 2 Disconnect the modem/telephone cable. 3 Disconnect the power cord and all other attached cables (such as the keyboard, mouse, and monitor). 4 Remove the side panel (see "removing the side panel" on page 121). 5 Remove the drive cage (see "removing the drive cage" on page 123). 6 Remove the two screws on the top of the hard drive and the one screw on the bottom of the hard drive. 7 Pull the hard drive out, and store the drive and screws in a safe location. 8 Replace the drive cage and the side panel (see "closing the computer" on page 140). replacing the diskette drive If you need to replace the floppy diskette drive, you can remove the existing drive and install a new one. To ensure that the drive fits properly into the PC, be sure to purchase the replacement diskette drive from HP. Refer to your Warranty & Support Guide for contact information. To remove the existing diskette drive: 1 Turn off the computer and all peripherals. 2 Disconnect the modem/telephone cable. 3 Disconnect the power cord and all other attached cables (such as the keyboard, mouse, and monitor). 4 Remove the side panel (see "removing the side panel" on page 121). 5 Remove the drive cage (see "removing the drive cage" on page 123). 132 user's guide
-
 1
1 -
2
-
3
-
4
-
5
-
6
-
7
-
8
-
9
-
10
-
11
-
12
-
13
-
14
-
15
-
16
-
17
-
18
-
19
-
20
-
21
-
22
-
23
-
24
-
25
-
26
-
27
-
28
-
29
-
30
-
31
-
32
-
33
-
34
-
35
-
36
-
37
-
38
-
39
-
40
-
41
-
42
-
43
-
44
-
45
-
46
-
47
-
48
-
49
-
50
-
51
-
52
-
53
-
54
-
55
-
56
-
57
-
58
-
59
-
60
-
61
-
62
-
63
-
64
-
65
-
66
-
67
-
68
-
69
-
70
-
71
-
72
-
73
-
74
-
75
-
76
-
77
-
78
-
79
-
80
-
81
-
82
-
83
-
84
-
85
-
86
-
87
-
88
-
89
-
90
-
91
-
92
-
93
-
94
-
95
-
96
-
97
-
98
-
99
-
100
-
101
-
102
-
103
-
104
-
105
-
106
-
107
-
108
-
109
-
110
-
111
-
112
-
113
-
114
-
115
-
116
-
117
-
118
-
119
-
120
-
121
-
122
-
123
-
124
-
125
-
126
-
127
-
128
-
129
-
130
-
131
-
132
-
133
-
134
-
 135
135 -
 136
136 -
 137
137 -
 138
138 -
 139
139 -
 140
140 -
 141
141 -
 142
142 -
 143
143 -
 144
144 -
 145
145 -
146
-
147
-
148
-
149
-
150
-
151
-
152
-
153
-
154
-
155
-
156
-
157
-
158
 |
 |
