HP Pavilion a400 HP Pavilion Destkop PCs - (English) Users Guide PAV NA/CTO 59 - Page 115
removing the preinstalled hard drive
 |
View all HP Pavilion a400 manuals
Add to My Manuals
Save this manual to your list of manuals |
Page 115 highlights
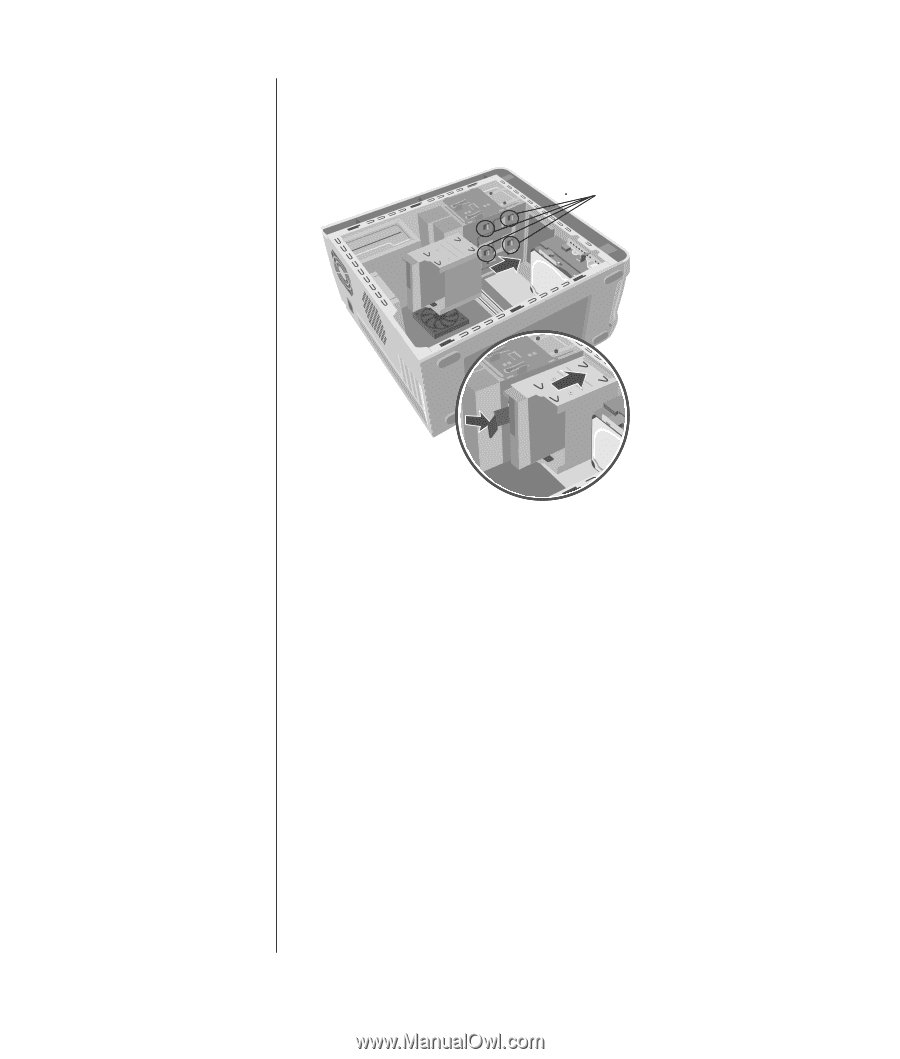
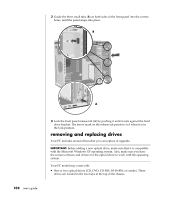
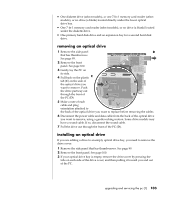
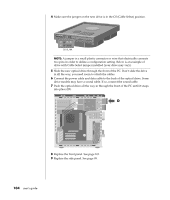
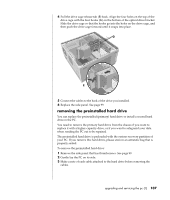
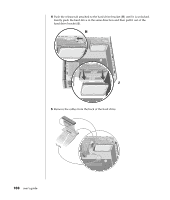
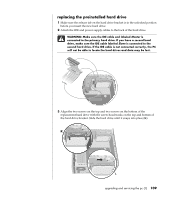
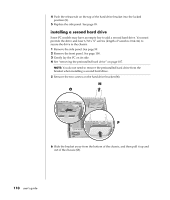
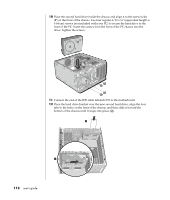
4 Pull the drive cage release tab (E) back. Align the four holes on the top of the drive cage with the four hooks (G) on the bottom of the optical drive bracket. Slide the drive cage so that the hooks go into the holes on the drive cage, and then push the drive cage forward until it snaps into place. G E 5 Connect the cables to the back of the drive you installed. 6 Replace the side panel. See page 99. removing the preinstalled hard drive You can replace the preinstalled (primary) hard drive or install a second hard drive in the PC. You need to remove the primary hard drive from the chassis if you want to replace it with a higher-capacity drive, or if you want to safeguard your data when sending the PC out to be repaired. The preinstalled hard drive is preloaded with the system recovery partition of your PC. If you remove this hard drive, please store in an antistatic bag that is properly sealed. To remove the preinstalled hard drive: 1 Remove the side panel that has thumbscrews. See page 99. 2 Gently lay the PC on its side. 3 Make a note of each cable attached to the hard drive before removing the cables. upgrading and servicing the pc (1) 107
-
 1
1 -
2
-
3
-
4
-
5
-
6
-
7
-
8
-
9
-
10
-
11
-
12
-
13
-
14
-
15
-
16
-
17
-
18
-
19
-
20
-
21
-
22
-
23
-
24
-
25
-
26
-
27
-
28
-
29
-
30
-
31
-
32
-
33
-
34
-
35
-
36
-
37
-
38
-
39
-
40
-
41
-
42
-
43
-
44
-
45
-
46
-
47
-
48
-
49
-
50
-
51
-
52
-
53
-
54
-
55
-
56
-
57
-
58
-
59
-
60
-
61
-
62
-
63
-
64
-
65
-
66
-
67
-
68
-
69
-
70
-
71
-
72
-
73
-
74
-
75
-
76
-
77
-
78
-
79
-
80
-
81
-
82
-
83
-
84
-
85
-
86
-
87
-
88
-
89
-
90
-
91
-
92
-
93
-
94
-
95
-
96
-
97
-
98
-
99
-
100
-
101
-
102
-
103
-
104
-
105
-
106
-
107
-
108
-
109
-
 110
110 -
 111
111 -
 112
112 -
 113
113 -
 114
114 -
 115
115 -
 116
116 -
 117
117 -
 118
118 -
 119
119 -
 120
120 -
121
-
122
-
123
-
124
-
125
-
126
-
127
-
128
-
129
-
130
-
131
-
132
-
133
-
134
-
135
-
136
-
137
-
138
-
139
-
140
-
141
-
142
-
143
-
144
-
145
-
146
-
147
-
148
-
149
-
150
-
151
-
152
-
153
-
154
-
155
-
156
-
157
-
158
 |
 |