HP Pavilion a400 HP Pavilion Destkop PCs - (English) Users Guide PAV NA/CTO 59 - Page 111
removing an optical drive, installing an optical drive
 |
View all HP Pavilion a400 manuals
Add to My Manuals
Save this manual to your list of manuals |
Page 111 highlights
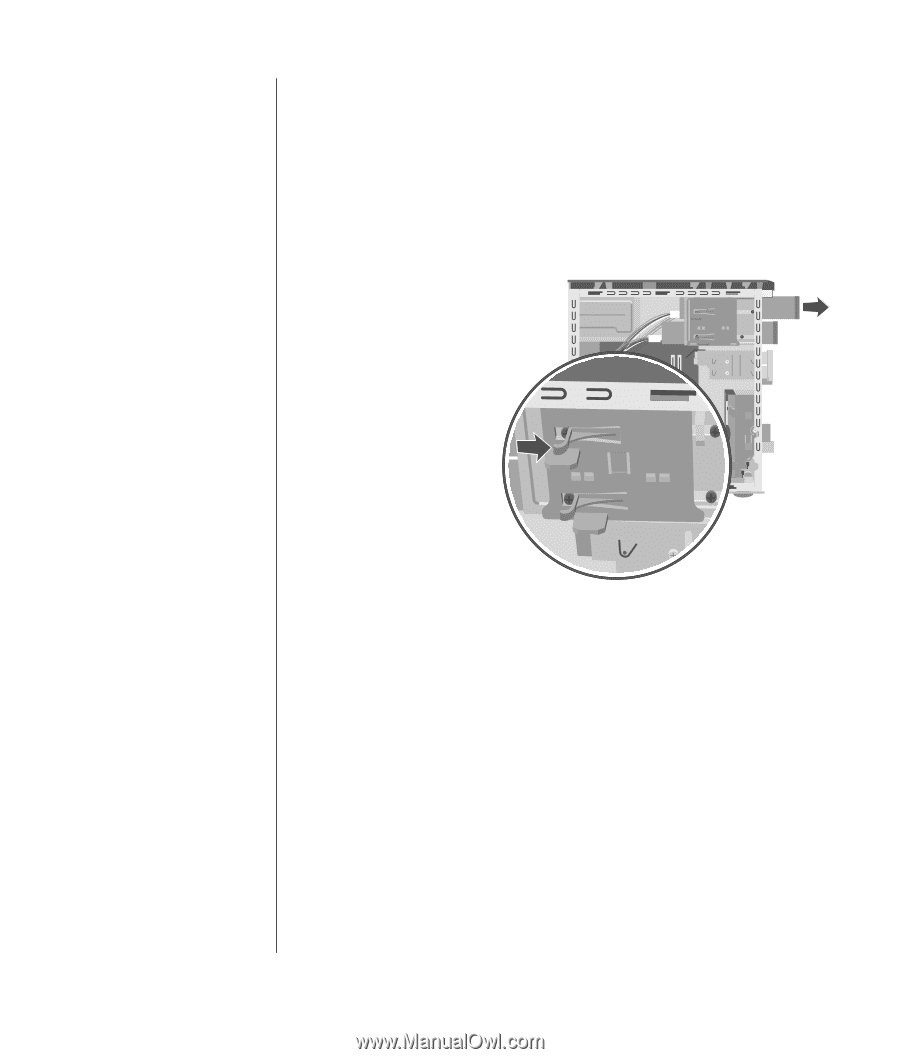
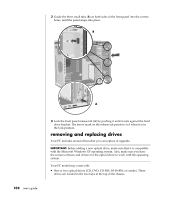
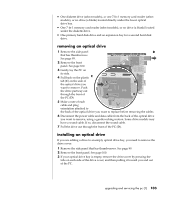
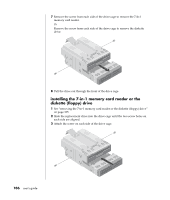
• One diskette drive (select models), or one 7-In-1 memory card reader (select models), or no drive (a blank) located directly under the lower optical drive bay. • One 7-In-1 memory card reader (select models), or no drive (a blank) located under the diskette drive. • One primary hard disk drive and an expansion bay for a second hard disk drive. removing an optical drive 1 Remove the side panel D that has thumbscrews. See page 99. 2 Remove the front panel. See page 100. 3 Gently lay the PC on its side. 4 Pull back on the plastic C tab (C) on the side of the optical drive you want to remove. Push the drive partway out through the front of the PC (D). 5 Make a note of each cable and plug orientation attached to the back of the optical drive you want to replace before removing the cables. 6 Disconnect the power cable and data cable from the back of the optical drive you want to remove, using a gentle rocking motion. Some drive models may have a sound cable. If so, disconnect the sound cable. 7 Pull the drive out through the front of the PC (D). installing an optical drive If you are adding a drive to an empty optical drive bay, you need to remove the drive cover: 1 Remove the side panel that has thumbscrews. See page 99. 2 Remove the front panel. See page 100. 3 If your optical drive bay is empty, remove the drive cover by pressing the tabs on each side of the drive cover, and then pulling it toward you and out of the PC. upgrading and servicing the pc (1) 103
-
 1
1 -
2
-
3
-
4
-
5
-
6
-
7
-
8
-
9
-
10
-
11
-
12
-
13
-
14
-
15
-
16
-
17
-
18
-
19
-
20
-
21
-
22
-
23
-
24
-
25
-
26
-
27
-
28
-
29
-
30
-
31
-
32
-
33
-
34
-
35
-
36
-
37
-
38
-
39
-
40
-
41
-
42
-
43
-
44
-
45
-
46
-
47
-
48
-
49
-
50
-
51
-
52
-
53
-
54
-
55
-
56
-
57
-
58
-
59
-
60
-
61
-
62
-
63
-
64
-
65
-
66
-
67
-
68
-
69
-
70
-
71
-
72
-
73
-
74
-
75
-
76
-
77
-
78
-
79
-
80
-
81
-
82
-
83
-
84
-
85
-
86
-
87
-
88
-
89
-
90
-
91
-
92
-
93
-
94
-
95
-
96
-
97
-
98
-
99
-
100
-
101
-
102
-
103
-
104
-
105
-
 106
106 -
 107
107 -
 108
108 -
 109
109 -
 110
110 -
 111
111 -
 112
112 -
 113
113 -
 114
114 -
 115
115 -
 116
116 -
117
-
118
-
119
-
120
-
121
-
122
-
123
-
124
-
125
-
126
-
127
-
128
-
129
-
130
-
131
-
132
-
133
-
134
-
135
-
136
-
137
-
138
-
139
-
140
-
141
-
142
-
143
-
144
-
145
-
146
-
147
-
148
-
149
-
150
-
151
-
152
-
153
-
154
-
155
-
156
-
157
-
158
 |
 |