HP Pavilion a400 HP Pavilion Destkop PCs - (English) Users Guide PAV NA/CTO 59 - Page 125
removing an add-in card, installing an add-in card
 |
View all HP Pavilion a400 manuals
Add to My Manuals
Save this manual to your list of manuals |
Page 125 highlights
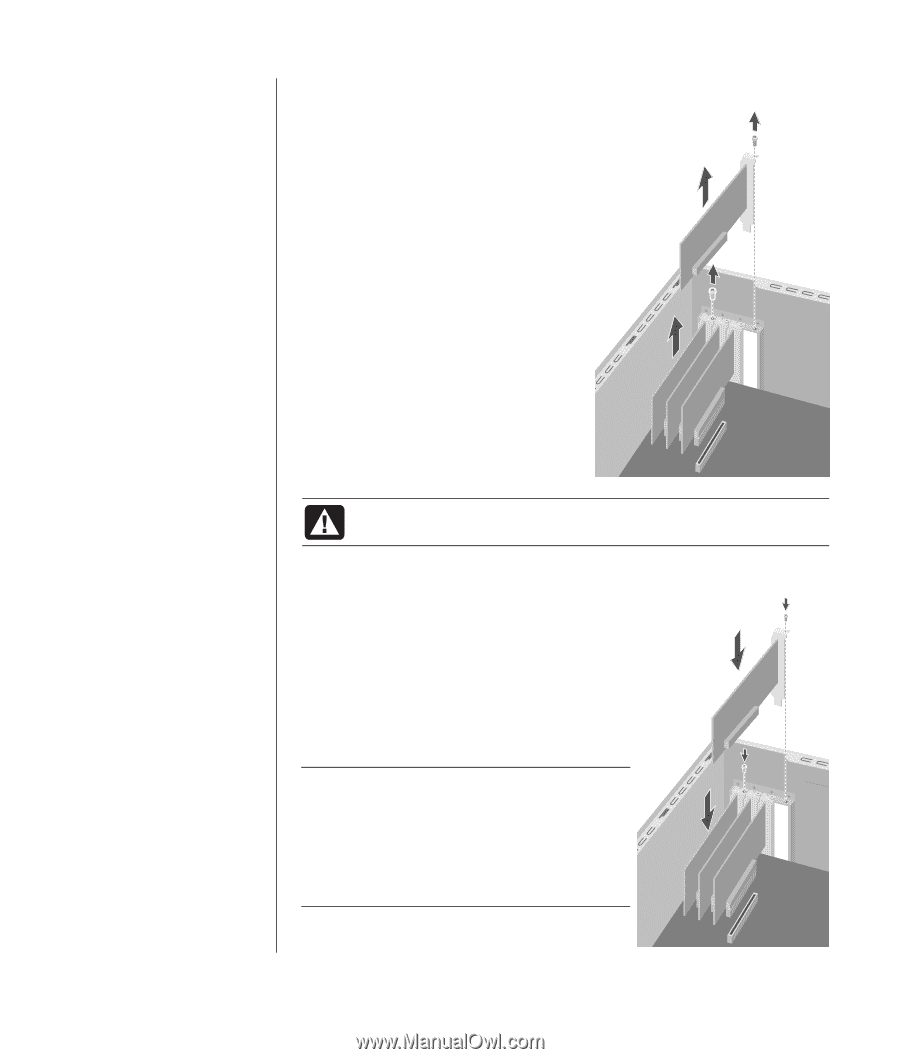
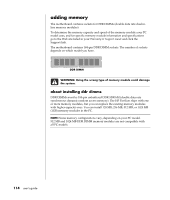
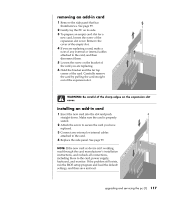
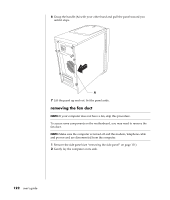
removing an add-in card 1 Remove the side panel that has thumbscrews. See page 99. 2 Gently lay the PC on its side. 3 To prepare an empty card slot for a new card, loosen the screw of the expansion slot cover. Remove the cover of the empty slot. 4 If you are replacing a card, make a note of any external or internal cables attached to the card, and then disconnect them. 5 Loosen the screw on the bracket of the card you are replacing. 6 Hold the bracket and the far top corner of the card. Carefully remove the card by pulling the card straight out of the expansion slot. WARNING: Be careful of the sharp edges on the expansion slot cover. installing an add-in card 1 Insert the new card into the slot and push straight down. Make sure the card is properly seated. 2 Attach the screw to secure the card you have replaced. 3 Connect any external or internal cables attached to the card. 4 Replace the side panel. See page 99. NOTE: If the new card or device isn't working, read through the card manufacturer's installation instructions, and recheck all connections, including those to the card, power supply, keyboard, and monitor. If the problem still exists, run the BIOS setup program and load the default settings, and then save and exit. upgrading and servicing the pc (1) 117
-
 1
1 -
2
-
3
-
4
-
5
-
6
-
7
-
8
-
9
-
10
-
11
-
12
-
13
-
14
-
15
-
16
-
17
-
18
-
19
-
20
-
21
-
22
-
23
-
24
-
25
-
26
-
27
-
28
-
29
-
30
-
31
-
32
-
33
-
34
-
35
-
36
-
37
-
38
-
39
-
40
-
41
-
42
-
43
-
44
-
45
-
46
-
47
-
48
-
49
-
50
-
51
-
52
-
53
-
54
-
55
-
56
-
57
-
58
-
59
-
60
-
61
-
62
-
63
-
64
-
65
-
66
-
67
-
68
-
69
-
70
-
71
-
72
-
73
-
74
-
75
-
76
-
77
-
78
-
79
-
80
-
81
-
82
-
83
-
84
-
85
-
86
-
87
-
88
-
89
-
90
-
91
-
92
-
93
-
94
-
95
-
96
-
97
-
98
-
99
-
100
-
101
-
102
-
103
-
104
-
105
-
106
-
107
-
108
-
109
-
110
-
111
-
112
-
113
-
114
-
115
-
116
-
117
-
118
-
119
-
 120
120 -
 121
121 -
 122
122 -
 123
123 -
 124
124 -
 125
125 -
 126
126 -
 127
127 -
 128
128 -
 129
129 -
 130
130 -
131
-
132
-
133
-
134
-
135
-
136
-
137
-
138
-
139
-
140
-
141
-
142
-
143
-
144
-
145
-
146
-
147
-
148
-
149
-
150
-
151
-
152
-
153
-
154
-
155
-
156
-
157
-
158
 |
 |