HP Pavilion a400 HP Pavilion Destkop PCs - (English) Users Guide PAV NA/CTO 59 - Page 121
removing a second hard drive
 |
View all HP Pavilion a400 manuals
Add to My Manuals
Save this manual to your list of manuals |
Page 121 highlights
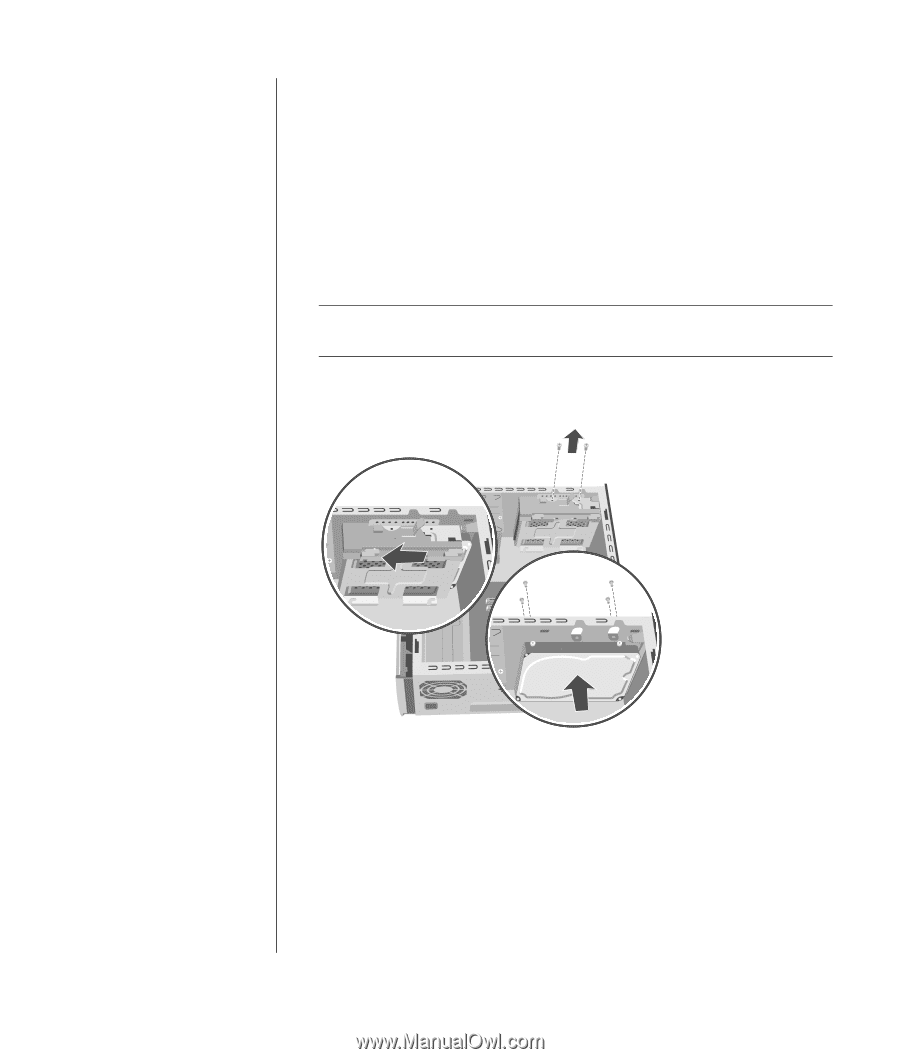
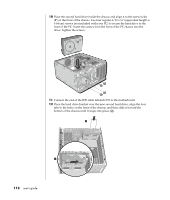
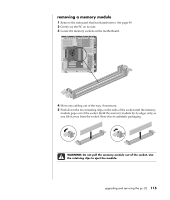
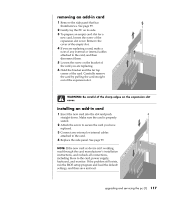
13 Attach the two screws to the hard drive bracket (R). 14 Replace the preinstalled hard drive. See page 109. 15 Replace the front panel. See page 101. 16 Replace the side panel. See page 99. removing a second hard drive 1 Remove the side panel. See page 99. 2 Remove the front panel. See page 100. 3 Gently lay the PC on its side. 4 See "removing the preinstalled hard drive" on page 107. NOTE: You do not need to remove the preinstalled hard drive from the bracket when installing a second hard drive. 5 Remove the two screws on the hard drive bracket (N). N O P 6 Slide the bracket away from the bottom of the chassis (O), and then pull it up and out of the chassis. 7 Remove the four screws on the front of the chassis to release the hard drive from the front of the chassis (P). Pull the hard drive out of the chassis. 8 Make a note of each cable attached to the second hard drive before removing the cables. Remove the IDE and power cables from the back of the second hard drive. upgrading and servicing the pc (1) 113
-
 1
1 -
2
-
3
-
4
-
5
-
6
-
7
-
8
-
9
-
10
-
11
-
12
-
13
-
14
-
15
-
16
-
17
-
18
-
19
-
20
-
21
-
22
-
23
-
24
-
25
-
26
-
27
-
28
-
29
-
30
-
31
-
32
-
33
-
34
-
35
-
36
-
37
-
38
-
39
-
40
-
41
-
42
-
43
-
44
-
45
-
46
-
47
-
48
-
49
-
50
-
51
-
52
-
53
-
54
-
55
-
56
-
57
-
58
-
59
-
60
-
61
-
62
-
63
-
64
-
65
-
66
-
67
-
68
-
69
-
70
-
71
-
72
-
73
-
74
-
75
-
76
-
77
-
78
-
79
-
80
-
81
-
82
-
83
-
84
-
85
-
86
-
87
-
88
-
89
-
90
-
91
-
92
-
93
-
94
-
95
-
96
-
97
-
98
-
99
-
100
-
101
-
102
-
103
-
104
-
105
-
106
-
107
-
108
-
109
-
110
-
111
-
112
-
113
-
114
-
115
-
 116
116 -
 117
117 -
 118
118 -
 119
119 -
 120
120 -
 121
121 -
 122
122 -
 123
123 -
 124
124 -
 125
125 -
 126
126 -
127
-
128
-
129
-
130
-
131
-
132
-
133
-
134
-
135
-
136
-
137
-
138
-
139
-
140
-
141
-
142
-
143
-
144
-
145
-
146
-
147
-
148
-
149
-
150
-
151
-
152
-
153
-
154
-
155
-
156
-
157
-
158
 |
 |