HP Presario S4000 Getting Started Compaq Presario S and 8000 Series Computer - Page 129
To Replace or Add a Drive
 |
View all HP Presario S4000 manuals
Add to My Manuals
Save this manual to your list of manuals |
Page 129 highlights
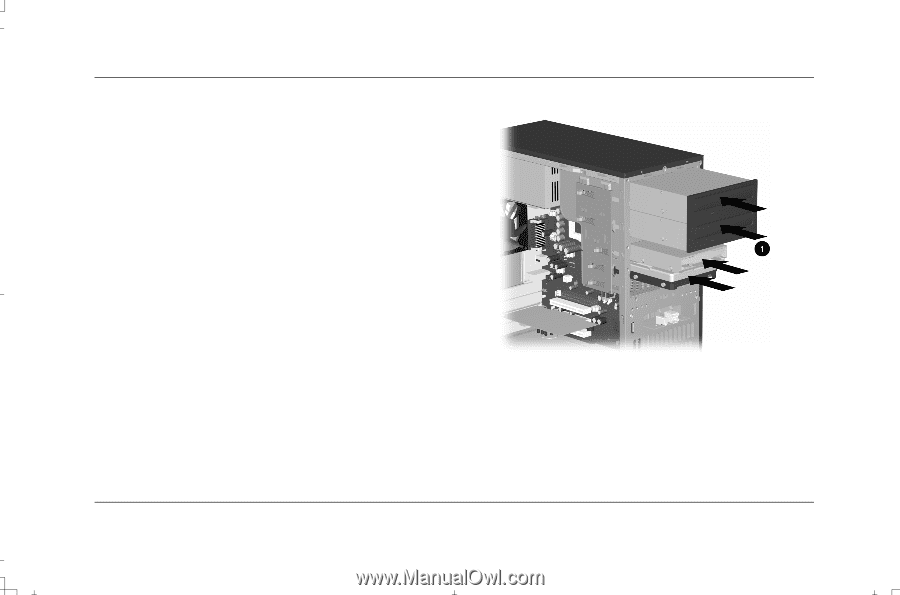
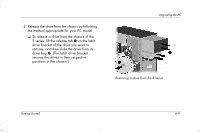
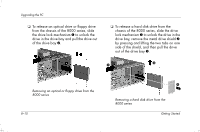
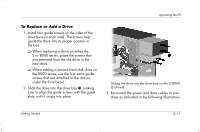
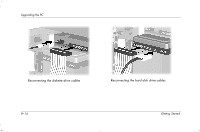
Upgrading the PC To Replace or Add a Drive 1. Install four guide screws on the sides of the drive (two on each side). The screws help guide the drive into its proper position in the bay. ❏ When replacing a drive on either the S or 8000 series, place the screws that you removed from the old drive in the new drive. ❏ When adding a second hard disk drive on the 8000 series, use the four extra guide screws that are attached to the chassis under the front bezel. 2. Slide the drive into the drive bay 1, making sure to align the guide screws with the guide slots, until it snaps into place. Sliding the drive into the drive bay on the S/8000 (S shown) 3. Reconnect the power and data cables to your drive as indicated in the following illustrations. Getting Started 8-13
-
 1
1 -
2
-
3
-
4
-
5
-
6
-
7
-
8
-
9
-
10
-
11
-
12
-
13
-
14
-
15
-
16
-
17
-
18
-
19
-
20
-
21
-
22
-
23
-
24
-
25
-
26
-
27
-
28
-
29
-
30
-
31
-
32
-
33
-
34
-
35
-
36
-
37
-
38
-
39
-
40
-
41
-
42
-
43
-
44
-
45
-
46
-
47
-
48
-
49
-
50
-
51
-
52
-
53
-
54
-
55
-
56
-
57
-
58
-
59
-
60
-
61
-
62
-
63
-
64
-
65
-
66
-
67
-
68
-
69
-
70
-
71
-
72
-
73
-
74
-
75
-
76
-
77
-
78
-
79
-
80
-
81
-
82
-
83
-
84
-
85
-
86
-
87
-
88
-
89
-
90
-
91
-
92
-
93
-
94
-
95
-
96
-
97
-
98
-
99
-
100
-
101
-
102
-
103
-
104
-
105
-
106
-
107
-
108
-
109
-
110
-
111
-
112
-
113
-
114
-
115
-
116
-
117
-
118
-
119
-
120
-
121
-
122
-
123
-
 124
124 -
 125
125 -
 126
126 -
 127
127 -
 128
128 -
 129
129 -
 130
130 -
 131
131 -
 132
132 -
 133
133 -
 134
134 -
135
-
136
-
137
-
138
-
139
-
140
-
141
-
142
-
143
-
144
-
145
-
146
-
147
-
148
-
149
-
150
-
151
-
152
-
153
-
154
-
155
-
156
-
157
-
158
 |
 |