HP Pro 4300 Maintenance & Service Guide HP Compaq Pro 4300 All-in-One Busi - Page 70
System Board Shield
 |
View all HP Pro 4300 manuals
Add to My Manuals
Save this manual to your list of manuals |
Page 70 highlights
11. Rotate the bottom of the board upward, and then remove the board from the computer. Figure 6-51 Removing the sidekey board To install the sidekey board, reverse the removal procedures. System Board Shield The system board shield covers the bottom of the system board. It is secured with two Torx screws and two hex screws around the serial port. Figure 6-52 System board shield location 62 Chapter 6 Removal and Replacement Procedures All-in One (AIO) Chassis
-
 1
1 -
2
-
3
-
4
-
5
-
6
-
7
-
8
-
9
-
10
-
11
-
12
-
13
-
14
-
15
-
16
-
17
-
18
-
19
-
20
-
21
-
22
-
23
-
24
-
25
-
26
-
27
-
28
-
29
-
30
-
31
-
32
-
33
-
34
-
35
-
36
-
37
-
38
-
39
-
40
-
41
-
42
-
43
-
44
-
45
-
46
-
47
-
48
-
49
-
50
-
51
-
52
-
53
-
54
-
55
-
56
-
57
-
58
-
59
-
60
-
61
-
62
-
63
-
64
-
 65
65 -
 66
66 -
 67
67 -
 68
68 -
 69
69 -
 70
70 -
 71
71 -
 72
72 -
 73
73 -
 74
74 -
 75
75 -
76
-
77
-
78
-
79
-
80
-
81
-
82
-
83
-
84
-
85
-
86
-
87
-
88
-
89
-
90
-
91
-
92
-
93
-
94
-
95
-
96
-
97
-
98
-
99
-
100
-
101
-
102
-
103
-
104
-
105
-
106
-
107
-
108
-
109
-
110
-
111
-
112
-
113
-
114
-
115
-
116
-
117
-
118
-
119
-
120
-
121
-
122
-
123
-
124
-
125
-
126
-
127
-
128
-
129
-
130
-
131
-
132
-
133
 |
 |
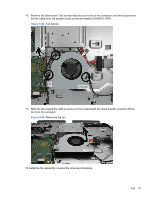
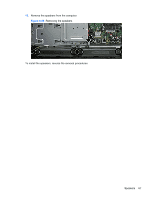
11.
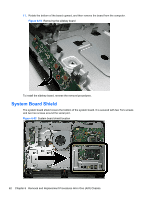
Rotate the bottom of the board upward, and then remove the board from the computer.
Figure 6-51
Removing the sidekey board
To install the sidekey board, reverse the removal procedures.
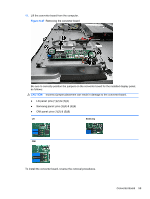
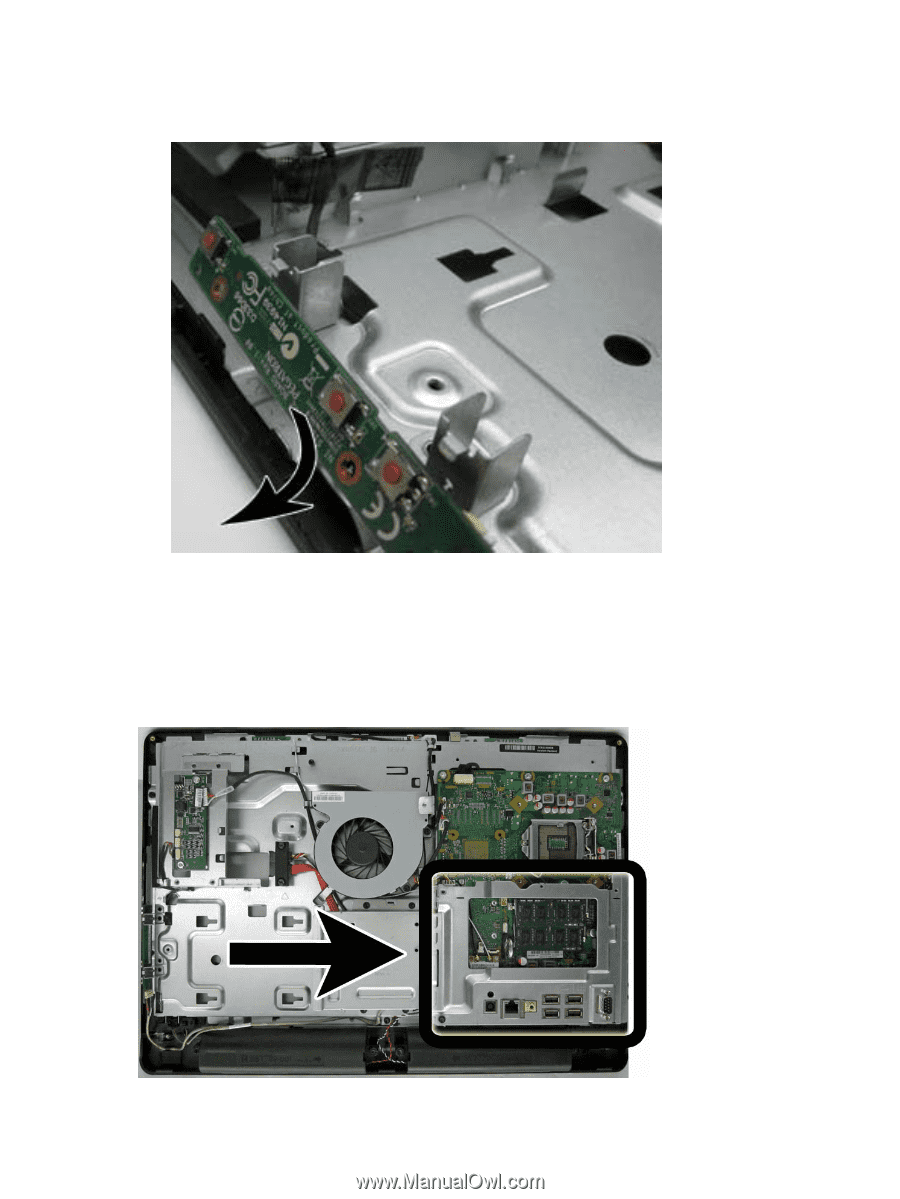
System Board Shield
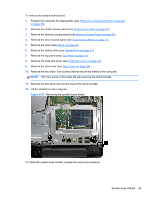
The system board shield covers the bottom of the system board. It is secured with two Torx screws
and two hex screws around the serial port.
Figure 6-52
System board shield location
62
Chapter 6
Removal and Replacement Procedures All-in One (AIO) Chassis