HP Surestore Tape Library Model 6/140 HP SureStore E Tape Library Model 6/140 - Page 21
Installing the Library (for Authorized Service Personnel only), for Authorized Service, Personnel only
 |
View all HP Surestore Tape Library Model 6/140 manuals
Add to My Manuals
Save this manual to your list of manuals |
Page 21 highlights
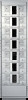
Getting Started NOTE Getting Started Installing the Library (for Authorized Service Personnel only) Installing the Library (for Authorized Service Personnel only) The power cord is factory installed. Libraries that are shipped to Argentina, Brazil, Chile, China, Hong Kong, Israel, Laos, Paraguay, Peru, Philippines, Singapore, and Thailand will have a stripped power cord. The appropriate connector must be installed by an electrician. Installation Overview Below are the steps involved in setting up the library. These steps are explained in more detail on the following pages. • Choose a location. • Unpackage the library. • Install the host bus adapter(s) and drivers. • Connect the host SCSI cables. • Connect the Fibre Channel cables (if the library is configured for Fibre Channel). • Connect the remote management card to the LAN. • Connect the power cable. • Power on the library, peripherals, and the host. • Configure the host system. Chapter 1 1-5
-
 1
1 -
2
-
3
-
4
-
5
-
6
-
7
-
8
-
9
-
10
-
11
-
12
-
13
-
14
-
15
-
 16
16 -
 17
17 -
 18
18 -
 19
19 -
 20
20 -
 21
21 -
 22
22 -
 23
23 -
 24
24 -
 25
25 -
 26
26 -
27
-
28
-
29
-
30
-
31
-
32
-
33
-
34
-
35
-
36
-
37
-
38
-
39
-
40
-
41
-
42
-
43
-
44
-
45
-
46
-
47
-
48
-
49
-
50
-
51
-
52
-
53
-
54
-
55
-
56
-
57
-
58
-
59
-
60
-
61
-
62
-
63
-
64
-
65
-
66
-
67
-
68
-
69
-
70
-
71
-
72
-
73
-
74
-
75
-
76
-
77
-
78
-
79
-
80
-
81
-
82
-
83
-
84
-
85
-
86
-
87
-
88
-
89
-
90
-
91
-
92
-
93
-
94
-
95
-
96
-
97
-
98
-
99
-
100
-
101
-
102
-
103
-
104
-
105
-
106
-
107
-
108
-
109
-
110
-
111
-
112
-
113
-
114
-
115
-
116
-
117
-
118
-
119
-
120
-
121
-
122
-
123
-
124
-
125
-
126
-
127
-
128
-
129
-
130
-
131
-
132
-
133
-
134
-
135
-
136
-
137
-
138
-
139
-
140
-
141
-
142
-
143
-
144
-
145
-
146
-
147
-
148
-
149
-
150
-
151
-
152
-
153
-
154
-
155
-
156
-
157
-
158
-
159
-
160
-
161
-
162
-
163
-
164
-
165
-
166
-
167
-
168
-
169
-
170
-
171
-
172
-
173
-
174
-
175
-
176
-
177
-
178
-
179
-
180
-
181
-
182
-
183
-
184
-
185
-
186
-
187
-
188
-
189
-
190
-
191
-
192
-
193
-
194
-
195
-
196
-
197
-
198
-
199
-
200
-
201
-
202
-
203
-
204
-
205
-
206
-
207
-
208
-
209
-
210
-
211
-
212
-
213
-
214
-
215
-
216
-
217
-
218
-
219
-
220
-
221
-
222
-
223
-
224
-
225
-
226
-
227
-
228
-
229
-
230
-
231
-
232
-
233
-
234
-
235
-
236
-
237
-
238
-
239
-
240
 |
 |
