HP Z3200ps HP Designjet Z3200 Photo Printer Series - User Guide [English] - Page 135
Ink marks on the back of the paper, Vertical dotted or dashed lines on the print
 |
UPC - 884420403401
View all HP Z3200ps manuals
Add to My Manuals
Save this manual to your list of manuals |
Page 135 highlights
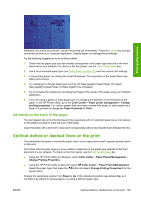
Print-quality issues Whenever you notice this problem, cancel the printing job immediately. Press the Cancel key and also cancel the job from your computer application. Soaked paper can damage the printheads. Try the following suggestions to avoid this problem: 1. Check that the paper type you have loaded corresponds to the paper type selected in the front panel and in your software. To check on the front panel, use the View loaded paper key. 2. Use a recommended paper type (see Order paper on page 103) and the correct print settings. 3. If using sheet paper, try rotating the sheet 90 degrees. The orientation of the paper fibers may affect performance. 4. Try changing to a thicker paper type, such as HP Heavyweight Coated Paper, HP Super Heavyweight Coated Paper or thicker Digital Fine Art papers. 5. Try to increase the margins by relocating the image to the center of the page using your software application. 6. If you are using a glossy or satin paper type, try changing the definition of the thickness of the paper. In the HP Printer Utility, go to the Color Center > Paper preset management > Change printing properties. For custom papers that have been created with glossy or satin papers as a base, it is possible to change the Paper thickness to Thick. Ink marks on the back of the paper This can happen after a lot of borderless printing, especially with non-standard paper sizes. Ink residues on the platen are likely to mark the back of the paper. Clean the platen with a soft cloth. Clean each rib separately without touching the foam between the ribs. Vertical dotted or dashed lines on the print The starwheels that assist in moving the paper may in some cases leave small, regularly spaced marks on the print. First check that the paper type you have loaded corresponds to the paper type selected in the front panel and in your software. To check on the front panel, use the View loaded paper key. ● Using the HP Printer Utility for Windows, select Color Center > Paper Preset Management > Change Printing Properties. ● Using the HP Printer Utility for Mac OS, select HP Color Center > Paper Preset Management. Select the paper type, then press the button and select Change Printing Properties from the popup menu. Change the starwheels position from Down to Up. If the starwheels position was already Up, as it normally is by default for glossy papers, try using a different paper type. ENWW Vertical dotted or dashed lines on the print 125
-
 1
1 -
2
-
3
-
4
-
5
-
6
-
7
-
8
-
9
-
10
-
11
-
12
-
13
-
14
-
15
-
16
-
17
-
18
-
19
-
20
-
21
-
22
-
23
-
24
-
25
-
26
-
27
-
28
-
29
-
30
-
31
-
32
-
33
-
34
-
35
-
36
-
37
-
38
-
39
-
40
-
41
-
42
-
43
-
44
-
45
-
46
-
47
-
48
-
49
-
50
-
51
-
52
-
53
-
54
-
55
-
56
-
57
-
58
-
59
-
60
-
61
-
62
-
63
-
64
-
65
-
66
-
67
-
68
-
69
-
70
-
71
-
72
-
73
-
74
-
75
-
76
-
77
-
78
-
79
-
80
-
81
-
82
-
83
-
84
-
85
-
86
-
87
-
88
-
89
-
90
-
91
-
92
-
93
-
94
-
95
-
96
-
97
-
98
-
99
-
100
-
101
-
102
-
103
-
104
-
105
-
106
-
107
-
108
-
109
-
110
-
111
-
112
-
113
-
114
-
115
-
116
-
117
-
118
-
119
-
120
-
121
-
122
-
123
-
124
-
125
-
126
-
127
-
128
-
129
-
 130
130 -
 131
131 -
 132
132 -
 133
133 -
 134
134 -
 135
135 -
 136
136 -
 137
137 -
 138
138 -
 139
139 -
 140
140 -
141
-
142
-
143
-
144
-
145
-
146
-
147
-
148
-
149
-
150
-
151
-
152
-
153
-
154
-
155
-
156
-
157
-
158
-
159
-
160
-
161
-
162
-
163
-
164
-
165
-
166
-
167
-
168
-
169
-
170
-
171
-
172
-
173
-
174
 |
 |
