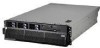
IBM 8872 Service Guide - Page 125
Removing, replacing
 |
UPC - 000435813060
View all IBM 8872 manuals
Add to My Manuals
Save this manual to your list of manuals |
Page 125 highlights
1. Insert the memory card into the memory card connector. 2. Press the memory card into the connector and close the locking levers. 3. Install the top cover (see "Top cover and bezel" on page 113). 4. Slide the server into the rack. Removing and replacing a DIMM DIMMs must be installed in pairs of the same type and speed. To use the memory mirroring feature, all the DIMMs that are installed in the server must be of the same type and speed, and the operating system must support memory mirroring. To remove a DIMM, complete the following steps: DIMM Retaining clip 1. Read the safety information that begins on page vii and "Installation guidelines" on page 99. 2. If you are removing a non-hot-swap DIMM, turn off the server and peripheral devices, and disconnect the power cords and all external cables necessary to replace the device. 3. Remove the top cover (see "Top cover and bezel" on page 113). Attention: To ensure proper cooling and airflow, do not operate the server for more than 2 minutes with the top cover removed. 4. Remove the memory card (see "Removing and replacing a memory card" on page 108). 5. Place the memory card on a flat surface with the DIMM connectors facing up. Attention: To avoid breaking the DIMM retaining clips or damaging the DIMM connectors, open and close the clips gently. 6. Open the retaining clip on each end of the DIMM connector and remove the DIMM from the connector. Chapter 4. Removing and replacing server components 109
-
 1
1 -
2
-
3
-
4
-
5
-
6
-
7
-
8
-
9
-
10
-
11
-
12
-
13
-
14
-
15
-
16
-
17
-
18
-
19
-
20
-
21
-
22
-
23
-
24
-
25
-
26
-
27
-
28
-
29
-
30
-
31
-
32
-
33
-
34
-
35
-
36
-
37
-
38
-
39
-
40
-
41
-
42
-
43
-
44
-
45
-
46
-
47
-
48
-
49
-
50
-
51
-
52
-
53
-
54
-
55
-
56
-
57
-
58
-
59
-
60
-
61
-
62
-
63
-
64
-
65
-
66
-
67
-
68
-
69
-
70
-
71
-
72
-
73
-
74
-
75
-
76
-
77
-
78
-
79
-
80
-
81
-
82
-
83
-
84
-
85
-
86
-
87
-
88
-
89
-
90
-
91
-
92
-
93
-
94
-
95
-
96
-
97
-
98
-
99
-
100
-
101
-
102
-
103
-
104
-
105
-
106
-
107
-
108
-
109
-
110
-
111
-
112
-
113
-
114
-
115
-
116
-
117
-
118
-
119
-
 120
120 -
 121
121 -
 122
122 -
 123
123 -
 124
124 -
 125
125 -
 126
126 -
 127
127 -
 128
128 -
 129
129 -
 130
130 -
131
-
132
-
133
-
134
-
135
-
136
-
137
-
138
-
139
-
140
-
141
-
142
-
143
-
144
-
145
-
146
-
147
-
148
-
149
-
150
-
151
-
152
-
153
-
154
-
155
-
156
-
157
-
158
-
159
-
160
-
161
-
162
-
163
-
164
-
165
-
166
-
167
-
168
-
169
-
170
 |
 |
