Intel SPSH4 Product Guide - Page 115
Hot Swap Drive Bays, Removing a Hot-Swap Drive Bay
 |
UPC - 735858156462
View all Intel SPSH4 manuals
Add to My Manuals
Save this manual to your list of manuals |
Page 115 highlights
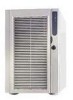
Hot Swap Drive Bays The hot swap drive bay assemblies come with a backplane board and a fan. Each drive slot contains a drive carrier with a plastic air baffle. Removing a Hot Swap Drive Bay To remove a drive bay: 1. Turn off power to the server and unplug the AC power cords from the power source. 2. Open and remove the front subchassis (page 103 and 104). 3. Remove the fan modules and the foam fan baffle (page 110). 4. Remove the four screws (two on each side) that secure the drive bay assembly to the front subchassis. D C B A A ✏ NOTE A Screws C Power cables OM13416 B I2C cable D Fan cable Figure 47. Removing a Hot Swap Drive Bay Although not necessary, for easier handling, you might want to remove any drives installed in the drive bay assembly before proceeding. 5. If both hot swap drive bays are installed, loosen two of the screws that secure one side of the other drive bay to the front subchassis. Loosening the other drive bay allows the drive bay enclosure to expand slightly, making it easier to remove the drive bay assembly. 6. Grasp the fan housing on the back of the drive bay assembly and pull the drive bay assembly out the back of the front subchassis. 7. If you are installing a replacement drive bay, skip to "Installing a Hot-Swap Drive Bay," step 5, on page 116 to install that device. Installing and Removing Components 115
-
 1
1 -
2
-
3
-
4
-
5
-
6
-
7
-
8
-
9
-
10
-
11
-
12
-
13
-
14
-
15
-
16
-
17
-
18
-
19
-
20
-
21
-
22
-
23
-
24
-
25
-
26
-
27
-
28
-
29
-
30
-
31
-
32
-
33
-
34
-
35
-
36
-
37
-
38
-
39
-
40
-
41
-
42
-
43
-
44
-
45
-
46
-
47
-
48
-
49
-
50
-
51
-
52
-
53
-
54
-
55
-
56
-
57
-
58
-
59
-
60
-
61
-
62
-
63
-
64
-
65
-
66
-
67
-
68
-
69
-
70
-
71
-
72
-
73
-
74
-
75
-
76
-
77
-
78
-
79
-
80
-
81
-
82
-
83
-
84
-
85
-
86
-
87
-
88
-
89
-
90
-
91
-
92
-
93
-
94
-
95
-
96
-
97
-
98
-
99
-
100
-
101
-
102
-
103
-
104
-
105
-
106
-
107
-
108
-
109
-
 110
110 -
 111
111 -
 112
112 -
 113
113 -
 114
114 -
 115
115 -
 116
116 -
 117
117 -
 118
118 -
 119
119 -
 120
120 -
121
-
122
-
123
-
124
-
125
-
126
-
127
-
128
-
129
-
130
-
131
-
132
-
133
-
134
-
135
-
136
-
137
-
138
-
139
-
140
-
141
-
142
-
143
-
144
-
145
-
146
-
147
-
148
-
149
-
150
-
151
-
152
-
153
-
154
-
155
-
156
-
157
-
158
-
159
-
160
-
161
-
162
-
163
-
164
-
165
-
166
-
167
-
168
-
169
-
170
 |
 |
