Intel SPSH4 Product Guide - Page 120
Hot-Plug Indicator Board, Removing a Hot-plug Indicator Board
 |
UPC - 735858156462
View all Intel SPSH4 manuals
Add to My Manuals
Save this manual to your list of manuals |
Page 120 highlights
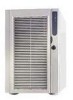
Hot-Plug Indicator Board To replace the hot-plug indicator board: 1. Remove the rear access cover. 2. Disconnect the ribbon cable from the end of the hot-plug indicator board. 3. Remove the two plastic rivets that secure the board to the electronics bay (Figure 51, C). 4. The end of the board where the cable attaches is inserted into a notch in the chassis. Tilt out the free end of the board and lift the board out of the notched bracket in the back of the electronics bay. Two plastic rivet inserts remain in the mounting holes in the chassis. BC B C A OM13420 A Ribbon cable C Rivet B Rivet sleeve Figure 51. Removing a Hot-plug Indicator Board 5. Place the end of the new hot-plug indicator board into the notched bracket in the back of the electronics bay. 6. Align the plastic rivet sleeves in the chassis back panel with the two mounting holes in the board and press the sleeves into the holes. 7. Insert the two plastic rivets into the mating sleeves and snap the rivets down to secure the board to the electronics bay. 8. Connect the ribbon cable to the mating connector on the hot-plug indicator board. 120 Intel SPSH4 Server Platform Product Guide
-
 1
1 -
2
-
3
-
4
-
5
-
6
-
7
-
8
-
9
-
10
-
11
-
12
-
13
-
14
-
15
-
16
-
17
-
18
-
19
-
20
-
21
-
22
-
23
-
24
-
25
-
26
-
27
-
28
-
29
-
30
-
31
-
32
-
33
-
34
-
35
-
36
-
37
-
38
-
39
-
40
-
41
-
42
-
43
-
44
-
45
-
46
-
47
-
48
-
49
-
50
-
51
-
52
-
53
-
54
-
55
-
56
-
57
-
58
-
59
-
60
-
61
-
62
-
63
-
64
-
65
-
66
-
67
-
68
-
69
-
70
-
71
-
72
-
73
-
74
-
75
-
76
-
77
-
78
-
79
-
80
-
81
-
82
-
83
-
84
-
85
-
86
-
87
-
88
-
89
-
90
-
91
-
92
-
93
-
94
-
95
-
96
-
97
-
98
-
99
-
100
-
101
-
102
-
103
-
104
-
105
-
106
-
107
-
108
-
109
-
110
-
111
-
112
-
113
-
114
-
 115
115 -
 116
116 -
 117
117 -
 118
118 -
 119
119 -
 120
120 -
 121
121 -
 122
122 -
 123
123 -
 124
124 -
 125
125 -
126
-
127
-
128
-
129
-
130
-
131
-
132
-
133
-
134
-
135
-
136
-
137
-
138
-
139
-
140
-
141
-
142
-
143
-
144
-
145
-
146
-
147
-
148
-
149
-
150
-
151
-
152
-
153
-
154
-
155
-
156
-
157
-
158
-
159
-
160
-
161
-
162
-
163
-
164
-
165
-
166
-
167
-
168
-
169
-
170
 |
 |
