Intel SPSH4 Product Guide - Page 92
Installing a Power Supply Module
 |
UPC - 735858156462
View all Intel SPSH4 manuals
Add to My Manuals
Save this manual to your list of manuals |
Page 92 highlights
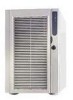
Installing a Power Supply Module To install a power supply module: 1. If present, remove the filler panel from the vacant slot. 2. Holding the power supply latch handle in the open position, slide the power supply module into the vacant slot until you feel resistance. CAUTION The module engaging its connector causes the resistance. To avoid damaging the module, do not tilt or twist the power supply module as you push it into the connector. 3. Guide the power cord through the strain relief notch in the latch handle and plug the cord into the AC power connector on the back of the power supply module. 4. Press the latch handle down to engage the latches and secure the power supply to the chassis. 5. Insert and tighten the four screws that secure the power supply module to the chassis. 6. Connect the AC power cord to the wall outlet or other AC power source. The green LED on the power supply module should be illuminated. 92 Intel SPSH4 Server Platform Product Guide
-
 1
1 -
2
-
3
-
4
-
5
-
6
-
7
-
8
-
9
-
10
-
11
-
12
-
13
-
14
-
15
-
16
-
17
-
18
-
19
-
20
-
21
-
22
-
23
-
24
-
25
-
26
-
27
-
28
-
29
-
30
-
31
-
32
-
33
-
34
-
35
-
36
-
37
-
38
-
39
-
40
-
41
-
42
-
43
-
44
-
45
-
46
-
47
-
48
-
49
-
50
-
51
-
52
-
53
-
54
-
55
-
56
-
57
-
58
-
59
-
60
-
61
-
62
-
63
-
64
-
65
-
66
-
67
-
68
-
69
-
70
-
71
-
72
-
73
-
74
-
75
-
76
-
77
-
78
-
79
-
80
-
81
-
82
-
83
-
84
-
85
-
86
-
 87
87 -
 88
88 -
 89
89 -
 90
90 -
 91
91 -
 92
92 -
 93
93 -
 94
94 -
 95
95 -
 96
96 -
 97
97 -
98
-
99
-
100
-
101
-
102
-
103
-
104
-
105
-
106
-
107
-
108
-
109
-
110
-
111
-
112
-
113
-
114
-
115
-
116
-
117
-
118
-
119
-
120
-
121
-
122
-
123
-
124
-
125
-
126
-
127
-
128
-
129
-
130
-
131
-
132
-
133
-
134
-
135
-
136
-
137
-
138
-
139
-
140
-
141
-
142
-
143
-
144
-
145
-
146
-
147
-
148
-
149
-
150
-
151
-
152
-
153
-
154
-
155
-
156
-
157
-
158
-
159
-
160
-
161
-
162
-
163
-
164
-
165
-
166
-
167
-
168
-
169
-
170
 |
 |
