Intel SPSH4 Product Guide - Page 117
Power Distribution Board
 |
UPC - 735858156462
View all Intel SPSH4 manuals
Add to My Manuals
Save this manual to your list of manuals |
Page 117 highlights
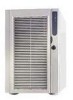
Power Distribution Board To replace the power distribution board: 1. Remove the front and rear access covers (page 66 and 67). 2. Open the front subchassis and remove the electronics bay (see "Opening the Front Subchassis and Rear Electronics Bay" and "Removing the Front Subchassis and Rear Electronics Bay" beginning on page 103). 3. Partially remove the power supplies (page 91) to disengage the power supply connectors from the power distribution board. 4. Disconnect the cables from the power distribution board. 5. Remove the four screws that secure the power distribution board to the main chassis. 6. Grasp the edge of the power distribution board and plastic overlay along the edge where the screw holes are located. Lift the edge, tilting the board about 30°. Pull up on the board to free the holes on the opposite edge from the tabs on the chassis and slide the board free. 7. Remove the two plastic rivets and the plastic overlay from the power distribution board. A B OM13417 A Power supply modules B Screws Figure 48. Removing a Power Distribution Board 8. Attach the plastic overlay to the new power distribution board using the two plastic rivets. 9. Grasp the new power distribution board and overlay with the power supply connectors facing the power supply bays. 10. Tilt the edge of the power distribution board in your hand about 30° and gently slide the other edge of the board into the four slots in the power supply bays. 11. When the board is inserted all the way into the slots, tilt the board down so the four mounting holes on the edge of the board are aligned with the corresponding holes in the main chassis. 12. Tighten the four screws to secure the power distribution board to the main chassis. Installing and Removing Components 117
-
 1
1 -
2
-
3
-
4
-
5
-
6
-
7
-
8
-
9
-
10
-
11
-
12
-
13
-
14
-
15
-
16
-
17
-
18
-
19
-
20
-
21
-
22
-
23
-
24
-
25
-
26
-
27
-
28
-
29
-
30
-
31
-
32
-
33
-
34
-
35
-
36
-
37
-
38
-
39
-
40
-
41
-
42
-
43
-
44
-
45
-
46
-
47
-
48
-
49
-
50
-
51
-
52
-
53
-
54
-
55
-
56
-
57
-
58
-
59
-
60
-
61
-
62
-
63
-
64
-
65
-
66
-
67
-
68
-
69
-
70
-
71
-
72
-
73
-
74
-
75
-
76
-
77
-
78
-
79
-
80
-
81
-
82
-
83
-
84
-
85
-
86
-
87
-
88
-
89
-
90
-
91
-
92
-
93
-
94
-
95
-
96
-
97
-
98
-
99
-
100
-
101
-
102
-
103
-
104
-
105
-
106
-
107
-
108
-
109
-
110
-
111
-
 112
112 -
 113
113 -
 114
114 -
 115
115 -
 116
116 -
 117
117 -
 118
118 -
 119
119 -
 120
120 -
 121
121 -
 122
122 -
123
-
124
-
125
-
126
-
127
-
128
-
129
-
130
-
131
-
132
-
133
-
134
-
135
-
136
-
137
-
138
-
139
-
140
-
141
-
142
-
143
-
144
-
145
-
146
-
147
-
148
-
149
-
150
-
151
-
152
-
153
-
154
-
155
-
156
-
157
-
158
-
159
-
160
-
161
-
162
-
163
-
164
-
165
-
166
-
167
-
168
-
169
-
170
 |
 |
