Intel SPSH4 Product Guide - Page 75
Removing the Baseboard, Removing the Front Retention Mechanism
 |
UPC - 735858156462
View all Intel SPSH4 manuals
Add to My Manuals
Save this manual to your list of manuals |
Page 75 highlights
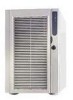
Removing the Baseboard To remove the baseboard: 1. Remove all external cables from the baseboard I/O ports at the back of the chassis. 2. Label and disconnect all internal cables connected to the PCI add-in boards. 3. Remove all PCI add-in boards (pages 96 and 98). 4. Plastic curtains run the length of the electronics bay separating the PCI add-in cards. Remove the curtains as follows: a. Release one end of the curtain from the front retention mechanism. Lift the free end high enough to clear the chassis. b. From outside of the rear of the chassis, push down on the other end of the curtain and pull the free end out of the chassis. 5. Label and remove all internal cables attached to connectors on the board. For a diagram showing labeled connectors, see Figure 58 on page 138. Remove all cables from the cable retention clip on the front of the electronics bay. 6. A plastic retention mechanism for the PCI add-in cards is fastened to the front of the electronics bay by three clips (Figure 12, A). Release each clip by pressing down on the tab and remove the retention mechanism. A C B D OM13264 A Tabs (3) on retention mechanism C Overlay tab (1 of 2) B Protective overlay D Overlay screw Figure 12. Removing the Front Retention Mechanism Installing and Removing Components 75
-
 1
1 -
2
-
3
-
4
-
5
-
6
-
7
-
8
-
9
-
10
-
11
-
12
-
13
-
14
-
15
-
16
-
17
-
18
-
19
-
20
-
21
-
22
-
23
-
24
-
25
-
26
-
27
-
28
-
29
-
30
-
31
-
32
-
33
-
34
-
35
-
36
-
37
-
38
-
39
-
40
-
41
-
42
-
43
-
44
-
45
-
46
-
47
-
48
-
49
-
50
-
51
-
52
-
53
-
54
-
55
-
56
-
57
-
58
-
59
-
60
-
61
-
62
-
63
-
64
-
65
-
66
-
67
-
68
-
69
-
 70
70 -
 71
71 -
 72
72 -
 73
73 -
 74
74 -
 75
75 -
 76
76 -
 77
77 -
 78
78 -
 79
79 -
 80
80 -
81
-
82
-
83
-
84
-
85
-
86
-
87
-
88
-
89
-
90
-
91
-
92
-
93
-
94
-
95
-
96
-
97
-
98
-
99
-
100
-
101
-
102
-
103
-
104
-
105
-
106
-
107
-
108
-
109
-
110
-
111
-
112
-
113
-
114
-
115
-
116
-
117
-
118
-
119
-
120
-
121
-
122
-
123
-
124
-
125
-
126
-
127
-
128
-
129
-
130
-
131
-
132
-
133
-
134
-
135
-
136
-
137
-
138
-
139
-
140
-
141
-
142
-
143
-
144
-
145
-
146
-
147
-
148
-
149
-
150
-
151
-
152
-
153
-
154
-
155
-
156
-
157
-
158
-
159
-
160
-
161
-
162
-
163
-
164
-
165
-
166
-
167
-
168
-
169
-
170
 |
 |
