Intel SR1600UR Service Guide - Page 76
Removing Fixed Mount Drive Carrier from the Server System
 |
UPC - 735858206723
View all Intel SR1600UR manuals
Add to My Manuals
Save this manual to your list of manuals |
Page 76 highlights
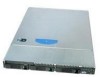
2. Slide the hard drive carrier out of the server system (see letter "B" in Figure 45). A Carrier Latch B AF003017 Figure 45. Removing Fixed Mount Drive Carrier from the Server System 3. Remove the four screws securing the plastic retention device to the drive carrier (see Figure 46). Store the plastic retention device for future use. Also, save the screws; you need them to install the hard drive into the carrier. AF002380 Figure 46. Removing the Drive Blank from the Fixed Hard Drive Carrier 4. Remove the hard drive from its wrapper and place it on an antistatic surface. 5. Set any jumpers and/or switches on the drive according to the drive manufacturer's instructions. 6. With the drive circuit-side down, position the connector end of the drive so that it is facing the rear of the drive carrier. 7. Align the holes in the hard disk drive to the holes in the drive carrier and attach it to the carrier with the screws that were attached to the plastic retention device (see Figure 47). 58 Intel® Server System SR1600UR Service Guide
-
 1
1 -
2
-
3
-
4
-
5
-
6
-
7
-
8
-
9
-
10
-
11
-
12
-
13
-
14
-
15
-
16
-
17
-
18
-
19
-
20
-
21
-
22
-
23
-
24
-
25
-
26
-
27
-
28
-
29
-
30
-
31
-
32
-
33
-
34
-
35
-
36
-
37
-
38
-
39
-
40
-
41
-
42
-
43
-
44
-
45
-
46
-
47
-
48
-
49
-
50
-
51
-
52
-
53
-
54
-
55
-
56
-
57
-
58
-
59
-
60
-
61
-
62
-
63
-
64
-
65
-
66
-
67
-
68
-
69
-
70
-
 71
71 -
 72
72 -
 73
73 -
 74
74 -
 75
75 -
 76
76 -
 77
77 -
 78
78 -
 79
79 -
 80
80 -
 81
81 -
82
-
83
-
84
-
85
-
86
-
87
-
88
-
89
-
90
-
91
-
92
-
93
-
94
-
95
-
96
-
97
-
98
-
99
-
100
-
101
-
102
-
103
-
104
-
105
-
106
-
107
-
108
-
109
-
110
-
111
-
112
-
113
-
114
-
115
-
116
-
117
-
118
-
119
-
120
-
121
-
122
-
123
-
124
-
125
-
126
-
127
-
128
-
129
-
130
-
131
-
132
-
133
-
134
-
135
-
136
-
137
-
138
-
139
-
140
-
141
-
142
-
143
-
144
-
145
-
146
-
147
-
148
-
149
-
150
-
151
-
152
-
153
-
154
-
155
-
156
-
157
-
158
-
159
-
160
-
161
-
162
-
163
-
164
-
165
-
166
-
167
-
168
-
169
-
170
-
171
-
172
-
173
-
174
-
175
-
176
-
177
-
178
-
179
-
180
-
181
-
182
-
183
-
184
-
185
-
186
-
187
-
188
 |
 |
