Kyocera KM-3035 Fax System (J) Operation Guide Rev-1 - Page 67
Dialing With a Chain Dial Key, Once the other party's fax number is entered, only
 |
View all Kyocera KM-3035 manuals
Add to My Manuals
Save this manual to your list of manuals |
Page 67 highlights
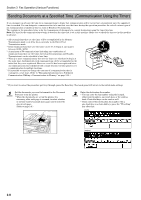
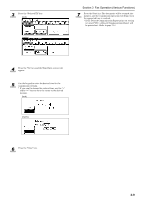
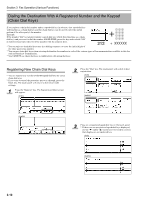
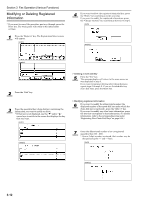
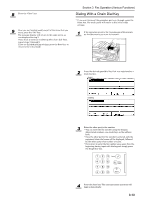
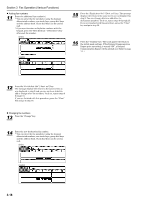
8 Press the "Close" key. 9 Once you are finished modifying all of the items that you want, press the "OK" key. The message display will return to the same screen as was displayed in step 3. If you want to continue modifying other chain dial keys, repeat steps 3 through 9. If you are finished making settings, press the Reset key to return to the initial mode. Section 3 Fax Operation (Various Functions) Dialing With a Chain Dial Key * If you want to cancel the procedure part way through, press the Reset key. The touch panel will return to the initial mode settings. 1 If the operation involves the transmission of documents, set the documents you want to transmit. 2 Press the desired speed-dial key that was registered as a chain dial key. (inch) (metric) 3 Enter the other party's fax number. * You can enter the fax number using the keypad, abbreviated numbers, one-touch keys or the address book. * Once the other party's fax number is entered, only the registered chain dial name will be displayed, followed by the other party's fax number or name. * If you want to enter the fax number once again from the beginning during input with the keypad, simply press the Stop/Clear key. 4 Press the Start key. The communication operation will begin automatically. 3-13
-
 1
1 -
2
-
3
-
4
-
5
-
6
-
7
-
8
-
9
-
10
-
11
-
12
-
13
-
14
-
15
-
16
-
17
-
18
-
19
-
20
-
21
-
22
-
23
-
24
-
25
-
26
-
27
-
28
-
29
-
30
-
31
-
32
-
33
-
34
-
35
-
36
-
37
-
38
-
39
-
40
-
41
-
42
-
43
-
44
-
45
-
46
-
47
-
48
-
49
-
50
-
51
-
52
-
53
-
54
-
55
-
56
-
57
-
58
-
59
-
60
-
61
-
 62
62 -
 63
63 -
 64
64 -
 65
65 -
 66
66 -
 67
67 -
 68
68 -
 69
69 -
 70
70 -
 71
71 -
 72
72 -
73
-
74
-
75
-
76
-
77
-
78
-
79
-
80
-
81
-
82
-
83
-
84
-
85
-
86
-
87
-
88
-
89
-
90
-
91
-
92
-
93
-
94
-
95
-
96
-
97
-
98
-
99
-
100
-
101
-
102
-
103
-
104
-
105
-
106
-
107
-
108
-
109
-
110
-
111
-
112
-
113
-
114
-
115
-
116
-
117
-
118
-
119
-
120
-
121
-
122
-
123
-
124
-
125
-
126
-
127
-
128
-
129
-
130
-
131
-
132
-
133
-
134
-
135
-
136
-
137
-
138
-
139
-
140
-
141
-
142
-
143
-
144
-
145
-
146
-
147
-
148
-
149
-
150
-
151
-
152
-
153
-
154
-
155
-
156
-
157
-
158
-
159
-
160
-
161
-
162
-
163
-
164
-
165
-
166
-
167
-
168
-
169
-
170
-
171
-
172
-
173
-
174
-
175
-
176
-
177
-
178
-
179
-
180
-
181
-
182
-
183
-
184
-
185
-
186
-
187
-
188
-
189
-
190
-
191
-
192
-
193
-
194
-
195
-
196
-
197
-
198
-
199
-
200
-
201
-
202
-
203
-
204
 |
 |