Lexmark X658DFE Service Manual - Page 523

-bin mailbox assembly standard output bin LED removal, 4-bin mailbox assembly LED clear lens removal

Page 523 highlights

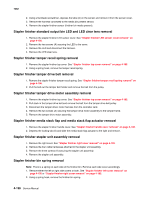
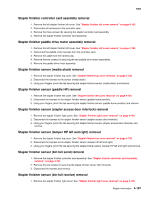
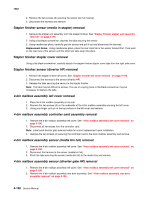
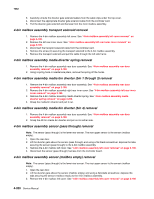
7462 4. Disconnect the sensor (mailbox empty) harness from the controller board. 4-bin mailbox assembly standard output bin LED removal 1. Remove the three screws (A) on the underside of bin 1 securing the output bin LED bracket. 2. Pull the output bin LED bracket out from the underside of bin 1 and disconnect the LED harness. 3. Remove the two screws (B) securing the output bin LED to the bracket and remove the output bin LED. 4-bin mailbox assembly LED clear lens removal 1. Remove the 4-bin mailbox standard output bin LED. See "4-bin mailbox assembly sensor (mailbox empty) removal" on page 3-200. 2. Remove the output bin LED clear lens from the output bin LED bracket. 4-bin mailbox assembly media bin full actuator removal 1. Remove the 4-bin mailbox assembly left cover. See "4-bin mailbox assembly left cover removal" on page 3-198. 2. Squeeze the front hinge of the media bin full actuator towards the rear until the front boss is released from its socket. 3. Pull the media bin full actuator toward the front and out of 4-bin mailbox assembly. Offset stacker rear door assembly removal 1. Open the rear door assembly. 2. Force the left hinge out of the slot by pushing the door to the right. 3. Once the left hinge has been disengaged, pull the right hinge out. 4. Remove the Offset stacker rear door assembly. Offset stacker right cover removal 1. Remove the two screws (A) on the inside of the exit bin compartment securing the right cover. 2. Pull out on the front side of the right cover to disengage the tabs (B). 3. Remove the Offset stacker right cover. Offset stacker left cover removal 1. Remove the two screws (A) on the inside of the exit bin compartment securing the left cover. 2. Pull out on the front side of the left cover to disengage the tabs (B). 3. Remove the Offset stacker left cover. Offset stacker top cover removal 1. Remove the left and right cover. See "Stapler finisher left cover removal" on page 4-195 and "Stapler finisher right cover removal" on page 4-195. 2. Remove the screw (A) on each side of the top cover. 3. Pull up and toward the front to remove the Offset stacker top cover. Offset stacker handle cover removal 1. Remove the left and right cover. See "Stapler finisher left cover removal" on page 4-195 and "Stapler finisher right cover removal" on page 4-195. Repair information 4-201

  • 1
  • 2
  • 3
  • 4
  • 5
  • 6
  • 7
  • 8
  • 9
  • 10
  • 11
  • 12
  • 13
  • 14
  • 15
  • 16
  • 17
  • 18
  • 19
  • 20
  • 21
  • 22
  • 23
  • 24
  • 25
  • 26
  • 27
  • 28
  • 29
  • 30
  • 31
  • 32
  • 33
  • 34
  • 35
  • 36
  • 37
  • 38
  • 39
  • 40
  • 41
  • 42
  • 43
  • 44
  • 45
  • 46
  • 47
  • 48
  • 49
  • 50
  • 51
  • 52
  • 53
  • 54
  • 55
  • 56
  • 57
  • 58
  • 59
  • 60
  • 61
  • 62
  • 63
  • 64
  • 65
  • 66
  • 67
  • 68
  • 69
  • 70
  • 71
  • 72
  • 73
  • 74
  • 75
  • 76
  • 77
  • 78
  • 79
  • 80
  • 81
  • 82
  • 83
  • 84
  • 85
  • 86
  • 87
  • 88
  • 89
  • 90
  • 91
  • 92
  • 93
  • 94
  • 95
  • 96
  • 97
  • 98
  • 99
  • 100
  • 101
  • 102
  • 103
  • 104
  • 105
  • 106
  • 107
  • 108
  • 109
  • 110
  • 111
  • 112
  • 113
  • 114
  • 115
  • 116
  • 117
  • 118
  • 119
  • 120
  • 121
  • 122
  • 123
  • 124
  • 125
  • 126
  • 127
  • 128
  • 129
  • 130
  • 131
  • 132
  • 133
  • 134
  • 135
  • 136
  • 137
  • 138
  • 139
  • 140
  • 141
  • 142
  • 143
  • 144
  • 145
  • 146
  • 147
  • 148
  • 149
  • 150
  • 151
  • 152
  • 153
  • 154
  • 155
  • 156
  • 157
  • 158
  • 159
  • 160
  • 161
  • 162
  • 163
  • 164
  • 165
  • 166
  • 167
  • 168
  • 169
  • 170
  • 171
  • 172
  • 173
  • 174
  • 175
  • 176
  • 177
  • 178
  • 179
  • 180
  • 181
  • 182
  • 183
  • 184
  • 185
  • 186
  • 187
  • 188
  • 189
  • 190
  • 191
  • 192
  • 193
  • 194
  • 195
  • 196
  • 197
  • 198
  • 199
  • 200
  • 201
  • 202
  • 203
  • 204
  • 205
  • 206
  • 207
  • 208
  • 209
  • 210
  • 211
  • 212
  • 213
  • 214
  • 215
  • 216
  • 217
  • 218
  • 219
  • 220
  • 221
  • 222
  • 223
  • 224
  • 225
  • 226
  • 227
  • 228
  • 229
  • 230
  • 231
  • 232
  • 233
  • 234
  • 235
  • 236
  • 237
  • 238
  • 239
  • 240
  • 241
  • 242
  • 243
  • 244
  • 245
  • 246
  • 247
  • 248
  • 249
  • 250
  • 251
  • 252
  • 253
  • 254
  • 255
  • 256
  • 257
  • 258
  • 259
  • 260
  • 261
  • 262
  • 263
  • 264
  • 265
  • 266
  • 267
  • 268
  • 269
  • 270
  • 271
  • 272
  • 273
  • 274
  • 275
  • 276
  • 277
  • 278
  • 279
  • 280
  • 281
  • 282
  • 283
  • 284
  • 285
  • 286
  • 287
  • 288
  • 289
  • 290
  • 291
  • 292
  • 293
  • 294
  • 295
  • 296
  • 297
  • 298
  • 299
  • 300
  • 301
  • 302
  • 303
  • 304
  • 305
  • 306
  • 307
  • 308
  • 309
  • 310
  • 311
  • 312
  • 313
  • 314
  • 315
  • 316
  • 317
  • 318
  • 319
  • 320
  • 321
  • 322
  • 323
  • 324
  • 325
  • 326
  • 327
  • 328
  • 329
  • 330
  • 331
  • 332
  • 333
  • 334
  • 335
  • 336
  • 337
  • 338
  • 339
  • 340
  • 341
  • 342
  • 343
  • 344
  • 345
  • 346
  • 347
  • 348
  • 349
  • 350
  • 351
  • 352
  • 353
  • 354
  • 355
  • 356
  • 357
  • 358
  • 359
  • 360
  • 361
  • 362
  • 363
  • 364
  • 365
  • 366
  • 367
  • 368
  • 369
  • 370
  • 371
  • 372
  • 373
  • 374
  • 375
  • 376
  • 377
  • 378
  • 379
  • 380
  • 381
  • 382
  • 383
  • 384
  • 385
  • 386
  • 387
  • 388
  • 389
  • 390
  • 391
  • 392
  • 393
  • 394
  • 395
  • 396
  • 397
  • 398
  • 399
  • 400
  • 401
  • 402
  • 403
  • 404
  • 405
  • 406
  • 407
  • 408
  • 409
  • 410
  • 411
  • 412
  • 413
  • 414
  • 415
  • 416
  • 417
  • 418
  • 419
  • 420
  • 421
  • 422
  • 423
  • 424
  • 425
  • 426
  • 427
  • 428
  • 429
  • 430
  • 431
  • 432
  • 433
  • 434
  • 435
  • 436
  • 437
  • 438
  • 439
  • 440
  • 441
  • 442
  • 443
  • 444
  • 445
  • 446
  • 447
  • 448
  • 449
  • 450
  • 451
  • 452
  • 453
  • 454
  • 455
  • 456
  • 457
  • 458
  • 459
  • 460
  • 461
  • 462
  • 463
  • 464
  • 465
  • 466
  • 467
  • 468
  • 469
  • 470
  • 471
  • 472
  • 473
  • 474
  • 475
  • 476
  • 477
  • 478
  • 479
  • 480
  • 481
  • 482
  • 483
  • 484
  • 485
  • 486
  • 487
  • 488
  • 489
  • 490
  • 491
  • 492
  • 493
  • 494
  • 495
  • 496
  • 497
  • 498
  • 499
  • 500
  • 501
  • 502
  • 503
  • 504
  • 505
  • 506
  • 507
  • 508
  • 509
  • 510
  • 511
  • 512
  • 513
  • 514
  • 515
  • 516
  • 517
  • 518
  • 519
  • 520
  • 521
  • 522
  • 523
  • 524
  • 525
  • 526
  • 527
  • 528
  • 529
  • 530
  • 531
  • 532
  • 533
  • 534
  • 535
  • 536
  • 537
  • 538
  • 539
  • 540
  • 541
  • 542
  • 543
  • 544
  • 545
  • 546
  • 547
  • 548
  • 549
  • 550
  • 551
  • 552
  • 553
  • 554
  • 555
  • 556
  • 557
  • 558
  • 559
  • 560
  • 561
  • 562
  • 563
  • 564
  • 565
  • 566
  • 567
  • 568
  • 569
  • 570
  • 571
  • 572
  • 573
  • 574
  • 575
  • 576
  • 577
  • 578
  • 579
  • 580
  • 581
  • 582
  • 583
  • 584
  • 585
  • 586
  • 587
  • 588
  • 589
  • 590
  • 591
  • 592
  • 593
  • 594

Repair information
4-201
7462
4.
Disconnect the sensor (mailbox empty) harness from the controller board.
4-bin mailbox assembly standard output bin LED removal
1.
Remove the three screws (A) on the underside of bin 1 securing the output bin LED bracket.
2.
Pull the output bin LED bracket out from the underside of bin 1 and disconnect the LED harness.
3.
Remove the two screws (B) securing the output bin LED to the bracket and remove the output bin LED.
4-bin mailbox assembly LED clear lens removal
1.
Remove the 4-bin mailbox standard output bin LED. See
“4-bin mailbox assembly sensor (mailbox
empty) removal” on page 3-200
.
2.
Remove the output bin LED clear lens from the output bin LED bracket.
4-bin mailbox assembly media bin full actuator removal
1.
Remove the 4-bin mailbox assembly left cover. See
“4-bin mailbox assembly left cover removal” on
page 3-198
.
2.
Squeeze the front hinge of the media bin full actuator towards the rear until the front boss is released from
its socket.
3.
Pull the media bin full actuator toward the front and out of 4-bin mailbox assembly.
Offset stacker rear door assembly removal
1.
Open the rear door assembly.
2.
Force the left hinge out of the slot by pushing the door to the right.
3.
Once the left hinge has been disengaged, pull the right hinge out.
4.
Remove the Offset stacker rear door assembly.
Offset stacker right cover removal
1.
Remove the two screws (A) on the inside of the exit bin compartment securing the right cover.
2.
Pull out on the front side of the right cover to disengage the tabs (B).
3.
Remove the Offset stacker right cover.
Offset stacker left cover removal
1.
Remove the two screws (A) on the inside of the exit bin compartment securing the left cover.
2.
Pull out on the front side of the left cover to disengage the tabs (B).
3.
Remove the Offset stacker left cover.
Offset stacker top cover removal
1.
Remove the left and right cover. See
“Stapler finisher left cover removal” on page 4-195
and
“Stapler
finisher right cover removal” on page 4-195
.
2.
Remove the screw (A) on each side of the top cover.
3.
Pull up and toward the front to remove the Offset stacker top cover.
Offset stacker handle cover removal
1.
Remove the left and right cover. See
“Stapler finisher left cover removal” on page 4-195
and
“Stapler
finisher right cover removal” on page 4-195
.