Netgear LB1120 User Manual - Page 25
Sign In, Settings > Advanced > LAN, Enabled, DHCP IP Range, Submit, DHCP lease time, Manual
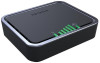 |
View all Netgear LB1120 manuals
Add to My Manuals
Save this manual to your list of manuals |
Page 25 highlights
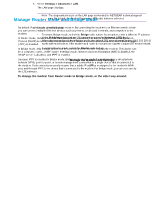
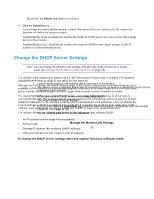
LTE Modem LB1120 and LB1121 4. Click the Sign In button. The full Dashboard page displays. 5. Select Settings > Advanced > LAN. Note The diagnostics feature on the LAN page is intended for NETGEAR technical support only. By default, the Enable Diagnostics Off radio button is selected. 6. Make sure that next to DHCP Server, the Enabled radio button is selected. By default, when the modem functions in Router mode, the DHCP server is enabled. 7. In the DHCP IP Range fields, enter the start and end IP addresses for the DHCP pool. The IP addresses must be in the same network as the LAN IP address of the modem. By default, the DHCP pool consists of addresses in the 192.168.5.20-192.168.5.99 range. The Submit button displays after you enter IP addresses for the DHCP pool. 8. To change the period that the leased DHCP address remains effective, in the DHCP lease time field, enter a time in minutes. By default, the lease time is 720 minutes (12 hours). 9. To change the DNS settings, next to DNS mode, select the Manual radio button. The DNS 1 and DNS 2 fields display. Manage the Modem LAN Settings 25
-
 1
1 -
2
-
3
-
4
-
5
-
6
-
7
-
8
-
9
-
10
-
11
-
12
-
13
-
14
-
15
-
16
-
17
-
18
-
19
-
 20
20 -
 21
21 -
 22
22 -
 23
23 -
 24
24 -
 25
25 -
 26
26 -
 27
27 -
 28
28 -
 29
29 -
 30
30 -
31
-
32
-
33
-
34
-
35
-
36
-
37
-
38
-
39
-
40
-
41
-
42
-
43
-
44
-
45
-
46
-
47
-
48
-
49
-
50
-
51
-
52
-
53
-
54
-
55
-
56
-
57
-
58
-
59
-
60
-
61
-
62
-
63
-
64
-
65
-
66
-
67
-
68
-
69
-
70
-
71
-
72
-
73
-
74
-
75
-
76
-
77
-
78
-
79
-
80
-
81
-
82
-
83
-
84
-
85
-
86
-
87
-
88
-
89
-
90
-
91
-
92
-
93
-
94
-
95
-
96
 |
 |