Netgear LB1120 User Manual - Page 26
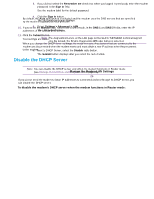
Disable the DHCP Server, To disable the modem's DHCP server when the modem functions in Router mode
 |
View all Netgear LB1120 manuals
Add to My Manuals
Save this manual to your list of manuals |
Page 26 highlights
LTE Modem LB1120 and LB1121 By default, the Auto radio button is selected and the modem uses the DNS servers that are specified by the mobile broadband service provider. 10. If you select the Manual radio button next to DNS mode, in the DNS 1 and DNS 2 fields, enter the IP addresses of the custom DNS servers. 11. Click the Submit button. Your settings are saved. When you change the DHCP server settings, the modem resets. Any devices that are connected to the modem are disconnected when the modem resets and must obtain a new IP address when they reconnect to the modem. Disable the DHCP Server Note You can disable the DHCP server only when the modem functions in Router mode (see Manage Router Mode and Bridge Mode on page 23). If you do not need the modem to issue IP addresses to connected devices through its DHCP server, you can disable the DHCP server. To disable the modem's DHCP server when the modem functions in Router mode: 1. Launch a web browser from a device that is connected to the modem. The device can be a computer that is directly connected to the modem or a client from a router that is connected to the modem. 2. In the address field of your browser, enter http://192.168.5.1. The limited Dashboard page displays. 3. If you did not select the Remember me check box when you logged in previously, enter the modem password in the Sign In field. See the modem label for the default password. 4. Click the Sign In button. The full Dashboard page displays. 5. Select Settings > Advanced > LAN. The LAN page displays. Note The diagnostics feature on the LAN page is intended for NETGEAR technical support only. By default, the Enable Diagnostics Off radio button is selected. 6. Next to DHCP Server, select the Disable radio button. The Submit button displays after you select the radio button. Manage the Modem LAN Settings 26
-
 1
1 -
2
-
3
-
4
-
5
-
6
-
7
-
8
-
9
-
10
-
11
-
12
-
13
-
14
-
15
-
16
-
17
-
18
-
19
-
20
-
 21
21 -
 22
22 -
 23
23 -
 24
24 -
 25
25 -
 26
26 -
 27
27 -
 28
28 -
 29
29 -
 30
30 -
 31
31 -
32
-
33
-
34
-
35
-
36
-
37
-
38
-
39
-
40
-
41
-
42
-
43
-
44
-
45
-
46
-
47
-
48
-
49
-
50
-
51
-
52
-
53
-
54
-
55
-
56
-
57
-
58
-
59
-
60
-
61
-
62
-
63
-
64
-
65
-
66
-
67
-
68
-
69
-
70
-
71
-
72
-
73
-
74
-
75
-
76
-
77
-
78
-
79
-
80
-
81
-
82
-
83
-
84
-
85
-
86
-
87
-
88
-
89
-
90
-
91
-
92
-
93
-
94
-
95
-
96
 |
 |
