Panasonic DMREZ28 Dvd Recorder - English / Spanish - Page 24
Recording from an External Device, To release the unit from recording, standby
 |
View all Panasonic DMREZ28 manuals
Add to My Manuals
Save this manual to your list of manuals |
Page 24 highlights
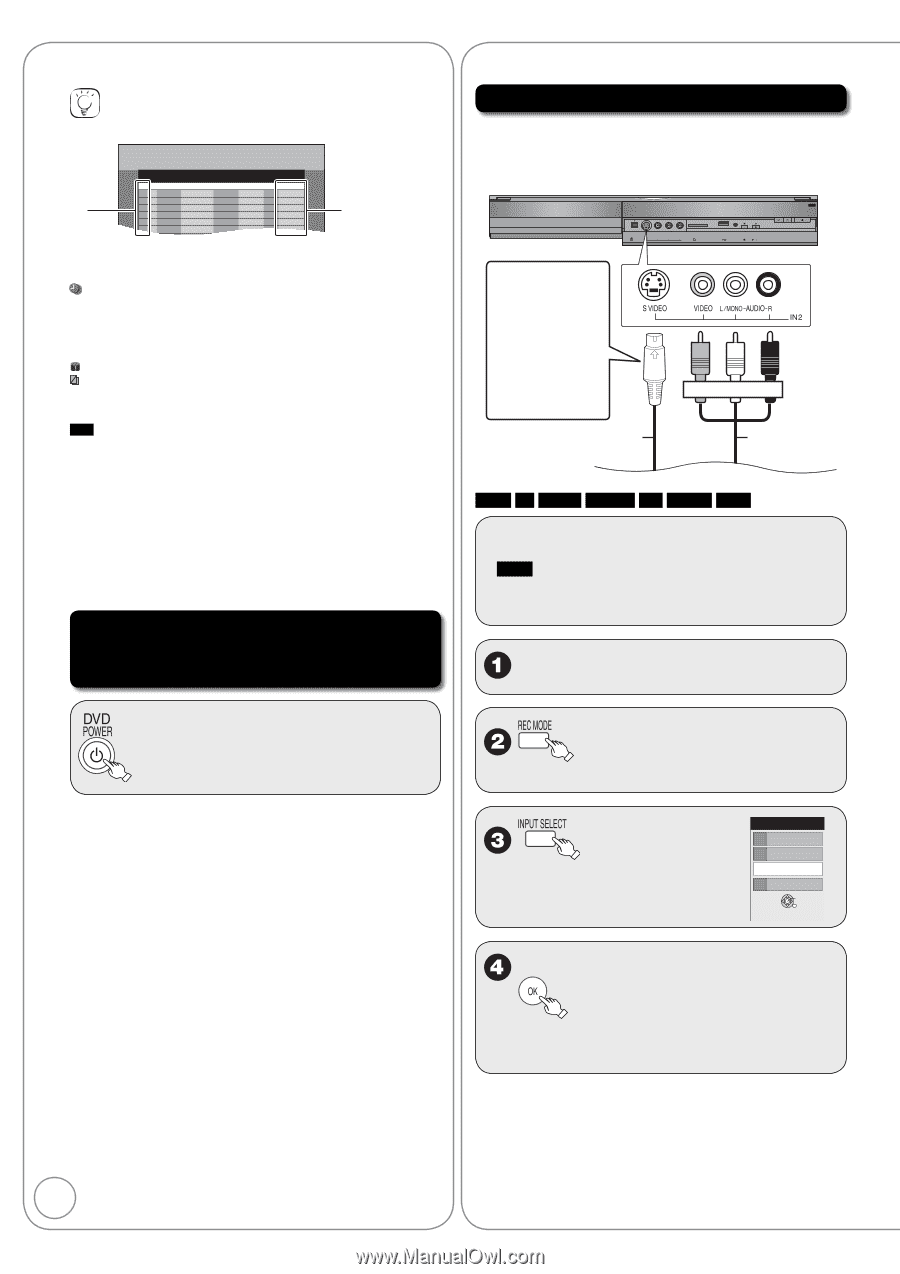
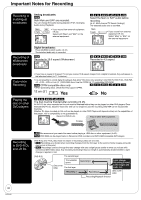
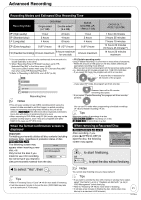
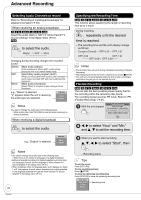
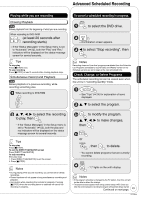
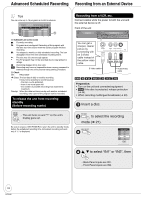
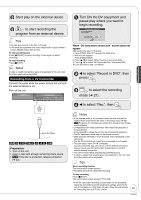
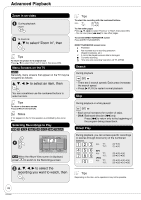
Advanced Scheduled Recording Recording from an External Device Tips You can enter up to 16 programs a month in advance. A Schedule List Remaining Recording Time DVD 1:58 SP 3/26 Tue 12:53 PM No Channel Date On Off Mode Check New Scheduled Recording B A Schedule List screen icons *: Currently recording : Programs are overlapped. Recording of the program with the later start time starts when the earlier program finishes recording. Q: You stopped a weekly or daily scheduled recording. The icon disappears when the next scheduled recording starts. : The disc was full. (not enough space) : The TV program may not be recorded due to copy-protect or ratings. X: Recording stopped (Dirty disc, etc.) PG! : Recording may become impossible when a wrong password is entered through the unit's parental rating setting procedure. B Check OK: Recordable ➔ (Date):The last day of daily or weekly recording !: It may not be possible to record because: - the disc is write-protected. - there is no more space left. - the number of possible recordings has reached its maximum. Overlap: When the date and time overlap with another scheduled recording, only a part of the program can be recorded. To release the unit from recording standby (Before recording starts) Recording from a VCR, etc. Connect cables while the power to both the unit and the external device is off. Front of the unit DV IN S VIDEO VIDEO L/MONO-AUDIO-R IN2 SD CARD USB CH REC RESET / 1.3 You can get a sharper, clearer picture by connecting with an S Video cable instead of the yellow video cable. S Video cable Yellow White Red Audio/Video cable RAM -R -R DL -RW(V) +R +R DL +RW Preparation: • Turn on the unit and connected equipment. • RAM If the disc is protected, release protection (➔ 44). • When recording multilingual broadcasts (➔ 20) Insert a disc. - The unit turns on and "z" on the unit's display goes out. Be sure to press [^ DVD POWER] to return the unit to standby mode before the scheduled recording time. Scheduled recording will work only if "z" is displayed. to select the recording mode (➔ 21). Input Select 1 TV 2 IN1 3 IN2 4 DV OK e, r to select "IN1" or "IN2", then - Back Panel inputs are IN1. - Front Panel inputs are IN2. 24 RQT9046
-
 1
1 -
2
-
3
-
4
-
5
-
6
-
7
-
8
-
9
-
10
-
11
-
12
-
13
-
14
-
15
-
16
-
17
-
18
-
 19
19 -
 20
20 -
 21
21 -
 22
22 -
 23
23 -
 24
24 -
 25
25 -
 26
26 -
 27
27 -
 28
28 -
 29
29 -
30
-
31
-
32
-
33
-
34
-
35
-
36
-
37
-
38
-
39
-
40
-
41
-
42
-
43
-
44
-
45
-
46
-
47
-
48
-
49
-
50
-
51
-
52
-
53
-
54
-
55
-
56
-
57
-
58
-
59
-
60
-
61
-
62
-
63
-
64
-
65
-
66
-
67
-
68
-
69
-
70
-
71
-
72
-
73
-
74
-
75
-
76
-
77
-
78
-
79
-
80
-
81
-
82
-
83
-
84
 |
 |