Panasonic DMREZ28 Dvd Recorder - English / Spanish - Page 48
Off Timer, Remote Control, Clock Settings, to select Set Code 1, Set Code
 |
View all Panasonic DMREZ28 manuals
Add to My Manuals
Save this manual to your list of manuals |
Page 48 highlights
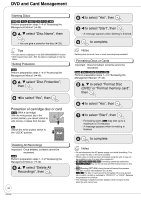
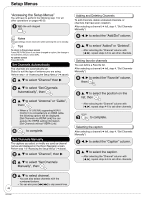
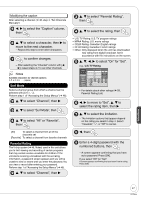
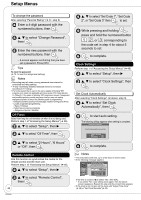
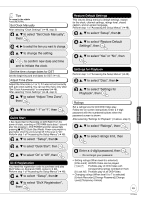
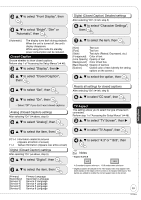
Setup Menus To change the password After selecting "Parental Rating" (➔ 47, step 3) Enter a 4-digit password with the numbered buttons, then e, r to select "Change Password", then Enter the new password with the numbered buttons, then - A screen appears confirming that you have set a password. Press [OK]. Tips To clear the password (➔ 70, To reset the ratings level settings) Notes • Recording may fail when a wrong password was entered for scheduled recording settings. • "V-chip" technology enables restricted shows to be locked according to TV ratings. • The V-chip system that is used in this set is capable of blocking "NR" programs (non rated, not applicable and none) as per FCC Rules Section 15.120(e)(2). If the option of blocking "NR" programs is chosen "unexpected and possibly confusing results may occur, and you may not receive emergency bulletins or any of the following types of programming:" - Emergency Bulletins (Such as EAS messages, weather warnings and others) - Locally originated programming • News • Political - Public Service Announcements • Religious • Sports • Weather Off Timer Select how long the unit remains on when it is not being used. Perform step 1 of "Accessing the Setup Menus" (➔ 46). e, r to select "Setup", then q e, r to select "Off Timer", then e, r to select "2 Hours", "6 Hours" or "Off", then e, r to select "Set Code 1", "Set Code 2", or "Set Code 3" then to set. While pressing and holding , press and hold the numbered button , , or corresponding to the code set in step 4 for about 5 seconds to set. to complete. Clock Settings Perform step 1 of "Accessing the Setup Menus" (➔ 46) e, r to select "Setup", then q e, r to select "Clock Settings", then Set Clock Automatically After selecting "Clock Settings" (➔ above, step 3). e, r to select "Set Clock Automatically", then to start auto setting. The following dialog appears when setting is complete. Set Clock Automatically Clock Setting completed successfully. 4/4/2006 12:15 AM DST On Time Zone.... EST to complete. Remote Control Use this function to synchronize the codes for the remote control and the main unit. Perform step 1 of "Accessing the Setup Menus" (➔ 46). e, r to select "Setup", then q 48 RQT9046 e, r to select "Remote Control", then Notes • This may take some time, up to a few hours in some cases. • If the following message appears Setup Channel Setup Set Clock Automatically Setting completed as follows. Finish the setup with this clock time? Note: Selecting "No" will start channel scanning again and renew the clock time. Yes No Disc Video Audio 12/14/2005 5:28 AM DST Off Time Zone....... EST Display ENTER If the time is correct, [w] to select "Yes", then [OK]. - If you select "No", auto setting starts again, then the above screen reappears. Repeat this step until the correct time appears. • If the clock is not correct, set the clock with "Adjust Time Zone" (➔ 49) or "Set Clock Manually"(➔ 49).
-
 1
1 -
2
-
3
-
4
-
5
-
6
-
7
-
8
-
9
-
10
-
11
-
12
-
13
-
14
-
15
-
16
-
17
-
18
-
19
-
20
-
21
-
22
-
23
-
24
-
25
-
26
-
27
-
28
-
29
-
30
-
31
-
32
-
33
-
34
-
35
-
36
-
37
-
38
-
39
-
40
-
41
-
42
-
 43
43 -
 44
44 -
 45
45 -
 46
46 -
 47
47 -
 48
48 -
 49
49 -
 50
50 -
 51
51 -
 52
52 -
 53
53 -
54
-
55
-
56
-
57
-
58
-
59
-
60
-
61
-
62
-
63
-
64
-
65
-
66
-
67
-
68
-
69
-
70
-
71
-
72
-
73
-
74
-
75
-
76
-
77
-
78
-
79
-
80
-
81
-
82
-
83
-
84
 |
 |
