Pfaff creative 2144 Owner's Manual - Page 55
Description, icons, Create, stitch, pattern, placing, single, stitches
 |
View all Pfaff creative 2144 manuals
Add to My Manuals
Save this manual to your list of manuals |
Page 55 highlights
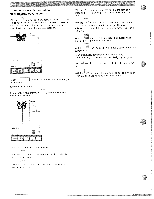
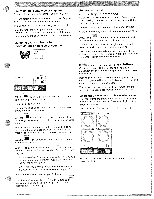
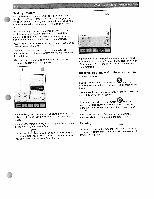
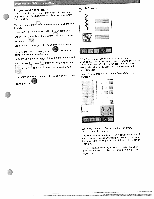
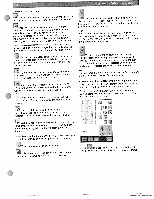
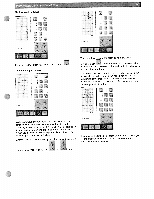
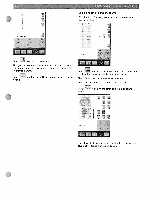
Description of the icons ) Use this con to open a window for opening, saving or deleting a stitch pattern on the machine or a Creative Card. Use this function to create a new stitch pattern. A variant of the main menu is opened. By touching the desired category and the sorted stitch selection you can select it directly. If you confirm the stitch, it appears individually on the workspace. By touching the icon for selecting stitch menus again, you can add any further stitch. The scroll bar is only active if the stitch pattern is longer than the scroll bar to scroll vertically through the workspace. Use your stitch pattern. With this icon you place single straight stitches at the end of a selected stitch. If you have selected more than one stitch these will be copied and placed right after the selected stitches. FT If you touch this icon you open a menu where you can see the whole stitch pattern and sew it. It's only in this mode that you are able to sew your stitch pattern. 4 You enlarge the representation in 3 steps, 150 %, 200 % and 300 An additional scroll bar for moving the workspace horizontally appears on the screen. This icon is only active if you have enlarged the representation. The function reduces the representation in 3 steps. If you touch this icon you can select one stitch or more. It you keep the icon depressed selected. The selected stitches will be all stitches will be marked with blue. This icon shows the stitch length of a selected stitch. You can change the stitch length for the selected stitch by touching the + or the - of the icon. If more than one stitch is selected this icon is not active. Hint: If a zig zag stitch is selected this icon does not show the stitch length but the way the feed dogs are moving. If the number on the icon is negative it means that the feed dogs move in reverse when you sew. . This icon shows the horizontal position of the selected stitch. If you change the position of a single stitch to the left or the right you automatically changes the stitch width. If more than one stitch is selected you change the position of the selected stitches or the whole pattern. Hint: The icon shows the numbers 0-9, this is not the stitch width but the the x- coordinates of the work space. Create a new stitch pattern by placing single stitches When you open the Stitch Creator the workspace is empty. A purple line indicates the middle of the work space. To create a new stitch pattern you must first place the starting point. This means that you set the position of the first stitch in the work space. -' - l With this icon you move the selection cursor stitch by stitch through your stitch pattern. You step stitch by stitch from the beginning to the end of the stitch pattern and backwards. a The scroll bar between the activity arrows allows you to scroll faster through the stitch pattern, stitch by stitch. This icon deletes all selected stitches. This icon opens a more option menu with pattern components to combine to get new stitch patterns. Touch to place the starting point and the first stitch. The position of the first stitch is marked with a red frame.
-
 1
1 -
2
-
3
-
4
-
5
-
6
-
7
-
8
-
9
-
10
-
11
-
12
-
13
-
14
-
15
-
16
-
17
-
18
-
19
-
20
-
21
-
22
-
23
-
24
-
25
-
26
-
27
-
28
-
29
-
30
-
31
-
32
-
33
-
34
-
35
-
36
-
37
-
38
-
39
-
40
-
41
-
42
-
43
-
44
-
45
-
46
-
47
-
48
-
49
-
 50
50 -
 51
51 -
 52
52 -
 53
53 -
 54
54 -
 55
55 -
 56
56 -
 57
57 -
 58
58 -
 59
59 -
 60
60 -
61
-
62
-
63
-
64
-
65
-
66
-
67
-
68
-
69
-
70
-
71
-
72
-
73
-
74
-
75
-
76
-
77
-
78
-
79
-
80
-
81
-
82
-
83
-
84
-
85
-
86
-
87
-
88
-
89
-
90
-
91
-
92
-
93
-
94
-
95
-
96
-
97
-
98
-
99
-
100
-
101
-
102
-
103
-
104
-
105
-
106
-
107
-
108
-
109
-
110
-
111
-
112
-
113
-
114
-
115
-
116
-
117
-
118
-
119
-
120
-
121
-
122
-
123
-
124
-
125
-
126
-
127
-
128
-
129
-
130
-
131
-
132
-
133
-
134
-
135
-
136
-
137
-
138
-
139
-
140
-
141
-
142
-
143
-
144
-
145
-
146
-
147
-
148
-
149
-
150
-
151
-
152
-
153
-
154
-
155
-
156
 |
 |
