Pioneer AVIC-U250 Owner's Manual - Page 57
Setting the user profiles, Customizing the map, screen settings, Customizing preferences
 |
View all Pioneer AVIC-U250 manuals
Add to My Manuals
Save this manual to your list of manuals |
Page 57 highlights
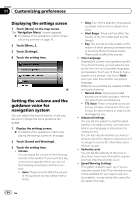
Customizing preferences Chapter 11 Customizing preferences Touch this key to open the list of traffic event types, and select which events to take into account in route calculation. Setting the user profiles If more drivers use this navigation system, their settings can be remembered by using one of the user profiles. 1 Display the settings screen. = For details of the operations, refer to Displaying the settings screen on page 54. 2 Touch [User Profiles]. 3 Touch the key on the right of new profile that you want to set. p Rename the profiles so that all users know which profile to use and switch between profiles by touching its name. p If you select a new profile, this system restarts so that the new settings can take effect. Customizing the map screen settings You can fine-tune the appearance of the map screen. Adjust the map view to your needs, choose suitable color themes from the list for both daytime and night use, change the blue arrow to a 3D car model, show or hide 3D buildings, turn track logging on or off, and manage your place visibility settings (which places to show on the map). 1 Display the settings screen. = For details of the operations, refer to Displaying the settings screen on page 54. 2 Touch [Map Settings]. The "Map Settings" screen appears. 3 Touch the setting item. You can see the effect when you change a setting. ! View Mode: Switch the map view between a 3D perspective view and a 2D topdown view. ! Viewpoint: Adjust the basic zoom and tilt levels to your needs. Three levels are available. ! Automatic Overview: When selected, the map zooms out to show an overview of the surrounding area if the next route event (maneuver) is far. When you get close to the event, the normal map view returns. ! Colors: Switch between daytime and night color modes or let the software switch between the two modes automatically a few minutes before sunrise and a few minutes after sunset. ! Day Map Color: Select the color scheme used in daytime mode. ! Night Map Color: Select the color scheme used in night mode. ! 3D Vehicle Gallery: Replace the default position marker to one of the 3D vehicle models. You can select separate icons for different vehicle types selected for route planning. Separate icons can be used for car, pedestrian and the other vehicles. ! Landmarks: Show or suppress 3D landmarks, 3D artistic or block representations of prominent or well-known objects. ! Buildings: Show or suppress 3D city models, 3D artistic or block representation of full city building data containing actual building size and position on the map. ! 3D Terrain: Show or suppress the 3D elevation of the surrounding terrain. En 57
-
 1
1 -
2
-
3
-
4
-
5
-
6
-
7
-
8
-
9
-
10
-
11
-
12
-
13
-
14
-
15
-
16
-
17
-
18
-
19
-
20
-
21
-
22
-
23
-
24
-
25
-
26
-
27
-
28
-
29
-
30
-
31
-
32
-
33
-
34
-
35
-
36
-
37
-
38
-
39
-
40
-
41
-
42
-
43
-
44
-
45
-
46
-
47
-
48
-
49
-
50
-
51
-
 52
52 -
 53
53 -
 54
54 -
 55
55 -
 56
56 -
 57
57 -
 58
58 -
 59
59 -
 60
60 -
 61
61 -
 62
62 -
63
-
64
-
65
-
66
-
67
-
68
-
69
-
70
-
71
-
72
-
73
-
74
-
75
-
76
 |
 |
