Pioneer PRO-1130HD Owner's Manual - Page 38
Tuner Setup
 |
View all Pioneer PRO-1130HD manuals
Add to My Manuals
Save this manual to your list of manuals |
Page 38 highlights
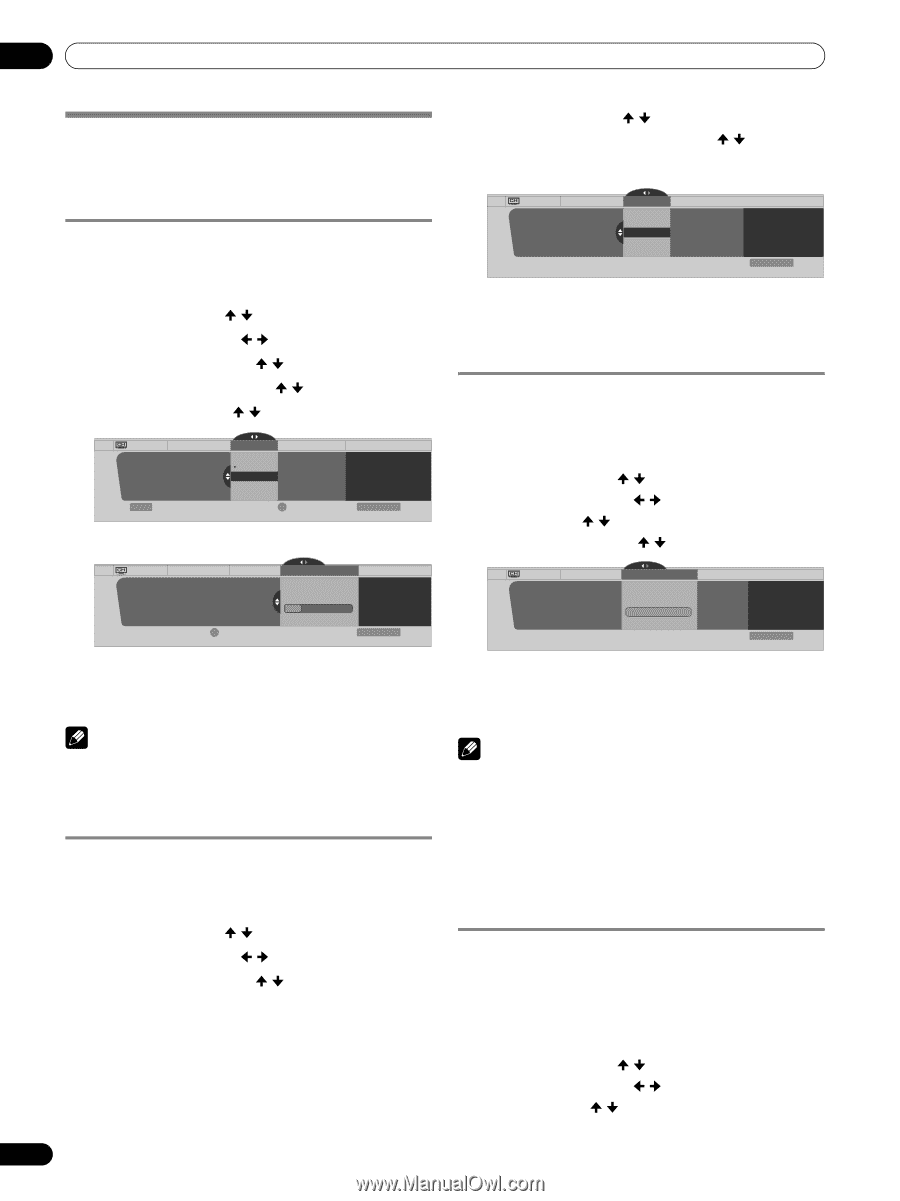
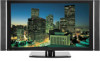
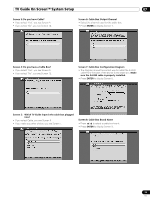
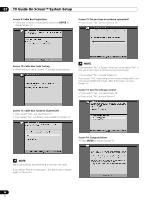
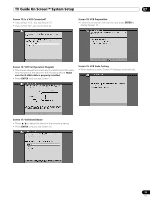
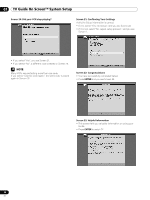
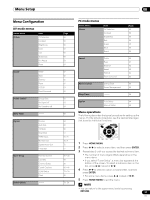
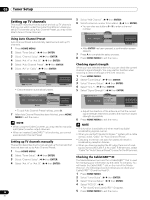
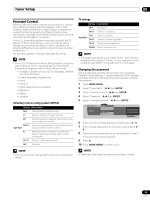
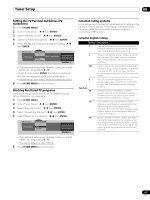
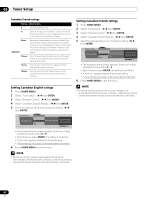
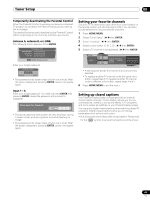
09 Tuner Setup Tuner Setup Setting up TV channels This section describes how to search and set up TV channels that you can watch under the current conditions. Unless you set up TV channels using Auto Channel Preset, you may not be able to tune in those channels. Using Auto Channel Preset Auto Channel Preset automatically searches and sets up TV channels. 1 Press HOME MENU. 2 Select "Tuner Setup". ( / then ENTER) 3 Select "Channel Setup". ( / then ENTER) 4 Select "Ant. A" or "Ant. B". ( / then ENTER) 5 Select "Auto Channel Preset". ( / then ENTER) 6 Select "Air" or "Cable". ( / then ENTER) Channel Setup Ant. A Auto Ch. Preset Cable Air Ant. A Auto Channel Preset Cable Enter Begin Preset D Cancel xxxxxxxxxxxxxxxxxxxxx 2.0 xxxxxxxxxxxxxxxxxxxxx 4.0 xxxxxxxxxxxxxxxxxxxxx 6.0 Home Menu Exit • Channel search automatically starts. Channel Setup Ant. A Auto Ch. Preset Cable Ant. A Auto Channel Preset • Cable One Moment Please ... xxxxxxxxxxxxxxxx xxxxxxxxxxxxxxxx xxxxxxxxxxxxxxxx D Cancel Home Menu Exit • To quit Auto Channel Preset halfway, press D. 7 After Auto Channel Preset has been finished, press HOME MENU to exit the menu. NOTE • When using the Cable Converter, you may need to manually add Cable Converter output channels. • When an inserted CableCARD™ is functioning, you cannot execute Auto Channel Preset. Setting up TV channels manually This section describes how to manually set up TV channels that have not been set up by Auto Channel Preset. 1 Press HOME MENU. 2 Select "Tuner Setup". ( / then ENTER) 3 Select "Channel Setup". ( / then ENTER) 4 Select "Ant. A" or "Ant. B". ( / then ENTER) 38 En 5 Select "Add Channel". ( / then ENTER) 6 Select a channel number to be added. ( / then ENTER) • You can also use buttons 0 - 9 to enter a channel number. Channel Setup Ant. A Ant. A Add Channel Add Channel 0000.000 1 xxxxxxxxxxxxxxxxxxxxx xxxxxxxxxxxxxxxxxxxxx xxxxxxxxxxxxxxxxxxxxx Home Menu Exit • After ENTER has been pressed, a confirmation screen appears. 7 Press A to complete the setup process. 8 Press HOME MENU to exit the menu. Checking signal strength When you have selected antenna A, you can check the current channel's signal strength. You may use this function when receiving a channel through a VHF/UHF antenna. 1 Press HOME MENU. 2 Select "Tuner Setup". ( / then ENTER) 3 Select "Channel Setup". ( / then ENTER) 4 Select "Ant. A". ( / then ENTER) 5 Select "Signal Strength". ( / then ENTER) Channel Setup Ant. A Ant. A Signal Strength Signal Strength Maximum: 100 Current: 100 xxxxxxxxxxxxxxxxxxxxx xxxxxxxxxxxxxxxxxxxxx xxxxxxxxxxxxxxxxxxxxx Home Menu Exit • Adjust the direction of the antenna so that the current signal strength reaches as close to the maximum signal strength as possible. 6 Press HOME MENU to exit the menu. NOTE • This function is available only when receiving digital broadcasting signals over air. • When you use the TV Guide On Screen™ system with a cable service, select "Cable" for "Auto Channel Preset". • Executing more than one scan for cables will result in broadcasting reception failures. • When you have connected the RF output terminal of a settop box to the ANT/CABLE A IN or ANT B IN terminal, select "Cable" for "Auto Channel Preset" to scan for the IN terminal. Checking the CableCARD™ ID The Media Receiver has a slot for a CableCARD™ that is used for managing your information by the cable TV company. You will locate the CableCARD™ slot on the rear of the Media Receiver. The following procedure allows you to check your CableCARD™ ID and the Host ID. 1 Press HOME MENU. 2 Select "Tuner Setup". ( / then ENTER) 3 Select "Channel Setup". ( / then ENTER) 4 Select "POD ID". ( / ) • The Host ID and CableCARD™ ID appear. 5 Press HOME MENU to exit the menu.
-
 1
1 -
2
-
3
-
4
-
5
-
6
-
7
-
8
-
9
-
10
-
11
-
12
-
13
-
14
-
15
-
16
-
17
-
18
-
19
-
20
-
21
-
22
-
23
-
24
-
25
-
26
-
27
-
28
-
29
-
30
-
31
-
32
-
 33
33 -
 34
34 -
 35
35 -
 36
36 -
 37
37 -
 38
38 -
 39
39 -
 40
40 -
 41
41 -
 42
42 -
 43
43 -
44
-
45
-
46
-
47
-
48
-
49
-
50
-
51
-
52
-
53
-
54
-
55
-
56
-
57
-
58
-
59
-
60
-
61
-
62
-
63
-
64
-
65
-
66
-
67
-
68
-
69
-
70
-
71
-
72
-
73
-
74
-
75
-
76
-
77
-
78
-
79
-
80
-
81
-
82
-
83
-
84
-
85
-
86
-
87
-
88
-
89
-
90
-
91
-
92
-
93
-
94
-
95
-
96
-
97
-
98
-
99
-
100
 |
 |