Pioneer PRO-1130HD Owner's Manual - Page 64
Image position adjustment, AV mode only, Automatic image position and clock, adjustments PC mode
 |
View all Pioneer PRO-1130HD manuals
Add to My Manuals
Save this manual to your list of manuals |
Page 64 highlights
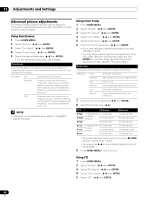
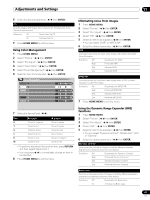
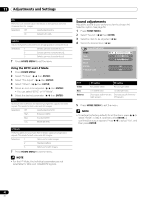
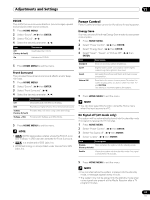
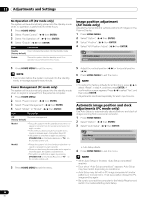
11 Adjustments and Settings No Operation off (AV mode only) The system will be automatically placed into the standby mode when no operation is performed for three hours. 1 Press HOME MENU. 2 Select "Power Control". ( / then ENTER) 3 Select "No Operation off". ( / then ENTER) 4 Select "Enable". ( / then ENTER) Item Description Disable Does not place the system into the standby mode. (factory default) Enable Places the system into the standby mode if no operation is performed for three hours. Image position adjustment (AV mode only) Adjusts the horizontal and vertical positions of images on the Plasma Display. 1 Press HOME MENU. 2 Select "Option". ( / then ENTER) 3 Select "Position". ( / then ENTER) 4 Select "H/V Position Adjust". ( / then ENTER) Position H/V Position Adjust Reset 5 Press HOME MENU to exit the menu. NOTE • Five minutes before the system is placed into the standby mode, a message appears every minute. Power Management (PC mode only) The system will be automatically placed into the standby mode when no signal is received from the personal computer. 1 Press HOME MENU. 2 Select "Power Control". ( / then ENTER) 3 Select "Power Management". ( / then ENTER) 4 Select "Mode1" or "Mode2". ( / then ENTER) Item Description Off No power management (factory default) Mode1 Mode2 • Places the system into the standby mode when no signal is received from the personal computer for eight minutes. • Even when you start using the computer and a signal is received again, the system stays off. • The system is switched on again by pressing STANDBY/ON on the Media Receiver or TV on the remote control unit. • Places the system into the standby mode when no signal is received for eight seconds. • When you start using the computer and a signal is received again, the system is switched on. • The system is switched on again by pressing STANDBY/ON on the Media Receiver or TV on the remote control unit. 5 Press HOME MENU to exit the menu. 5 Adjust the vertical position ( / ) or horizontal position ( / ). 6 Press HOME MENU to exit the menu. NOTE • To restore the factory defaults for all the items, press / to select "Reset" in step 4, and then press ENTER. A confirmation screen appears. Press / to select "Yes", and then press ENTER. • Adjustments are stored separately for each input source. Automatic image position and clock adjustments (PC mode only) Use Auto Setup to automatically adjust positions and clock of images coming from a personal computer. 1 Press HOME MENU. 2 Select "Option". ( / then ENTER) 3 Select "Auto Setup". ( / then ENTER) Option Auto Setup Manual Setup • Auto Setup starts. 4 Press HOME MENU to exit the menu. NOTE • When Auto Setup is finished, "Auto Setup completed." appears. • Even when "Auto Setup completed." appears, Auto Setup may have failed, depending on conditions. • Auto Setup may fail with a PC image composed of similar patterns or monochrome. If not successful, change the PC image and try again. • Be sure to connect the computer to the Media Receiver and switch it on before starting Auto Setup. 64 En
-
 1
1 -
2
-
3
-
4
-
5
-
6
-
7
-
8
-
9
-
10
-
11
-
12
-
13
-
14
-
15
-
16
-
17
-
18
-
19
-
20
-
21
-
22
-
23
-
24
-
25
-
26
-
27
-
28
-
29
-
30
-
31
-
32
-
33
-
34
-
35
-
36
-
37
-
38
-
39
-
40
-
41
-
42
-
43
-
44
-
45
-
46
-
47
-
48
-
49
-
50
-
51
-
52
-
53
-
54
-
55
-
56
-
57
-
58
-
 59
59 -
 60
60 -
 61
61 -
 62
62 -
 63
63 -
 64
64 -
 65
65 -
 66
66 -
 67
67 -
 68
68 -
 69
69 -
70
-
71
-
72
-
73
-
74
-
75
-
76
-
77
-
78
-
79
-
80
-
81
-
82
-
83
-
84
-
85
-
86
-
87
-
88
-
89
-
90
-
91
-
92
-
93
-
94
-
95
-
96
-
97
-
98
-
99
-
100
 |
 |