Pioneer PRO-1130HD Owner's Manual - Page 48
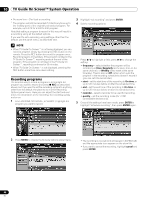
Recording programs
 |
View all Pioneer PRO-1130HD manuals
Add to My Manuals
Save this manual to your list of manuals |
Page 48 highlights
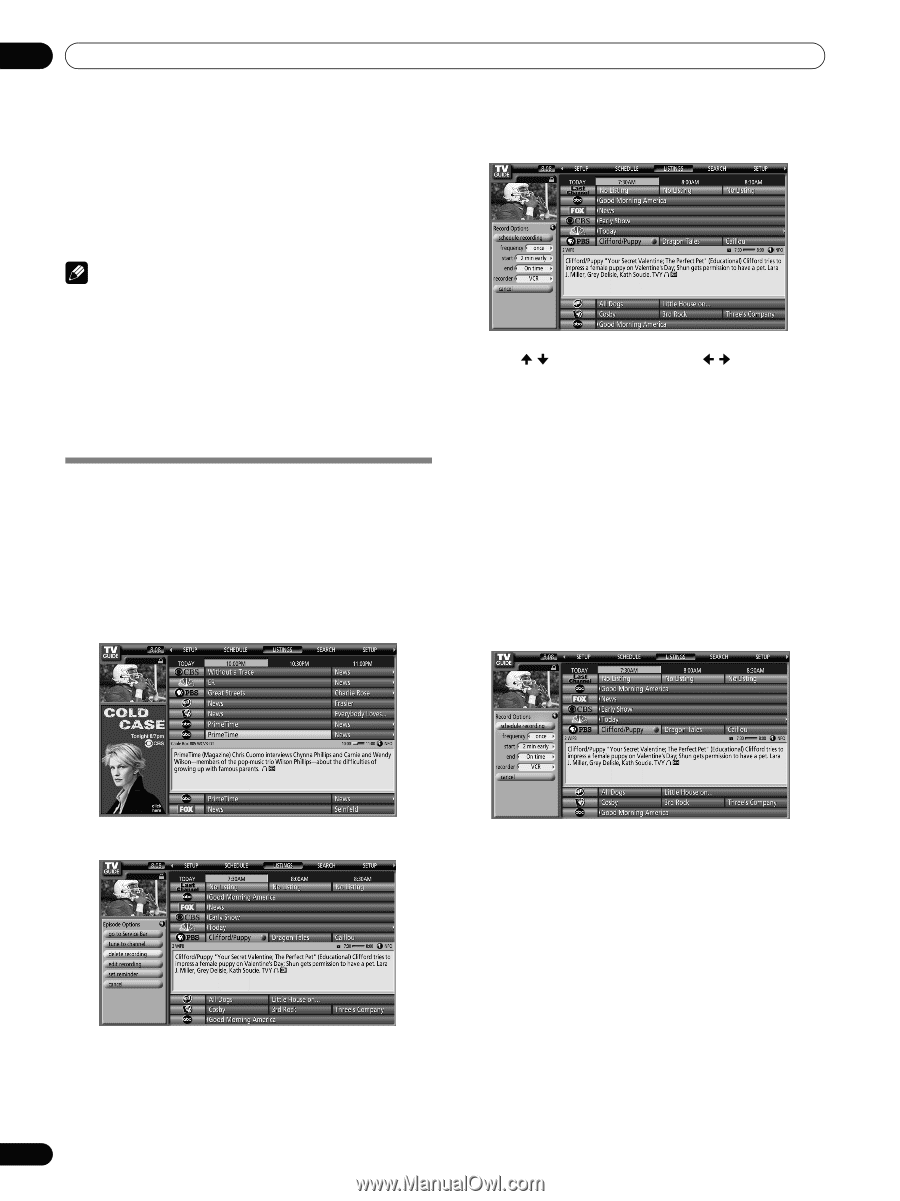
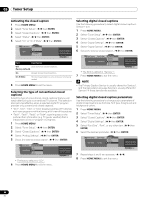
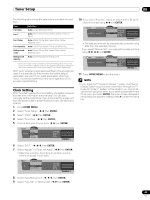
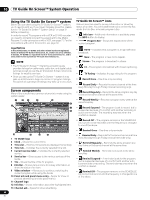
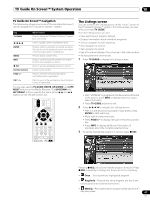
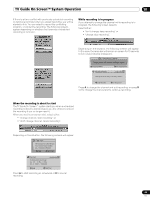
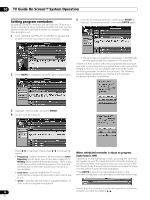
10 TV Guide On Screen™ System Operation • No record icon - Don't set a recording. 1 The program will still be recorded if it starts any time up to the midway point of the originally scheduled program. For example, up to 9:15 for a 9:00 to 9:30 program. Note that setting a program to record in this way will result in a recording using all the default options. If you want to set a recording using settings other than the default, use the panel menu, as described next. NOTE • When TV Guide On Screen™ is not being displayed, you can record a program simply by pressing the REC button on the remote. Press the REC button to record the program once. Recording begins immediately. If the program is listed in the TV Guide On Screen™, recording ends at the end of the program. If the program is not listed in the TV Guide On Screen™, recording continues for 30 minutes. • When TV Guide On Screen™ is not displayed, pressing the REC button more than once does nothing. Recording programs The simplest way to record a program is to highlight the program you want to record and press REC (as described above), but if you want to set the recording options to anything other than the default, the place to do it is the Recording Options panel menu. Here you can adjust the start and end times, the destination of the recording, the recording quality and so on. 1 From LISTINGS, SCHEDULE, or SEARCH, highlight the program you want to record. 3 Highlight "set recording" and press ENTER. 4 Set the recording options: Press / to highlight a field; press / to change the setting. • frequency - select whether the program will be recorded just Once, Regularly (at the same time on the same channel), or Weekly (every week at the same time/day). There's also an Off option which puts the program in the recording schedule but doesn't record it (you can set it to record later). • start - set the start time of the recording to On time, or up to 120 minutes before or after the scheduled time. • end - set the end time of the recording to On time, or up to 120 minutes before or after the scheduled time. • recorder - select a recorder to be used for recording. • quality - set the recording mode (for i.LINK connectable devices only). 5 Once all the settings have been made, press ENTER to highlight "schedule recording", then press ENTER again. 2 Press MENU to display the Episode Options panel menu. • The recording is now set (and will appear in SCHEDULE) and the appropriate icon appears on the show tile. • If you want to cancel the recording, highlight cancel and press ENTER. 48 En
-
 1
1 -
2
-
3
-
4
-
5
-
6
-
7
-
8
-
9
-
10
-
11
-
12
-
13
-
14
-
15
-
16
-
17
-
18
-
19
-
20
-
21
-
22
-
23
-
24
-
25
-
26
-
27
-
28
-
29
-
30
-
31
-
32
-
33
-
34
-
35
-
36
-
37
-
38
-
39
-
40
-
41
-
42
-
 43
43 -
 44
44 -
 45
45 -
 46
46 -
 47
47 -
 48
48 -
 49
49 -
 50
50 -
 51
51 -
 52
52 -
 53
53 -
54
-
55
-
56
-
57
-
58
-
59
-
60
-
61
-
62
-
63
-
64
-
65
-
66
-
67
-
68
-
69
-
70
-
71
-
72
-
73
-
74
-
75
-
76
-
77
-
78
-
79
-
80
-
81
-
82
-
83
-
84
-
85
-
86
-
87
-
88
-
89
-
90
-
91
-
92
-
93
-
94
-
95
-
96
-
97
-
98
-
99
-
100
 |
 |