Pioneer PRO-1130HD Owner's Manual - Page 75
Watching an image from a personal, computer
 |
View all Pioneer PRO-1130HD manuals
Add to My Manuals
Save this manual to your list of manuals |
Page 75 highlights
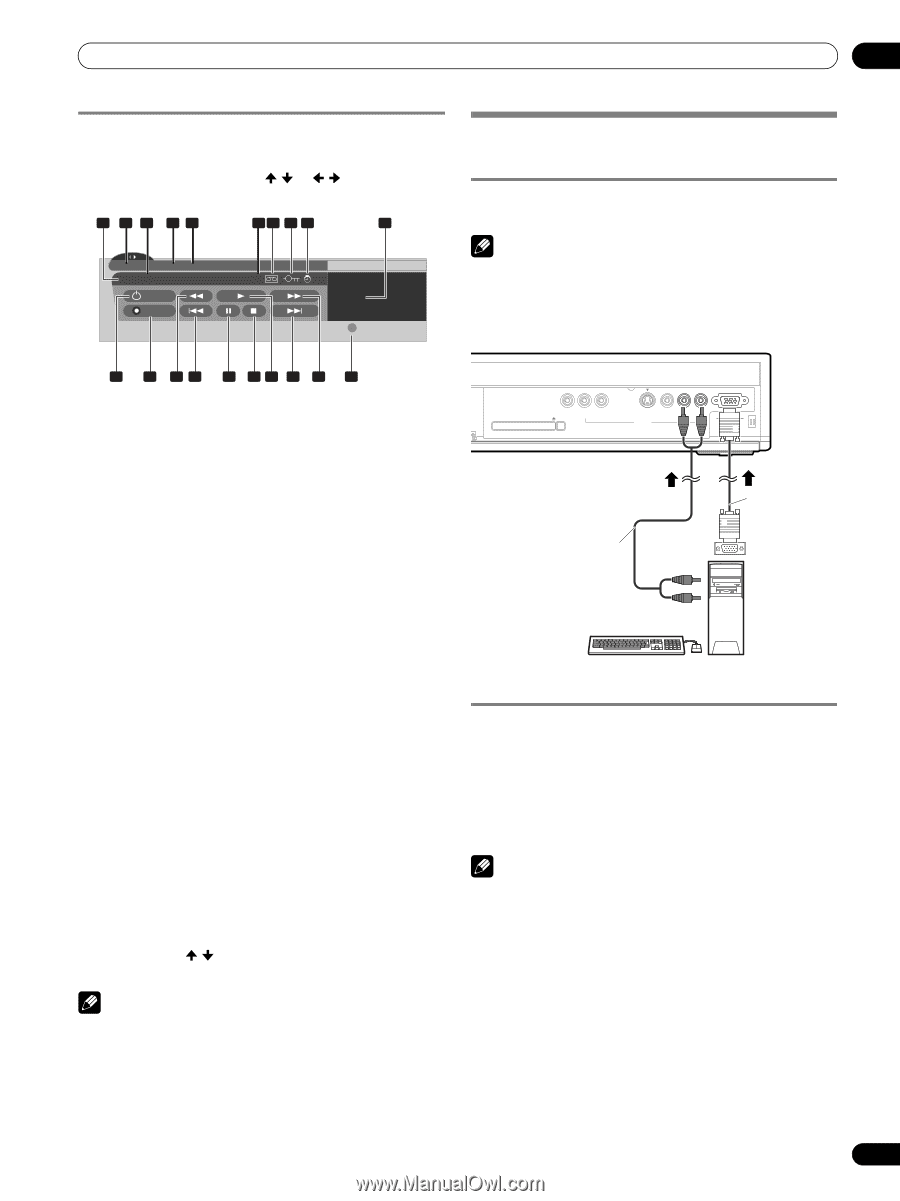
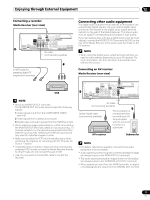
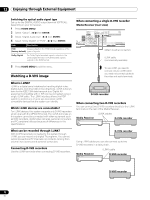
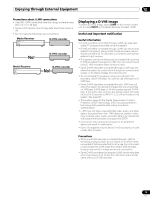
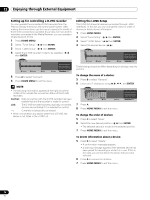
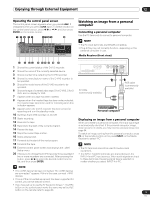
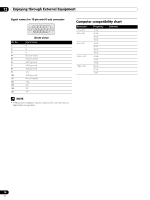
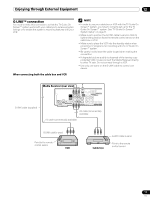
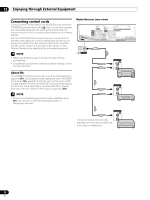
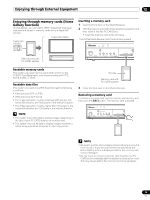
Enjoying through External Equipment 12 Operating the control panel screen The control panel screen appears when you press i.LINK. It disappears when you press i.LINK again. To select a button on the control panel screen, press / or / , and then press ENTER on the remote control. 1 2 3 45 67 8 9 20 D-VHS4 XXXXXXX XXX No1394 00:00:00 D ON/OFF REC Device List • D-VHS4 A i.LINK Setup Watching an image from a personal computer Connecting a personal computer Use the PC terminals to connect a personal computer. NOTE • The PC input terminals are DDC2B-compatible. • Plug & Play may not correctly function, depending on the personal computer in use. Media Receiver (front view) 10 11 12 13 14 15 16 17 18 19 1 Shows the current status of the D-VHS recorder. 2 Shows the name of the currently selected device. 3 Shows counter time output by the D-VHS recorder. 4 Shows the manufacturer name of the D-VHS recorder to be operated. 5 Shows the model name of the D-VHS recorder to be operated. 6 Shows the type of inserted video tape; D for D-VHS, S for S- VHS, and no display for VHS. 7 Appears when any tape has been inserted. 8 Appears when the inserted tape has been write protected. The inserted tape cannot be used for recording when this indicator appears. 9 Appears when the D-VHS recorder has been preset for recording and is in the standby mode. 10 Switches the D-VHS recorder on and off. 11 Starts recording. 12 Rewinds the tape. 13 Rewinds to the start of the current program. 14 Pauses the tape. 15 Stops the current tape motion. 16 Starts playing back. 17 Forwards to the start of the next program. 18 Forwards the tape. 19 Exits the control panel screen and displays the i.LINK Setup menu. 20 Allows you to change the D-VHS recorder to be operated if two or more recorders are connected. After pressing this button, press / to select the desired model from the list, and then press ENTER. HOME GALLERY PC CARD SLOT Y CB / PB CR / PR COMPONENT VIDEO EJECT S-VIDEO VIDEO INPUT 4 L AUDIO R PC ANALOG RGB PC AV cable (commercially available) RGB cable (commercially available) Personal computer Displaying an image from a personal computer When connected to a personal computer, the input signal type is automatically identified. If the personal computer image does not come in clearly, you may need to use Auto Setup. See page 64. To watch an image coming from the personal computer, press PC on the remote control unit or press INPUT on the Media Receiver to select "PC". NOTE • The PC terminals cannot be used for audio-visual equipment. • The INPUT 4 AUDIO terminals are shared between the INPUT 4 and PC input sources. When audio signals are input to these terminals, the same signal type is selected no matter whether you select INPUT 4 or PC. NOTE • If no i.LINK device has been connected, "No i.LINK devices are connected." appears. If this is the case, connect i.LINK devices. • If none of the connected equipment has been supported for control, you cannot execute control. • If you have set up to use the TV Guide On Screen™, the REC button on the control panel works the same way as the REC button on the remote (refer to page 48). 75 En
-
 1
1 -
2
-
3
-
4
-
5
-
6
-
7
-
8
-
9
-
10
-
11
-
12
-
13
-
14
-
15
-
16
-
17
-
18
-
19
-
20
-
21
-
22
-
23
-
24
-
25
-
26
-
27
-
28
-
29
-
30
-
31
-
32
-
33
-
34
-
35
-
36
-
37
-
38
-
39
-
40
-
41
-
42
-
43
-
44
-
45
-
46
-
47
-
48
-
49
-
50
-
51
-
52
-
53
-
54
-
55
-
56
-
57
-
58
-
59
-
60
-
61
-
62
-
63
-
64
-
65
-
66
-
67
-
68
-
69
-
 70
70 -
 71
71 -
 72
72 -
 73
73 -
 74
74 -
 75
75 -
 76
76 -
 77
77 -
 78
78 -
 79
79 -
 80
80 -
81
-
82
-
83
-
84
-
85
-
86
-
87
-
88
-
89
-
90
-
91
-
92
-
93
-
94
-
95
-
96
-
97
-
98
-
99
-
100
 |
 |