Ricoh CL3000e Manual
Ricoh CL3000e - Aficio Color Laser Printer Manual
 |
UPC - 026649201172
View all Ricoh CL3000e manuals
Add to My Manuals
Save this manual to your list of manuals |
Ricoh CL3000e manual content summary:
- Ricoh CL3000e | Manual - Page 1
MANUALS FOR THIS PRINTER : Paper : CD-ROM : Manuals for Administrator : Manuals for Client MANUALS PROVIDED Printed Manuals MANUALS FOR THIS PRINTER (this sheet) Quick Installation Guide Option Setup Guide Maintenance Guide Manuals on CD-ROM (Labeled "Operating Instructions") Manuals for this - Ricoh CL3000e | Manual - Page 2
Guide (This manual) Maintenance Guide Option Setup Guide CD-ROM "Printer Drivers and Utilities" CD-ROM "Operating Instructions" CD-ROM "DeskTopBinder V2 Lite" Power Cable Toner Cartridge (Black) Toner Cartridge (Yellow) Toner Cartridge (Cyan) Toner Cartridge (Magenta) Photo Conductor Unit (Black - Ricoh CL3000e | Manual - Page 3
toner color and location are correct, and then insert the toner cartridge vertically and slowly. You can check the location for each toner cartridge by reading the labels on the printer Ì The front and side guides should be set exactly to Menu: Language Press the {On Line} key. "Ready" appears on - Ricoh CL3000e | Manual - Page 4
error messages, see "Troubleshooting" in the Maintenance Guide. Press the {On Line} key. "Ready" appears on the panel display. Ready Turn off the printer's power switch. ADJUSTING THE IMAGE DENSITY To use the printer color you want to adjust, and then press the {Enter #} key. Image Density Black - Ricoh CL3000e | Manual - Page 5
subnet mask is the mask value to use a part of the IP address as a network address. Line} key. "Ready" appears on the panel display. Ready INSTALLING THE PRINTER DRIVER You can install the printer drivers and software easily from the CD-ROM labeled "Printer Drivers and Utilities". The supported - Ricoh CL3000e | Manual - Page 6
Operating Instructions Maintenance Guide Getting Started Paper and Other Media Replacing Consumables and Maintenance Kit Cleaning and Adjusting the Printer Troubleshooting Appendix For safety, please read this manual carefully before you use this product and keep it handy for future reference. - Ricoh CL3000e | Manual - Page 7
manual before using this machine. It contains important information related to USER SAFETY and PREVENTING EQUIPMENT PROBLEMS. Power Source 220-240V, 50/60 Hz, 4A or more Please be sure to connect the power cable to a power source as above. Operator Safety: This printer is considered a class 1 laser - Ricoh CL3000e | Manual - Page 8
24 3. Replacing Consumables and Maintenance Kit Toner Cartridge ...29 Waste Toner Bottle Type 125 32 Photo Conductor Unit Type 125 Black/Color 34 Fusing Unit Type 125 38 Intermediate Transfer Unit Type 125 42 4. Cleaning and Adjusting the Printer Cautions to Take When Cleaning 47 Adjusting - Ricoh CL3000e | Manual - Page 9
5. Troubleshooting Error & Status Messages on the Control Panel 53 Printer Does Not Print 62 Other Printing Problems 65 Removing Misfed Paper 69 When "Remove Misfeed A:Internal Path" Appears 69 When "Remove Misfeed B: Fusing Unit" Appears 70 When "Remove Misfeed Y: Paper Tray" Appears 72 When - Ricoh CL3000e | Manual - Page 10
NT are registered trademarks of Microsoft Corporation in the United States and/or other countries. IPS-PRINT Printer Language Emulation 4.0 Microsoft® Windows NT® Workstation 4.0 Notes: Some illustrations in this manual might be slightly different from the machine. Certain options might not be - Ricoh CL3000e | Manual - Page 11
Safety Information When using your printer, the following safety precautions should always be followed. Safety During Operation In this manual, the following important symbols are used: R WARNING: Indicates a potentially hazardous situation which, if instructions are not followed, could result in - Ricoh CL3000e | Manual - Page 12
avoid hazardous electric shock or laser radiation exposure, do not remove any covers or screws other than those specified in this manual. • Turn off the equipment needs service or repair. • Your equipment's cover has been damaged. • Do not incinerate spilled toner or used toner. Toner dust might - Ricoh CL3000e | Manual - Page 13
supply waste at household waste collection part with a "v" label (means hot surface) could result in a burn. • The fusing unit becomes very hot. When installing the new fusing unit, turn off the printer and wait about 30 minutes. After that, install the new fusing unit. Not waiting for the unit - Ricoh CL3000e | Manual - Page 14
R CAUTION: • When removing misfed paper, do not touch the fusing unit because it could be very hot. • To prevent an injury, this printer should be lifted by at least two people. • When moving the machine, each person should hold the handles that are located on opposite sides, and - Ricoh CL3000e | Manual - Page 15
panel. For more information about how to configure Energy Saver mode, see "Making Printer Settings with Control Panel" in the Administrator Reference on the CD-ROM labeled "Operating Instructions". ❖ Specifications Energy Saver mode Power Consumption Default Time Recovery Time 15 W or less 60 - Ricoh CL3000e | Manual - Page 16
How to Read This Manual Symbols In this manual, the following symbols are used: R WARNING: This symbol indicates a potentially hazardous situation which, if instructions are not followed, could result in death or serious injury. R CAUTION: This symbol indicates a potentially hazardous situation - Ricoh CL3000e | Manual - Page 17
8 - Ricoh CL3000e | Manual - Page 18
transfer belt with the single path method, we've achieved short paper path architecture equivalent to the single drum method. This printer is as compact as a monochrome printer but offers high performance output of 20 pages per minute (ppm) in black and white and 16 ppm in full color. The printer - Ricoh CL3000e | Manual - Page 19
replacing the fusing unit or transfer roller, installing the Duplex Unit, or removing misfed paper. 6. Bypass Tray Use to print onto thick paper, OHP transparencies, custom size paper, and envelopes as well as plain paper. When printing on custom size paper , printer driver settings are required - Ricoh CL3000e | Manual - Page 20
overheating. Do not block the ventilator as it may cause a printer malfunction due to overheating. 2. Right Cover Open this cover when replacing photo conductor units, the transfer belt or waste toner bottle. 3. Power Switch Use this switch to turn the power on and off. 4. Standard Tray Extension - Ricoh CL3000e | Manual - Page 21
overheating. Do not block the ventilator as it may cause a printer malfunction due to overheating. 2. Right Cover Open this cover when replacing photo conductor units, the transfer belt or waste toner bottle. 3. Power Switch Use this switch to turn the power on and off. 4. Standard Tray Extension - Ricoh CL3000e | Manual - Page 22
Color/Black When "Replace Color PCU" or "Replace Black PCU" appears on the panel display, replace the indicated Photo Conductor Unit. 6. Transfer Belt When "Replace Transfer Belt" appears on the panel display, replace this unit. 7. Waste Toner Bottle Collects waste toner. When "Replace Waste Toner - Ricoh CL3000e | Manual - Page 23
the current status of the printer and error messages. 2. {Job Reset} Key When the printer is online, press this key to cancel any ongoing print job. 3. {On Line} Key Indicates whether the printer is online or offline. scrolling, and increase or decrease values on the panel display in units of 10. - Ricoh CL3000e | Manual - Page 24
Supported by This Printer Paper Sizes This section describes the paper size, feed direction, and the maximum amount of paper that can be loaded into each paper tray in this printer . Note ❒ The following symbols and terminology are used to represent the feed direction. In this manual Unit - Ricoh CL3000e | Manual - Page 25
supported and the printer selects the paper size automatically. • Means that the size is supported. See p.24 "Loading Paper in the Bypass Tray". • Means that the size is supported not supported. ❖ Input Paper Sizes (Inch version) Feed direction Size (inch) Bypass Tray Tray 1 Paper Feed Unit (Tray - Ricoh CL3000e | Manual - Page 26
Paper and Other Media Supported by This Printer Feed direction Size (inch) Bypass Tray Tray 1 Paper Feed Unit (Tray 2/3) Folio K 81/4 × 13 Foolscap F4 K 81/2 × 13 2 F/GL K 8 × 13 Com#10 Env C5 Env K 4 1/8 × 9 1/2 K 6.38 × 9.02 C6 Env K 4.49 × 6.38 DL Env K 4.33 × 8.66 - Ricoh CL3000e | Manual - Page 27
Important 2 ❒ Do not use paper that is meant for an ink-jet printer, or it may stick to the fusing unit and cause a paper misfeed. ❒ Set the paper as described below • Tray 1: Print side facing up • Paper Feed Unit: Print side facing up • Bypass Tray: Print side facing down ❒ Print quality - Ricoh CL3000e | Manual - Page 28
panel or the printer driver. Only the Bypass Tray supports this function. ❖ printer driver. Tray 1 or Paper Feed Unit cannot be used. ❖ OHP transparencies When printing on an OHP transparency that has a print side, be sure to print on the print side. Otherwise, it may stick to the fusing unit - Ricoh CL3000e | Manual - Page 29
one or select "Slip sheet" in the printer driver. For more information about using "Slip sheet", see the printer driver's Help. • Confirm that the top of Envelopes made of paper that is not supported by this printer (See p.20 "Paper not supported by this printer") • We recommend setting the margins - Ricoh CL3000e | Manual - Page 30
Paper and Other Media Supported by This Printer • Damp paper • Paper that is dry enough to base paper is exposed • Paper with clips or staples Print Area The following shows the print area for this printer. Be sure to set the print margins correctly by the application. A : Print area B : Feed - Ricoh CL3000e | Manual - Page 31
guides to the pa- per size you want to load. you do, the tray might fall and 2 cause an injury. Loading Paper in Tray 1/Optional Paper Feed Unit A Pull the paper tray out of the printer than the limit mark inside the tray. ❒ The side guides should be set exactly to the paper size to avoid paper - Ricoh CL3000e | Manual - Page 32
paper tray D Adjust the side guides to the pa- per size you want to load. A Pull the paper tray out of the printer until it stops. After that, paper tray completely into the printer. Specifying a paper type By selecting the paper type you want to load, the printer can perform printing better. - Ricoh CL3000e | Manual - Page 33
dis- play "Paper Input", and then press the {Enter #} key. ❒ Paper sizes supported by the Bypass Tray can be 90 - 216 mm (3.5 8.5 inches) in width, and press the {Enter #} key. ❒ The paper size selected with the printer driver overrides the one selected with the control panel. You do not have - Ricoh CL3000e | Manual - Page 34
to the pa- per width. 2 B Extend the Bypass Tray. ZHBY070E ZHBY080E C Slide the side guides outwardA , and then load paper until it stops with the print side down B. ZHBY090E ZHBY100E Important ❒ Confirm that the top of the stack is not - Ricoh CL3000e | Manual - Page 35
{Enter #} key. paper. Bypass Size: Note Custom Size ❒ The printer cannot print from applications that do not support custom paper size. E Press the {U} or {T} key to set the vertical value, and then press the ❒ Set the vertical value for A, and set {Enter #} key. the horizontal value for - Ricoh CL3000e | Manual - Page 36
selecting the paper type you want to load, the printer can perform printing better. Paper Input: Paper Type You Paper, Recycled Paper, Special Paper, Color Paper, Letterhead, play "Bypass Tray key. Bypass Tray: Thick Paper F Press the {On Line} key. "Ready" appears on the panel display. "Menu" - Ricoh CL3000e | Manual - Page 37
Paper and Other Media 2 28 - Ricoh CL3000e | Manual - Page 38
XXX. ❒ If cyan, magenta or yellow toner runs out, you can print in black and white using the black toner. Change the color mode setting to "Black and White" with the printer driver. ❒ If black toner runs out, printing is not possible until the black toner cartridge is replaced. A Open the upper left - Ricoh CL3000e | Manual - Page 39
cartridge from the package. D Shake the toner cartridge back and forth about 10 times. ZHBH470E E Check that the toner color and lo- cation are correct, and then insert the toner cartridge vertically and slowly. ZHBH480E ZHBH460E In the illustration, black cartridge is used as an example. 30 - Ricoh CL3000e | Manual - Page 40
in the same way. ZHBH490E Important ❒ Do not repeatedly install and re- move the toner cartridges. This could result in a toner leak. G Close the upper left cover of the printer. ZHBH500E Note ❒ If the toner cartridge is not in- stalled properly, you cannot close the upper left cover of the - Ricoh CL3000e | Manual - Page 41
the right cover when it is open. Important ❒ Do not lock the waste toner bottle that has been removed. Toner may spill. Replace the waste toner bottle when the following message appears on the panel display. Replace Waste Toner A Turn off the power. B Open the right cover. ZHBH640E E Remove the - Ricoh CL3000e | Manual - Page 42
in the position as shown in the illustration. ZHBH660E G Lock the waste toner bottle. Waste Toner Bottle Type 125 3 ZHBH670E Important ❒ Be sure to lock the waste toner bottle to prevent toner from leaking inside the printer. H Close the right cover slowly. I Turn on the power. ZHBH430E 33 - Ricoh CL3000e | Manual - Page 43
Unit Type 125 Color • Keep toner (used or unused) and the toner cartridge out of reach of children. • Do not put an object on the right cover when it is open. Replace the black or color photo conductor unit when the following message appears on the panel display. ZHBH690E Replace Black PCU - Ricoh CL3000e | Manual - Page 44
up. 3 ZHBH330E Photo Conductor Unit Type 125 Color A Pinch the green lever to unlock the unit. ZHBH310E E Remove the photo conductor unit. Photo Conductor Unit Type 125 Black A Pinch the green lever to unlock the unit. ZHBH340E B Pull out the photo conductor unit slowly until it stops. ZHBH320E - Ricoh CL3000e | Manual - Page 45
slowly. ❖ Photo Conductor Unit Type 125 Black F Take out the new photo conduc- tor unit. G Peel off the tape, which is around Photo Conductor Unit by peeling it downward, and remove the cov- er on top of the Unit. ZHBH370E ❖ Photo Conductor Unit Type 125 Color ZHBH681E 36 ZHBHA680E ZHBH380E - Ricoh CL3000e | Manual - Page 46
cover and into the machine until it stops. ❖ Photo Conductor Unit Type 125 Black J Lower the inner cover slowly. ZHBH410E 3 K Push the green lever to fasten the inner cover. ZHBH390E ❖ Photo Conductor Unit Type 125 Color ZHBH420E L Close the right cover slowly. ZHBH400E Important ❒ If you - Ricoh CL3000e | Manual - Page 47
could result in a burn. ❖ Fusing Unit 3 • The fusing unit becomes very hot. When installing the new fus- ing unit, turn off the printer and wait about 30 minutes. After that, ZHBH200E install the new fusing unit. Not waiting for the unit to cool down ❖ Transfer Roller can result in a burn - Ricoh CL3000e | Manual - Page 48
slowly. ZHBH230E 3 ZHBP281E C Pinch the connector lever, and then pull out the connector. F Take out the new fusing unit from the box. G Place the unit as shown, and then insert the new fusing unit slowly. ZHBH210E D Push the green release buttons on the left and right outwards to unlock the - Ricoh CL3000e | Manual - Page 49
part as shown, and then insert the transfer roller into the printer. 3 ZHBH260E J Turn the green part in the direc- tion of the arrow, and then re- move the transfer K Take out the new transfer roller. Important ❒ Do not touch the roller part. When "Replace Fusing Unit" Appears on the Panel - Ricoh CL3000e | Manual - Page 50
or {T} key to display "Fusing Unit", and then press the {Enter #} key. Maint. Reset Fusing Unit The following message appears. Fusing Unit: Press # to Reset E Press the {Enter #} key. Wait for a few seconds. F Press the {On Line} key. "Ready" appears on the panel display. Fusing Unit Type 125 3 41 - Ricoh CL3000e | Manual - Page 51
fol- lowing message appears on the panel display. Replace Transfer Belt soon or Replace Transfer Belt Check the contents of the box for the following items: ❖ Transfer Belt ZHBH290E C Remove the Waste Toner Bottle. Reference See p.32 "Waste Toner Bottle Type 125". D Pull out the green levers on - Ricoh CL3000e | Manual - Page 52
toner bottle. H Turn the green screws on the left and right in the direction of the arrows to loosen them. ZHBH630E Important ❒ Do not lock the waste toner bot- tle that has been removed. Toner may spill. ZHBH520E The screws are not removed. I Pinch the both screws and remove the transfer belt - Ricoh CL3000e | Manual - Page 53
direction of the arrows to tighten them. ❒ Do not touch the belt part. K Take out the new transfer belt. L Holding the transfer belt as shown, insert the transfer belt in the printer. ZHBH580E O Place the waste toner bottle in the position as shown in the illustration. ZHBH560E ZHBH660E 44 - Ricoh CL3000e | Manual - Page 54
Transfer Unit Type 125 S Close the right cover. ZHBH670E ZHBH430E 3 Important ❒ Be sure to lock the waste toner bottle to prevent toner from leaking inside the printer. Q Lower the inner cover slowly. T Turn on the power. U Make the setting from the control panel. When "Replace Transfer Belt - Ricoh CL3000e | Manual - Page 55
Press the {U} or {T} key to display "Transfer Belt", and then press the {Enter #} key. 3 Maint. Reset: Transfer Belt The following message appears. Transfer Belt: Press # to Reset E Press the {Enter #} key. Wait for a few seconds. F Press the {On Line} key. "Ready" appears on the panel display - Ricoh CL3000e | Manual - Page 56
shock, explosion or loss of sight. If the machine has laser systems, there is a risk of serious eye damage. R CAUTION: • When removing misfed paper, do not touch the fusing unit because it could be very hot. Clean the printer periodically to maintain fine printing. Dry wipe the exterior with - Ricoh CL3000e | Manual - Page 57
Color Registration When the printer is moved, when the Fusing Unit is replaced, or after printing repeatedly for some time, registration shifting might occur. By performing color registration adjustment, you can maintain optimum print results. C Press the {U} or {T} key to dis- play "Color Regist - Ricoh CL3000e | Manual - Page 58
should be made from the application or the printer driver whenever possible. C Press the {U} or 4 ting might cause a deterioration of color balance. We recommend that D Press the the {Enter #} key. Menu: Maintenance E Compare the colors on the printed image density test sheet with those on - Ricoh CL3000e | Manual - Page 59
Adjusting the Printer ❒ If the {U} or {T} key to select the color you want to adjust, and then press the {Enter #} key. 4 Image Density: Black G Press the {U} or {T} key to set one. To adjust another color, repeat the steps F and G. H Press the {On Line} key. "Ready" appears on the panel - Ricoh CL3000e | Manual - Page 60
Feed Unit). The vertical adjustment is used for all trays. Normally, you need not update the registration. But when the optional Paper Feed Unit or press the {Enter #} key. The test sheet is printed, and then the printer returns to the previous menu. E Confirm the position of the image on the test - Ricoh CL3000e | Manual - Page 61
Cleaning and Adjusting the Printer A Press the {Escape} key. A : Print Area B Press the {U} or {T} key to Enter #} key. F Print the test sheet to check the settings you have made. G Press the {On Line} key. 4 Adjustment: Horiz.: Tray 2 "Ready" appears on the panel display. D Press the {U} or - Ricoh CL3000e | Manual - Page 62
messages Add Toner: XXX Description The printer is out of the indicated toner(s). XXX: Yellow/Magenta/Cyan/Black Solution Replace with a new toner cartridge of the indicated color(s). Even when yellow, magenta or cyan toner runs out, you can print in black and white using the black toner. See p.29 - Ricoh CL3000e | Manual - Page 63
printer is open. of the printer. Close Upper Left Cover The upper left cover of the printer is open. Close the upper left cover of the printer. Color Regist Error Color or service repre- sentative. Hardware Problem Black PCU An error has occurred in the black PCU (Photo Conductor Unit). - Ricoh CL3000e | Manual - Page 64
your sales or service representative. Hardware Problem Color PCU An error has occurred in the color PCU (Photo Conductor Unit). Turn the power switch off and on. If the message appears again, contact your sales or service representative. Hardware Problem DIMM The printer detected a DIMM Turn - Ricoh CL3000e | Manual - Page 65
Troubleshooting Messages/Second messages Description Solution Hardware Problem Option RAM There is a problem with the optional Memory Unit. Remove and reinstall the optional Memory Unit. If the message appears again, contact your sales or service representative. See the Option Setup Guide. - Ricoh CL3000e | Manual - Page 66
a new black PCU. See p.29 "Replacing Consumables and Maintenance Kit". Replace Color PCU It is time to replace the color PCU (Photo Conductor Unit). Replace the color PCU (Photo Conductor Unit) with a new color PCU. See p.29 "Replacing Consumables and Maintenance Kit". Replace Fusing Unit It is - Ricoh CL3000e | Manual - Page 67
the waste toner bottle with a new waste toner bottle. See p.29 "Replacing Consumables and Maintenance Kit". Reset PCU Correctly The black or color PCU is not set correctly or is not set. Set the black or color PCU correctly. See p.29 "Replacing Consumables and Maintenance Kit". Reset Fusing Unit - Ricoh CL3000e | Manual - Page 68
Error & Status Messages on the Control Panel Messages/Second messages Toner is Almost Empty: Magenta Toner is Almost Empty: Yellow Description The magenta toner is almost empty. The yellow toner is almost empty. Solution Prepare a new magenta toner cartridge. Prepare a new yellow toner cartridge. - Ricoh CL3000e | Manual - Page 69
Troubleshooting ❖ Print Error Messages ("Error Log" in Configuration Page) Messages/Second messages Description Solution Collate Cancelled The collate feature has been cancelled. Install the optional Printer Hard Disk or increase the memory capacity to 128MB or more. Driver Setting Error ( - Ricoh CL3000e | Manual - Page 70
the image correctly, add memory to the printer, or 5 reduce the resolution of the image. RPCS Syntax Error Bidirectional transmission Confirm that the option set- may not be working properly tings for the printer driver or the RPCS printer driver set- match the options actually in- tings - Ricoh CL3000e | Manual - Page 71
Troubleshooting Printer Does Not Print Possible Cause Solutions Is the power on? Confirm that the cable is securely plugged into the power outlet and the printer. Turn on the power. Does the On Line indicator If not, press {On Line} to light it. stay on? Does the Error indicator stay red? If - Ricoh CL3000e | Manual - Page 72
port] box to confirm that the correct port is selected. • Windows 2000 A Click [Start], point to [Settings] and then click [Printers]. B Click to select the icon of the printer. Next, on the [File] menu, click [Properties]. C Click the [Port] tab. D Check the [Print to the following port] box - Ricoh CL3000e | Manual - Page 73
If the error occurs even after executing above operation, go to the following steps. D Unplug the IEEE 1394 interface cable which is connected to the printer. E Execute the utility tool for 1394 Interface Unit Type 4510 which is stored in the following path in the CD-ROM labeled "Printer Drivers and - Ricoh CL3000e | Manual - Page 74
specified. If a specific color is missing, turn the power switch off and on. If this does not solve the problem, contact your sales or service representative. Color changes extremely when Do not extreme settings for the color balance under the [Print adjusted with the printer driver. Quality] tab - Ricoh CL3000e | Manual - Page 75
Troubleshooting Status Possible Causes, Descriptions, and Solutions It takes too much time to complete the print job. Photographs and other data intensive pages take a long time for the printer to process, so simply wait when printing such data. Changing the settings with printer driver may help - Ricoh CL3000e | Manual - Page 76
Media". The fusing unit is deteriorated or damaged. Replace them. See p.29 "Replacing Consumables and Maintenance Kit". Solid areas, lines or text are shiny or glossy when created as a mixture of cyan, magenta, yellow. Select "K(black)" for [Gray Reproduction] in the printer driver's dialog box - Ricoh CL3000e | Manual - Page 77
True Type fonts with printer fonts in the printing process. To print an image similar to the image on the computer, make the settings to print out True Type fonts as an image. See the printer driver's Help. Note ❒ If the problem cannot be solved, contact your sales or service representative. 68 - Ricoh CL3000e | Manual - Page 78
. This might cause a misfeed and damage the printer. 5 ZHBH120E When "Remove Misfeed A:Internal Path" Appears R CAUTION: • The inside of the machine be- comes very hot. Do not touch the parts with a "v" label (means hot surface). Touching a part with a "v" label (means hot surface) could result - Ricoh CL3000e | Manual - Page 79
Troubleshooting D Remove the misfed paper. E Close the cover. ZHBH080E When "Remove Misfeed B: Fusing Unit" Appears R CAUTION: • The inside of the machine be- comes very hot. Do not touch the parts with a "v" label (means hot surface). Touching a part with a "v" label (means hot surface) could - Ricoh CL3000e | Manual - Page 80
remove the paper easily, do not forcefully pull it, but go to the next step. G Return levers "B1" on the left and right. D Pull part "B2" toward the front, and then open the guide board. 5 E Remove the misfed paper. ZHBH130E ZHBH930E H Close the front cover slowly. ZHBH140E ZHBP282E 71 - Ricoh CL3000e | Manual - Page 81
Troubleshooting When "Remove Misfeed Y: Paper Tray" Appears A Pull out the tray. C Slide the paper tray completely into the printer. ZHBH160E Important ZHBH940E ❒ Be sure to insert the paper tray can apply this procedure for both the paper tray and the optional Paper Feed Unit. 72 ZHBH770E - Ricoh CL3000e | Manual - Page 82
Removing Misfed Paper When "Remove Misfeed Z: Duplex Unit" Appears R CAUTION: • The inside of the machine be- comes very hot. Do not touch the parts with a "v" label (means hot surface). Touching a part with a "v" label (means hot surface) could result in a burn. A Open the front cover by pushing - Ricoh CL3000e | Manual - Page 83
Troubleshooting 5 74 - Ricoh CL3000e | Manual - Page 84
the cord and causing a fire or an electric shock. • When moving the printer after use, do not take out any of the Toners, Photo Conductor Units, nor the Waste Toner Bottle to prevent toner spill inside the machine. Repack the printer in its original packing materials for transporting. Note ❒ The - Ricoh CL3000e | Manual - Page 85
reinstall them. Note ❒ See the Option Setup Guide for installing options. Important ❒ Be sure to move the printer horizontally. To prevent toner from scattering, move the printer slowly. ❒ If the optional Paper Feed Unit is installed, remove it from the printer, and then move them separately. 76 - Ricoh CL3000e | Manual - Page 86
, 13 E Energy Star, 6 Enter # Key, 14 Envelopes, 20 Error, 53 Error Indicator, 14 Error indicator, 62 Escape Key, 14 Ethernet Port, 12 F Form Feed Key, 14 Front Cover, 10 Fusing Unit, 13, 38 G Glossy Paper, 19 Guide to the Printer Control Panel, 14 Exterior -Front View, 10 Exterior -Rear View, 11 - Ricoh CL3000e | Manual - Page 87
Standard Tray Extension, 11, 12 Storing Paper, 18 T Thick Paper, 19 Toner Cartridge, 13, 29 Transfer Belt, 13 Transfer Roller, 13 Transfer Unit, 42 Tray 1, 10 Troubleshooting, 53 U Upper Left Cover, 10 USB Port, 11, 12 V Ventilator, 10, 11, 12 W Warning, 2 Waste Toner Bottle, 13, 32 78 EE GB G081 - Ricoh CL3000e | Manual - Page 88
Low Voltage Directive 73/23/EEC." Notice to Users in EEA Countries 802.11b Interface Unit TypeA(R-WL11): This product complies with the The CE Declaration of Conformity is available on the Internet at URL: http://www.ricoh.co.jp/fax/ce_doc/. In accordance with IEC 60417, this machine uses the - Ricoh CL3000e | Manual - Page 89
-3111 Operating Instructions Maintenance Guide Overseas Affiliates U.S.A. RICOH CORPORATION 5 Dedrick Place West Caldwell, New Jersey 07006 Phone: +1-973-882-2000 The Netherlands RICOH EUROPE B.V. Groenelaan 3, 1186 AA, Amstelveen Phone: +31-(0)20-5474111 United Kingdom RICOH UK LTD. Ricoh House - Ricoh CL3000e | Manual - Page 90
Duplex Printing...14 Color Mode ...16 Paper Selection ...17 Paper Size ...18 Media Type ...19 Paper source...20 Resolution ...20 Gradation ...21 Color Profile ...22 Color Setting ...24 Dithering ...26 Gray Reproduction...27 Black Over Print ...28 Toner Saving...29 Color Control ...29 User Code ...30 - Ricoh CL3000e | Manual - Page 91
Utility for Mac Installing Printer Utility for Mac ...33 Starting Printer Utility for Mac ...34 Printer Utility for Mac Functions ...35 Downloading PS Fonts ...36 Displaying Printer's Fonts...38 Deleting Fonts...38 Initializing the Printer Disk ...39 Page Setup ...40 Printing Font Catalog...40 - Ricoh CL3000e | Manual - Page 92
follow the instructions in this manual. Please keep this manual in a handy place near the printer. Please read the Safety Information before using this printer. It contains important information related to USER SAFETY and PREVENTING EQUIPMENT PROBLEMS. Important Contents of this manual are subject - Ricoh CL3000e | Manual - Page 93
4 • The product names of Windows® 2000 are as follows: Microsoft® Windows® 2000 Advanced Server Microsoft® Windows® 2000 Server Microsoft® Windows® 2000 Professional • The product names of Windows NT® 4.0 are as follows: Microsoft® Windows NT® Server 4.0 • Microsoft® Windows NT® Workstation 4.0 - Ricoh CL3000e | Manual - Page 94
Setting up Options This documentation describes the specific printer functions and menus that are added by installing the PPD file. For more information about the functions and menus of the Windows 95/98/Me PostScript printer driver, see the printer driver's Help. Preparation On a Macintosh, Mac OS - Ricoh CL3000e | Manual - Page 95
❒ To use this function, the optional Hard Disk Drive must be installed on the printer. Note ❒ The "User ID" can consist of up to eight alphanumeric (a- z, A- Z, 0- 9) characters. ❒ Entering the "User ID" helps you to distinguish the print job from others. Reference For more information about - Ricoh CL3000e | Manual - Page 96
default, sample print jobs are automatically collated by the printer driver. If the collate option is selected in the application Printer Properties to set Sample Print. C Click to select the [Setup] tab. D Select [Sample Print] in [Job Type]. E Click [Details...]. F Enter the "User ID" in [User - Ricoh CL3000e | Manual - Page 97
ID]. This can consist of up to eight alphanumeric (a- z, A- Z, 0- 9) characters. Note ❒ Select this to identify the user associated with the job. F Click [OK] to close the Printer Properties. G Start printing from the application's print dialog box. The Sample Print job is sent to the machine and - Ricoh CL3000e | Manual - Page 98
ID]. This can consist of up to eight alphanumeric (a-z, A-Z, 0-9) characters. Note ❒ This is used to identify the user associated with a job. ❒ The "User ID" can consist of up to eight alphanumeric (a-z, A-Z, 0-9) characters. E After making all of the settings you want, click [Print]. The Sample - Ricoh CL3000e | Manual - Page 99
default, locked print jobs are automatically collated by the printer driver. If the collate option is selected in the application Printer Properties to set Locked Print. C Click to select the [Setup] tab. D Select [Locked Print] in [Job Type]. E Click [Details...]. F Enter the "User ID" in [User - Ricoh CL3000e | Manual - Page 100
alphanumeric (a-z, A-Z, 0-9) characters. Then enter a password in [Password], up to four digits. Note ❒ Use this to identify the user associated with the job. F Click [OK] to close the Printer Properties. G Start printing from the application's print dialog box. The Locked Print job is sent to the - Ricoh CL3000e | Manual - Page 101
select [Job Log] from the pop up menu. C Select [Locked Print] in [Job Type], and then select the appropriate setting. D Enter the "User ID" in [User ID]. This can consist of up to eight alphanumeric (a-z, A-Z, 0-9) characters. Then enter a password in [Password], up to four digits. Note ❒ This is - Ricoh CL3000e | Manual - Page 102
. Limitation ❒ To use this function, a Memory Unit of at least 128MB or Hard Disk Drive must be installed on the printer. ❒ If you use Windows 2000, Windows XP, Defaults dialog box. Mac OS [Collate:] on [Printer Specific Options] in the print dialog box. Mac OS X [Collate] on the [Feture 1] - Ricoh CL3000e | Manual - Page 103
14 Duplex Printing Use this function to select duplex printing. Limitation ❒ To use this function, the optional Duplex Unit must be installed on the printer. ❒ You cannot perform duplex printing from the Bypass Tray. The following table shows the tabs or menus where you can select this function. - Ricoh CL3000e | Manual - Page 104
15 ❖ Open to Top Prints output so that you can open it to the top. Windows 2000, Windows XP, Mac OS, Mac OS X Note ❒ If you use a Macintosh, click to select the button that means [Flip on Long Edge] or [Flip on Short Edge]. ❖ None Disables Duplex Printing. ❖ Flip on Short Edge Prints output so that - Ricoh CL3000e | Manual - Page 105
Defaults dialog box. Mac OS [Color Mode:] on [Printer Specific Options] in the print dialog box. Mac OS X [Color Mode] on the [Features 1] tab on [Printer Features] in the print dialog box. Note ❒ If you use Windows 95/98/Me, this mode is called "Color/Black and White". You can select the - Ricoh CL3000e | Manual - Page 106
and White Prints everything, including color documents, in black and white. Black and White printing is faster than Color printing. To stop black and white areas being printed with CMYK toner, select [Black and White] in the printer driver as well as in the application. Paper Selection Paper Sources - Ricoh CL3000e | Manual - Page 107
] tab in the Page Setup dialog box. Mac OS X [Paper Size:] in the Page Setup dialog box. Reference For more information about the paper sizes supported by this printer, see "Paper and Other Media Supported by This Printer" in the Maintenance Guide. - Ricoh CL3000e | Manual - Page 108
dialog box. Mac OS [Paper Type:] on [Printer Specific Options] in the print dialog box. Mac OS X [Paper Type] on the [Features 3] tab on [Printer Features] in the print dialog box. Reference For more information about the media type supported by this printer, see "Types of Paper and Other Media - Ricoh CL3000e | Manual - Page 109
] tab in the Printing Preferences dialog box. Windows NT 4.0 [Graphic] on [Document Options] on the [Advanced] tab in the Document Defaults dialog box. Mac OS [Printer Specific Options] in the print dialog box. Mac OS X [Resolution] on the [Features 1] tab on - Ricoh CL3000e | Manual - Page 110
Options] on the [Advanced] tab in the Document Defaults dialog box. Mac OS [Gradation:] on [Printer Specific Options] in the print dialog box. Mac OS X [Gradation] on the [Features 1] tab on [Printer Features] in the print dialog box. You can select the following items: ❖ Standard Prints with - Ricoh CL3000e | Manual - Page 111
on [Printer Specific Options] in the print dialog box. Mac OS X [Color Profile] on the [Features 2] tab on [Printer Features] in the print dialog box. You can select the following items: Important ❒ If you use Windows 95/98/Me, you can configure [Color Profile] in [Advanced] by selecting [Manual - Ricoh CL3000e | Manual - Page 112
materials and so on. If you use this CRD for printing photographs, the color or gradations might not be reproduced well. ❖ Solid Color Use this setting to print specific colors, logos and so on. ❖ User Setting Use this setting to print images with downloaded CRD from your application. Note - Ricoh CL3000e | Manual - Page 113
Setting:] on [Printer Specific Options] in the print dialog box. Mac OS X [Color Setting] on the [Features 2] tab on [Printer Features] in the print dialog box. Important ❒ If you use Windows 95/98/Me, you can configure [Color Setting] in [Advanced] by selecting [Manual] from the [Color] setting - Ricoh CL3000e | Manual - Page 114
Select this setting to perform color matching based on one of the printer's built- in color rendering dictionaries and perform CMYK conversion. This setting performs the printing which output target is Monitor γ = 1.8. ❖ Super Fine Select this setting to use a color rendering dictionary as in the - Ricoh CL3000e | Manual - Page 115
Dithering] on [Printer Specific Options] in the print dialog box. Mac OS X [Dithering] on the [Features 2] tab on [Printer Features] in the print dialog box. Important ❒ If you use Windows 95/98/Me, you can configure [Dithering] in [Advanced] by selecting [Manual] from [Color] setting. [Automatic - Ricoh CL3000e | Manual - Page 116
[Printer Specific Options] in the print dialog box. Mac OS X [Black Text/Graphics] on the [Features 2] tab on [Printer Features] in the print dialog box. Important ❒ If you use Windows 95/98/Me, you can configure [Gray Reproduction] in [Advanced] by selecting [Man- ual] from the [Color] setting - Ricoh CL3000e | Manual - Page 117
:] on [Printer Specific Options] in the print dialog box. Mac OS X [Black Over Print] on the [Features 2] tab on [Printer Features] in the print dialog box. Important ❒ If you use Windows 95/98/Me, you can configure [Black Over Print] in [Advanced] by selecting [Manual] from the [Color] setting. - Ricoh CL3000e | Manual - Page 118
] on the [Advanced] tab in the Document Defaults dialog box. Mac OS [Toner Saver:] on [Printer Specific Options] in the print dialog box. Mac OS X [Toner Saver] on the [Features 1] tab on [Printer Features] in the print dialog box. Color Control Use this to select whether or not you want the - Ricoh CL3000e | Manual - Page 119
, click this button to specify exactly how you want the colors on your screen adjusted before printing. User Code Use this to set a user code for print logging. Enter a user code using up to eight digits. A user code identifies a group of users and allows you to check the number of sheets printed - Ricoh CL3000e | Manual - Page 120
[Chooser] on the Apple Menu. Mac OS X This function is not available. ❖ Tray 2 • You can select the tray with the following menu for PAPER FEED UNIT Type 3000: Paper Source⇒ p.20 ❖ Tray 3 • You can select the other tray with the following menu for an additional PAPER FEED - Ricoh CL3000e | Manual - Page 121
Printing⇒ p.14 ❖ Hard Disk • You can use the following function with Printer Hard Disk Type 3000: Collate⇒ p.13 Note ❒ This function is for Windows 95/98/Me only. ❖ Total Memory • You can use the following function with Memory Unit Type C (64/128/256 MB): Collate⇒ p.13 Note ❒ The optional Memory - Ricoh CL3000e | Manual - Page 122
Mac is included on the CD-ROM labeled "Printer Drivers and Utilities". ❒ Printer Utility for Mac requires Mac OS 8.1 or later. (Mac OS X Classic environment is supported.) ❒ Printer Utility for Mac cannot use Mac OS X (native mode). Installing Printer Utility for Mac Follow these steps to install - Ricoh CL3000e | Manual - Page 123
Utility for Mac The following instructions describe how to start Printer Utility for Mac. Important ❒ Before starting Printer Utility for Mac, confirm that the printer is selected with [Chooser] on the Apple menu. A Double-click the Printer Utility for Mac icon. The Printer Utility for Mac dialog - Ricoh CL3000e | Manual - Page 124
's Fonts...] Display and delete the fonts in printer memory and the printer's hard disk drive. See p.38 "Displaying Printer's Fonts". • [Initialize Printer's Disk...] Initialize the printer's hard disk drive. See p.39 "Initializing the Printer Disk". • [Page Setup...] Set up the paper size to print - Ricoh CL3000e | Manual - Page 125
administrator. If you are not, be sure to consult your system administrator. ❒ If the printer restarts, all the printer settings return to their defaults. ❒ Confirm that a Macintosh and the printer are connected with Appletalk. Note ❒ Some fonts cannot be downloaded. ❒ Before downloading, read the - Ricoh CL3000e | Manual - Page 126
37 B Click [Add to list]. The dialog box to select fonts appears. C Click to select the desired font files, and then click [Open]. The list of selectable font names appears. D After adding all the fonts you want to download, click [OK]. The dialog box of selected fonts to download appears. E Click [ - Ricoh CL3000e | Manual - Page 127
's disk]. C Click [OK]. Deleting Fonts You can delete fonts from the printer's memory or hard disk drive. A Select [Display Printer's fonts] on the [File] menu. A dialog box appears. B Select [Printer's memory] or [Printer's disk]. C Select the fonts you want to delete. Limitation ❒ You cannot - Ricoh CL3000e | Manual - Page 128
which you want to delete the fonts. F Click [Continue], and then click [OK]. G Click [OK]. Initializing the Printer Disk When initializing the printer's hard disk, all the fonts downloaded to the printer's hard disk drive are deleted. Before initializing, be sure to check the fonts on the hard disk - Ricoh CL3000e | Manual - Page 129
Sample". A Select [Page Setup...] on the [File] menu. B Choose the paper size. Printing Font Catalog Print the names of fonts available on the printer. Note ❒ The paper selected under [Page Setup] is used. A Select [Print Fonts Catalogue] on the [File] menu. B Click [Print]. Printing Font Sample You - Ricoh CL3000e | Manual - Page 130
name in the [New Name:] field. Limitation ❒ You can enter up to 31 digits and letters. ❒ Do not use symbols, for example C Click [Rename]. The printer name is changed. D Press [OK]. E Select [Chooser] on the Apple menu. F Click the [AdobePS] icon. G Click to select the - Ricoh CL3000e | Manual - Page 131
The printer restarts. Note ❒ The fonts that you downloaded in the printer's memory will be deleted. ❒ If the printer restarts, all the printer defaults. Downloading PostScript Files You can download a Postscript file to the printer. A Select [Download PostScript File...] on the [Utility] menu. - Ricoh CL3000e | Manual - Page 132
belongs to and the available zone list appear. B Select the zone to which you want to switch the printer, and then click [Change]. A confirmation message appears. C Click [Continue]. A confirmation message appears. D Press [OK]. E Select [Chooser] on the Apple menu. F Click the [AdobePS] icon - Ricoh CL3000e | Manual - Page 133
C Click [OK]. Launching the Dialogue Console You can create and edit a PostScript file for printing, and then download it to the printer. Important ❒ "Launch Dialogue Console" is recommended for users with an understanding of PostScript. ❒ Do not download any file other than PostScript files to the - Ricoh CL3000e | Manual - Page 134
C After editing the PostScript file, select [Download Top Window] on [Console] menu to start print- ing. The PostScript file is sent to the printer. Note ❒ The [Reply from Printer] box opens, depending on the PostScript file you sent. D Select [Return To Main Menu] on the [Console] menu to close the - Ricoh CL3000e | Manual - Page 135
INDEX B Black Over Print, 28 C Collate, 13 Color Control, 29 Color Mode, 16 Color Profile, 22 Color Setting, 24 D Deleting Fonts, 38 Displaying Printer's Fonts, 38 Displaying the Printer Status, 44 Dithering, 26 Downloading PostScript Files, 42 Downloading PS Fonts, 36 Duplex Printing, 14 F - Ricoh CL3000e | Manual - Page 136
47 R Renaming the Printer, 41 Resolution, 20 Restarting the Printer, 42 S Selecting the Zone, 43 Setting up Options, 5 T Toner Saving, 29 U User Code, 30 - Ricoh CL3000e | Manual - Page 137
48 Copyright © 2002 - Ricoh CL3000e | Manual - Page 138
49 EE GB UE USA G081-6630 - Ricoh CL3000e | Manual - Page 139
Option Setup Guide For safety, please read this manual carefully before you use this product and keep it handy for future reference. - Ricoh CL3000e | Manual - Page 140
exposure. Do not attempt any maintenance or troubleshooting other than that mentioned in this manual. This printer contains a laser beam generator and direct exposure to laser beams can cause permanent eye damage. Notes: Some illustrations in this manual might be slightly different from the machine - Ricoh CL3000e | Manual - Page 141
TABLE OF CONTENTS How to Read This Manual 1 1. Options Available Options 3 PAPER FEED UNIT Type 3000 8 AD440 (Duplex Unit 11 Memory Unit Type C (SDRAM Module 13 Printer Hard Disk Type 3000 16 Formatting the Printer Hard Disk drive 18 1394 Interface Unit Type 4510 19 Connecting the cable to - Ricoh CL3000e | Manual - Page 142
ii - Ricoh CL3000e | Manual - Page 143
How to Read This Manual Symbols In this manual, the following symbols are used: R WARNING: This symbol indicates a potentially hazardous situation which, if instructions are not followed, could result in death or serious injury. R CAUTION: This symbol indicates a potentially hazardous situation - Ricoh CL3000e | Manual - Page 144
2 - Ricoh CL3000e | Manual - Page 145
of features to use. For the specifications of each option, see the Administrator Reference. ❖ Option List Basic model Printer PAPER FEED UNIT Type ❍ 3000 AD440 (Duplex Unit) ❍ Memory Unit Type C ❍ Printer Hard Disk Type 3000 ❍ 1394 Interface Unit Type 4510 ❍ *1 802.11b Interface - Ricoh CL3000e | Manual - Page 146
Option Installation Flow Chart A Attach the Paper Feed Unit to the bottom of the printer. Attach the Paper Feed Unit. You can attach up to two Paper Feed Units. 1 (PAPER FEED UNIT Type 3000) T B Install the Duplex Unit. (AD440) Install the unit to the back of the front cover. T C Install - Ricoh CL3000e | Manual - Page 147
front cover. Makes duplex prints. See p.11 "AD440 (Duplex Unit)". ZHBH050E 2. PAPER FEED UNIT Type 3000 Loads up to 530 sheets of paper. Up to two units can be attached to the printer. "Tray 2" appears on the panel display for the first unit and "Tray 3" appears on the panel display for the second - Ricoh CL3000e | Manual - Page 148
controller board. See p.16 "Printer Hard Disk Type 3000". 2. User Account Enhance Unit Type B See p.38 "User Account Enhance Unit Type B". 3. 802.11b Interface Unit Type A Note ❒ 802.11b Interface Unit, USB2.0 In- terface Board, Bluetooth Interface Unit and 1394 Interface Unit cannot be installed in - Ricoh CL3000e | Manual - Page 149
controller board. See p.16 "Printer Hard Disk Type 3000". 2. User Account Enhance Unit Type B See p.38 "User Account Enhance Unit Type B". 3. 802.11b Interface Unit Type A Note ❒ 802.11b Interface Unit, USB2.0 In- terface Board, Bluetooth Interface Unit and 1394 Interface Unit cannot be installed in - Ricoh CL3000e | Manual - Page 150
to two Paper Feed Units can be attached to the printer. When in- ❖ Paper Feed Unit (including a paper tray) stalling two Paper Feed Units, con- nect the two units first by following the procedure below be- fore connecting the units to the printer. Then, place the printer on the connected two - Ricoh CL3000e | Manual - Page 151
3000 D H Pull the paper tray out of the Pa- Align the printer to the two up- per Feed Unit until it stops. After right pins on the Paper Feed Unit that, lift it slightly, and then pull and then lower it slowly. it out completely. Place it on a flat surface. 1 ZHBYA930E E Remove the - Ricoh CL3000e | Manual - Page 152
or service representative. Reference For printing the configuration page, see "Making Printer Settings with the Control Panel" in the Administrator Reference. See "Loading Paper" in the Maintenance Guide. Important ❒ Before using the new Paper Feed Unit, you must make settings in the printer driver - Ricoh CL3000e | Manual - Page 153
(Duplex Unit) AD440 (Duplex Unit) R CAUTION: D Hold the Duplex Unit as shown in • The inside of the machine be- the illustration, and then insert it 1 comes very hot. Do not touch the into the inside of the front cover. parts with a "v" label (means hot surface). Touching a part with - Ricoh CL3000e | Manual - Page 154
attempting reinstallation, contact your sales or service representative. Reference See "Making Printer Settings with the Control Panel" in the Administrator Reference for printing the configuration page. Important ❒ Before using the Duplex Unit, you must make settings in the printer driver. 12 - Ricoh CL3000e | Manual - Page 155
off the power, and then un- plug the power cable. B Remove the two screws that fas- ten the controller board on the back of the printer. ZHBP020E There are two slots for the Memory Unit. Use the available slot (the one in the front in the illustration B) to install an optional Memory - Ricoh CL3000e | Manual - Page 156
MB 320 MB 128 MB 256 MB 384 MB D Adjust the notch of the Memory Unit to the slot, and then insert vertically. ZHBP110E E Press the Memory Unit down un- til it clicks into place. ZHBP070E Important ❒ The printer may not work prop- erly if the controller board is not set properly. G Fasten the - Ricoh CL3000e | Manual - Page 157
your sales or service representative. Reference For printing the configuration page, see "Making Printer Settings with the Control Panel" in the Administrator Reference. Important ❒ Before using the new Memory Unit, you must make settings in the printer driver. Memory Unit Type C (SDRAM Module - Ricoh CL3000e | Manual - Page 158
the inside of the ten the controller board on the controller board compartment. It back of the printer. may cause a machine malfunc- tion or a burn. Important ❒ Before touching the Printer Hard Disk, touch something metal to discharge any static electricity. Static electricity can damage the - Ricoh CL3000e | Manual - Page 159
board to the printer with the two screws that you removed in step C. ZHBP170E F Fasten the Printer Hard Disk us- ing the supplied screw. ZHBP180E G is installed properly, you will see "Printer Hard Disk Drive" for "Controller Option". ❒ If the Printer Hard Disk is not installed properly, reinstall - Ricoh CL3000e | Manual - Page 160
Printer Hard Disk, you must make the settings in the printer driver. Formatting the Printer Hard Disk drive If it becomes necessary to format the Printer sales or service representative. Important ❒ Do not turn off the power while formatting the Printer Hard Disk to avoid a printer malfunction. D - Ricoh CL3000e | Manual - Page 161
XP. ❒ Under Windows 2000, the 1394 Interface Unit can only be used with Service Pack 1 or later. If the Service Pack is not installed, the connectable SCSI print device in a 1394 bus is only one. The client cannot install the printer driver without using an account with Administrators permission - Ricoh CL3000e | Manual - Page 162
the two screws that fas- ten the controller board on the back of the printer. 1 Note ❒ The removed screws will be used in step G to fasten the 1394 Interface Unit. ❒ Lift the end of USB2.0 Interface Unit (A), and then remove it from the controller board (B). ZHBP080E The removed screws will be - Ricoh CL3000e | Manual - Page 163
" for "Controller Option". ❒ If the 1394 Interface Unit is not installed properly, reinstall it from step B. If you cannot install it properly even after attempting reinstallation, contact your sales or service representative. Reference See "Making Printer Settings with the Control Panel" in the - Ricoh CL3000e | Manual - Page 164
the IEEE 1394 Configuration 1394 Interface Unit Use this procedure to configure the 1 A printer for use in the IEEE interface cable (6 pins x 6 pins) connect the end with the ferrite core to the printer. B Connect the other end to the host computer. Setting Name IP Address1394 Subnet Mask1394 - Ricoh CL3000e | Manual - Page 165
1394 Interface Unit Type 4510 C Press {Enter #}. G Assign the IP address to The display returns to the previous menu in a few seconds. Note ❒ To get the IP address for the printer, contact your network administrator. A Press {U} or {T} until the following message appears. IEEE 1394 Setup: IP - Ricoh CL3000e | Manual - Page 166
(k) is on the leftmost position, the selected IP address is reset. M Press {On Line}. "Ready" appears on the panel display. 1 E Repeat steps C and D to the pointer (k) is at the rightmost position, and press {Enter #} to register the IP address you selected. N Print a configuration page to con- - Ricoh CL3000e | Manual - Page 167
of the package for the following: ❖ 802.11b Interface Unit Type A • Interface Unit ZHBP430E B Turn off the power, and then un- plug the power cable. C Remove the two screws that fas- ten the controller board on the back of the printer. • Card ZHBP410E ZHBP080E The removed screws will be used - Ricoh CL3000e | Manual - Page 168
(A), and then remove it from the controller board (B). 2 ZHBP190E Confirm that the 802.11b Interface Unit is firmly connected to the controller board. G Fasten the 802.11b Interface Unit on the controller board using the screws that you removed in step E. ZHBP200E H Attach the antenna to the card - Ricoh CL3000e | Manual - Page 169
K Insert the card slowly into the Fasten the controller board to the 802.11b Interface Unit with the la- printer with the two screws that bel facing down and the uneven you removed in step C. black antenna surface facing up until it stops. 1 ZHBP210E J Align the controller board to the top - Ricoh CL3000e | Manual - Page 170
{U} or {T} to display "Host Interface" menu. 1 Configure the printer for using the IEEE 802.11b (Wireless LAN). The fol- Menu information about setting the items in the "Network Setup", see the Quick Installation Guide. A Press {Menu}. ZHBS040E The following message appears on the panel display. - Ricoh CL3000e | Manual - Page 171
802.11b Interface Unit Type A G Press {U} or {T} to select the transmission mode. J Set "Trans. Speed" in the same way. Note Note ❒ The factory default is "802.11 Ad hoc". ❒ - Ricoh CL3000e | Manual - Page 172
Options B Press the {U} or {T} key to select characters, and then press the {Enter #} key. 1 SSID: [ 1] A The pointer (k) moves to the next character position. SSID: Ak [ 1] C Continue entering the key. Note ❒ The characters that can be used are ASCII 0x20-0x7e (32 bytes). ❒ If you press - Ricoh CL3000e | Manual - Page 173
key you enter is not 10 or 26 characters long, the following message appears. Error: Enter 10 or 26 characters ❒ If you press the {Escape} key, the Key: [26] 0000000000000000 The screen returns to step L. M Press {On Line}. "Ready" appears on the panel display. Ready N Print a configuration page - Ricoh CL3000e | Manual - Page 174
the package for the following: ❖ Bluetooth • Interface Unit • Antenna Cap ZHBP520E ZHBPA921E B Turn off the power, and then un- plug the power cable. C Remove the two screws that fas- ten the controller board on the back of the printer. • Card 32 ZHBP410E ZHBP510E ZHBP080E The removed screws - Ricoh CL3000e | Manual - Page 175
and then push down until it clicks (B). 1 ZHBP020E E Remove USB2.0 Interface Unit. 1 2 ZHBP190E Confirm that the Bluetooth Interface Unit is firmly connected to the controller board. G Fasten the Bluetooth Interface Unit on the controller board using the screws removed in step E. ZHBPB460E Note - Ricoh CL3000e | Manual - Page 176
installing the option. ZHBPA530E J Attach the antenna cap over the antenna. ZHBPA920E K Adjust the Bluetooth module to the slot, and then insert vertically. ZHBO550E Important ❒ The printer may not work prop- erly if the controller board is not set properly. M Fasten the controller board to the - Ricoh CL3000e | Manual - Page 177
ten the controller board on the 1 controller board compartment. It back of the printer. may cause a machine malfunc- tion or a burn. Important ❒ Before touching Board. ❒ Do not subject the Network Interface Board Interface Unit to physical shocks. A Check the contents of the package - Ricoh CL3000e | Manual - Page 178
G. ing the screws that you removed 1 ❒ Lift the end of USB2.0 Interface Unit (A), and then remove it in step E. from the controller board (B). 2 1 ZHBP450E I Fasten the controller board to the printer with the two screws that ZHBPA070E Important ❒ The printer may not work prop- erly if the - Ricoh CL3000e | Manual - Page 179
after attempting reinstallation, contact your sales or service representative. Reference See "Making Printer Settings with the Control Panel" in the network interface ca- ble to the jack on the Network Interface Unit. ZHBP1470E D Connect the other end of the net- work interface cable to the network. - Ricoh CL3000e | Manual - Page 180
Screw Note ❒ The other screw supplied is not to be used. B Turn off the power, and then un- plug the power cable. C Remove the two screws that fas- ten the controller board on the back of the printer. Important ❒ Before touching the User Account Enhance Unit, touch something metal to discharge any - Ricoh CL3000e | Manual - Page 181
, pull Align the screw hole of the User out the controller board slowly. Account Enhance Unit and the controller board, and then fasten the User Account Enhance Unit on the controller board using a 1 supplied screw. ZHBP020E The User Account Enhance Unit is to be installed to the position - Ricoh CL3000e | Manual - Page 182
" for "Controller Option". ❒ If the User Account Enhance Unit is not installed properly, reinstall it from step B. If you cannot install it properly even after attempting reinstallation, contact your sales or service representative. Reference See "Making Printer Settings with the Control Panel" in - Ricoh CL3000e | Manual - Page 183
AD440 (Duplex Unit), 5, 11 Available Options, 3 M Memory Unit Type C (SDRAM Module), 6, 7, 13 N Netwok Interface Board Type 3000, 6 Network Interface Board Type 3000, 35 O Options, 3 P PAPER FEED UNIT Type 3000, 5, 8 Printer Hard Disk Type 3000, 6, 7, 16 U User Account Enhance Unit Type B, 6, 7, 38 - Ricoh CL3000e | Manual - Page 184
MEMO 42 EE GB G081 - Ricoh CL3000e | Manual - Page 185
Copyright © 2002 - Ricoh CL3000e | Manual - Page 186
HONG KONG LTD. 21/F., Tai Yau Building, 181, Johnston Road, Wan Chai, Hong Kong Phone: +852-2862-2888 Singapore RICOH ASIA PACIFIC PTE.LTD. 260 Orchard Road, #15-01/02 The Heeren, Singapore 238855 Phone: +65-830-5888 Model number: Aficio CL3000, CL3000DN Printed in The Netherlands EE GB G081-6530 - Ricoh CL3000e | Manual - Page 187
Operating Instructions Administrator Reference 1 Introduction ...7 How to Read This Manual ...9 Confirming a Network Environment 11 Print Server Client 18 Installing the PCL 5c or RPCS Printer Driver 19 Installing the PostScript Printer Driver 24 Changing Port Settings ...29 Setting Up Options - Ricoh CL3000e | Manual - Page 188
Operating Instructions Administrator Reference 2 2. Windows XP Print Server Configuration Configuring the Protocols ...34 Configuring TCP/IP and IPP for Printing 34 Installing Software...37 Installing SmartNetMonitor for Client 37 Installing the PCL 5c or RPCS Printer Driver 38 Installing the - Ricoh CL3000e | Manual - Page 189
Operating Instructions Administrator Reference 3 4. NetWare Configuration Configuring the NetWare Protocol using the Control Panel 71 NetWare 3.x - Advanced Settings 76 Installing SmartNetMonitor for Admin 77 Setting Up as a Print Server...77 Setting Up as a Remote Printer ...79 NetWare 4.x, 5 - - Ricoh CL3000e | Manual - Page 190
Operating Instructions Administrator Reference 4 7. Monitoring and Configuring the Printer Changing Names and Comments 108 SmartNetMonitor for Admin ...109 Web Browser ...111 Displaying the Status of Printer 113 SmartNetMonitor for Admin ...113 SmartNetMonitor for Client ...114 Web Browser ...115 - Ricoh CL3000e | Manual - Page 191
Operating Instructions Administrator Reference 5 Host Interface Menu...159 Host Interface Parameters ...160 Using telnet...183 Commands List...184 Getting Printer Information over the Network 206 Printer current status...206 Printer configuration...208 Understanding the Displayed Information 212 - Ricoh CL3000e | Manual - Page 192
Operating Instructions Administrator Reference 6 Precautions ...228 Connecting a Dial Up Router to a Network 228 PostScript Printing from Windows...230 NetWare Printing...230 Using DHCP ...231 Configuring a WINS Server ...233 Memory Capacity and Paper Size 235 Specifications...237 Mainframe ...237 - Ricoh CL3000e | Manual - Page 193
follow the instructions in this manual. Please keep this manual in a handy place near the machine. Please read the Safety Information before using this machine. It contains important information related to USER SAFETY and PREVENTING EQUIPMENT PROBLEMS. Important Contents of this manual are subject - Ricoh CL3000e | Manual - Page 194
Operating Instructions Administrator Reference 8 Solaris is a trademark or registered trademark of Sun Microsystems, Inc. in the United States and other countries. Other product names used herein are for identification purposes only and might be trademarks of their respective companies. We disclaim - Ricoh CL3000e | Manual - Page 195
Administrator Reference How to Read This Manual 9 Symbols In this manual, the following symbols are used: R WARNING: This symbol indicates a potentially hazardous situation which, if instructions are not followed, could result in death or serious injury. R CAUTION: This symbol indicates - Ricoh CL3000e | Manual - Page 196
Operating Instructions Administrator Reference 10 [] Keys that appear on the machine's panel display. Keys and buttons that appear on the computer's display. {} Keys built into the machine's control panel. Keys on the computer's keyboard. - Ricoh CL3000e | Manual - Page 197
Operating Instructions Administrator Reference 11 Confirming a Network Environment Windows 2000, Windows XP, Windows NT (Server) NetWare (Server) Windows 95/98/Me Windows 2000 Windows XP Windows NT NetWare (Client) Macintosh UNIX ❖ Connecting Printer and Computer • Network connection (Ethernet - Ricoh CL3000e | Manual - Page 198
Operating Instructions Administrator Reference 12 Print Server Configuration You can use Windows 2000, Windows XP, or Windows NT 4.0 as a print server. Print Server Windows 2000, Windows XP - Ricoh CL3000e | Manual - Page 199
Instructions Administrator Reference 13 Netware Configuration For setting up the machine as a network printer in a NetWare environment. The Network Interface Board allows you to use the machine as either a print server or a remote printer. Print Server NetWare File Server Remote Printer - Ricoh CL3000e | Manual - Page 200
the PCL 5c or RPCS Printer Driver" or p.24 "Installing the PostScript Printer Driver". Note ❒ If you want to use "LPR Port", "Print Services for UNIX" must be installed. Configuring the Protocols Configuring TCP/IP and IPP for Printing Follow these instructions to configure the Network Interface - Ricoh CL3000e | Manual - Page 201
Operating Instructions Administrator Reference 15 Configuring the printer Configure the printer to use the TCP/IP protocol. how to make the above settings, see "Windows 2000 Configuration" in Printer Client Reference that comes with this printer. If DHCP is used to assign IP addresses, see p.231 " - Ricoh CL3000e | Manual - Page 202
that the settings are correct. Configuring NetBEUI for Printing Follow these instructions to configure the Network Interface Board and Windows 2000 to use the NetBEUI protocol. Configuring the printer Configure the printer to use the NetBEUI protocol. • Confirm that the NetBEUI protocol is - Ricoh CL3000e | Manual - Page 203
Operating Instructions Administrator Reference 17 Configuring a Windows 2000 computer Follow these steps to configure a Windows 2000 computer to use the NetBEUI protocol. A Click [Start] on the taskbar, - Ricoh CL3000e | Manual - Page 204
(Finnish), Svenska (Swedish) D Click [SmartNetMonitor for Client / Admin]. E Click to select [SmartNetMonitor for Client], and then click [Next >]. F Follow the instructions on the screen. Note ❒ If you are required to restart the computer after the installation of SmartNetMonitor for Client, re - Ricoh CL3000e | Manual - Page 205
Operating Instructions Administrator Reference 19 Installing the PCL 5c or RPCS Printer Driver A Close all applications that are running. B Insert the CD-ROM into the CD-ROM drive. Auto Run will start the installer. Important ❒ Never have two versions of the same printer driver installed on your - Ricoh CL3000e | Manual - Page 206
Operating Instructions Administrator Reference 20 G Select the printer model(s) you want to use. To change the printer name, change it in the [Change settings for 'Printer Name'] box. H Double-click the printer name to display the printer settings. Note ❒ The details shown for [Comment:], [Driver:], - Ricoh CL3000e | Manual - Page 207
Operating Instructions Administrator Reference 21 ❒ You cannot add an address partially similar to a Configuration Page". NetBEUI address appears as "\\RNPxxxx\xxx" on the configuration page. Type the printer's network path name in the form of "%%Computer name\Share name". Do not type "\\" as - Ricoh CL3000e | Manual - Page 208
Operating Instructions Administrator Reference 22 D If a proxy server and IPP user name are used, click [Detailed ], and then click [OK]. D Type the printer's IP address in the "Name or address of server providing lpd" box. E Type "lp" in the "Name of printer or print queue on that server" box, and - Ricoh CL3000e | Manual - Page 209
Operating Instructions Administrator Reference 23 L To share the printer, check the left side of the [Shared] box. M Click the box under [Shared name] to install the alternative driver for the necessary system. Note ❒ Check [Shared] to start installation of an alternative driver ([Windows NT 4.0/ - Ricoh CL3000e | Manual - Page 210
Operating Instructions Administrator Reference 24 Installing the PostScript Printer Driver A Close all applications that are running. B Insert the CD-ROM into the CD-ROM drive. Auto Run will start the installer. Important ❒ Never have two versions of the same printer driver installed on your system - Ricoh CL3000e | Manual - Page 211
Operating Instructions Administrator Reference 25 F Select the port you want to use. • SmartNetMonitor • Standard TCP/IP Port • LPR Port SmartNetMonitor A Click [Create a new port:]. B Select [SmartNetMonitor], and then click [Next >]. C Select a printer you want to use. ❖ TCP/IP A Click [TCP/IP], - Ricoh CL3000e | Manual - Page 212
Instructions Administrator Reference 26 B Click the printer you want to use, and then click [OK]. Note ❒ Printers that respond to a broadcast from the computer will be displayed. To print to a printer typed in [Printer URL] will be set as the IPP port name. D If a proxy server and IPP user name are - Ricoh CL3000e | Manual - Page 213
to select the name of the printer whose driver you want to install, and then click [Next >]. H Change the name of the printer if you want, and then click [Next >]. Configure the default printer as necessary. Check [Yes] to set the printer as the default printer. I Check [Share as:], and then click - Ricoh CL3000e | Manual - Page 214
Operating Instructions Administrator Reference 28 J Select whether or not you want to print a test page, and then click [Next>]. K Click [Finish]. Start printer driver installation. Note ❒ During installation, the [Digital Signature Not Found] dialog box may appear. In this case, click [Yes] to - Ricoh CL3000e | Manual - Page 215
Instructions Administrator Reference 29 Changing Port Settings Follow the steps to change SmartNetMonitor for Client settings, such as the proxy server settings or IPP URL. Note ❒ There are no settings for the NetBEUI protocol. A From the [Printers] window, click the icon of the printer User - Ricoh CL3000e | Manual - Page 216
, paper size and feed direction with the printer driver when bidirectional transmission is disabled. Limitation ❒ To change the printer settings requires Manage Printers permission. Members of the Administrators and Power Users groups have Manage Printers permission by default. When you set up - Ricoh CL3000e | Manual - Page 217
printer driver supports bidirectional transmission and updates the printer status automat- ically. ❒ The PCL 5c printer driver supports bidirectional transmission, you can update the printer status manually. ❒ The PostScript 3 printer driver does not support bidirectional transmission. To support - Ricoh CL3000e | Manual - Page 218
Instructions Administrator Reference 32 ❖ When connecting with the network • The printer must be set to bidirectional transmission. • SmartNetMonitor for Client included on the CD-ROM must be installed, and the TCP/IP proto- col must be used. • Under Windows 2000, [Enable bidirectional support - Ricoh CL3000e | Manual - Page 219
menu, click [Properties]. C Select [Shared as:] under the [Sharing] tab. D To share a printer with the users running a different version of Windows, click [Additional Driv- ers...]. Note ❒ If you have installed an alternative driver by checking [Shared], you do not have to follow this step. E Click - Ricoh CL3000e | Manual - Page 220
the PCL 5c or RPCS Printer Driver" or p.43 "Installing the PostScript Printer Driver". Note ❒ If you want to use "LPR Port", "Print Services for UNIX" must be installed. Configuring the Protocols Configuring TCP/IP and IPP for Printing Follow these instructions to configure the Network Interface - Ricoh CL3000e | Manual - Page 221
Operating Instructions Administrator Reference 35 Configuring the printer Configure the printer to use the TCP/IP protocol. how to make the above settings, see "Windows XP Configuration" in Printer Client Reference that comes with this printer. If DHCP is used to assign IP addresses, see p.231 "Using - Ricoh CL3000e | Manual - Page 222
Operating Instructions Administrator Reference 36 Configuring a Windows XP computer Follow these steps to configure a Windows XP computer to use the TCP/IP protocol. A Click [Start] on the - Ricoh CL3000e | Manual - Page 223
(Finnish), Svenska (Swedish) D Click [SmartNetMonitor for Client / Admin]. E Click to select [SmartNetMonitor for Client], and then click [Next >]. F Follow the instructions on the screen. Note ❒ If you are required to restart the computer after the installation of SmartNetMonitor for Client, re - Ricoh CL3000e | Manual - Page 224
Operating Instructions Administrator Reference 38 Installing the PCL 5c or RPCS Printer Driver A Close all applications that are running. B Insert the CD-ROM into the CD-ROM drive. Auto Run will start the installer. Important ❒ Never have two versions of the same printer driver installed on your - Ricoh CL3000e | Manual - Page 225
Operating Instructions Administrator Reference 39 F Select the printer drivers you want to use when the "Select Program" dialog box appears, and then click [Next >]. You can select more than one printer driver. G Select the printer model(s) you want to use. To change the printer name, change it in - Ricoh CL3000e | Manual - Page 226
Instructions Administrator Reference 40 B Click the printer you want to use, and then click [OK]. Note ❒ Printers that respond to an IP broadcast from the computer will be displayed. To print to a printer in [Printer URL] will be set as the IPP port name. D If a proxy server and IPP user name are - Ricoh CL3000e | Manual - Page 227
shown after [Port:]. K Double-click [Shared] to display the shared settings. L To share the printer, check the left side of the [Shared] box. M Click the box under [Shared name] to install the alternative driver for the necessary system. Note ❒ Check [Shared] to start installation of an alternative - Ricoh CL3000e | Manual - Page 228
Operating Instructions Administrator Reference 42 N Configure the default printer as necessary. ❖ Default Printer Check [Default Printer] to set the printer as the default printer. O Click [Continue] to start printer driver installation. Note ❒ During installation, the [Hardware Installation] dialog - Ricoh CL3000e | Manual - Page 229
Operating Instructions Administrator Reference 43 Installing the PostScript Printer Driver A Close all applications that are running. B Insert the CD-ROM into the CD-ROM drive. Auto Run will start the installer. Important ❒ Never have two versions of the same printer driver installed on your system - Ricoh CL3000e | Manual - Page 230
Operating Instructions Administrator Reference 44 E Click [Next >]. F Select the port you want to use. • SmartNetMonitor • Standard TCP/IP Port • LPR Port SmartNetMonitor A Click [Create a new port:]. B Select [SmartNetMonitor], and then [Next >]. C Select a printer you want to use. ❖ TCP/IP A Click - Ricoh CL3000e | Manual - Page 231
Type a different name from those of any existing port name. If you omit this, the address typed in [Printer URL] will be set as the IPP port name. D If a proxy server and IPP user name are used, click [Detailed Settings] and configure the necessary settings. Note ❒ For more information about these - Ricoh CL3000e | Manual - Page 232
to select the name of the printer whose driver you want to install, and then click [Next >]. H Change the name of the printer if you want, and then click [Next >]. Configure the default printer as necessary. Check [Yes] to set the printer as the default printer. I Check [Share as:], and then click - Ricoh CL3000e | Manual - Page 233
Instructions Administrator Reference 47 L Set up the options. Reference For more information about option settings, see p.48 "Setting Up Options". Changing Port Settings Follow the steps to change SmartNetMonitor for Client settings, such as the proxy server settings or IPP URL. A From the [Printers - Ricoh CL3000e | Manual - Page 234
, paper size and feed direction with the printer driver when bidirectional transmission is disabled. Limitation ❒ To change the printer settings requires Manage Printers permission. Members of the Administrators and Power Users groups have Manage Printers permission by default. When you set up - Ricoh CL3000e | Manual - Page 235
printer driver supports bidirectional transmission and updates the printer status automat- ically. ❒ The PCL 5c printer driver supports bidirectional transmission, you can update the printer status manually. ❒ The PostScript 3 printer driver does not support bidirectional transmission. To support - Ricoh CL3000e | Manual - Page 236
Instructions Administrator Reference 50 ❖ When connecting with the network • The printer must be set to bidirectional transmission. • SmartNetMonitor for Client included on the CD-ROM must be installed, and the TCP/IP proto- col must be used. • Under Windows XP [Enable bidirectional support - Ricoh CL3000e | Manual - Page 237
menu, click [Properties]. C Select [Shared as:] under the [Sharing] tab. D To share a printer with the users running a different version of Windows, click [Additional Driv- ers...]. Note ❒ If you have installed an alternative driver by checking [Shared], you do not have to follow this step. E Click - Ricoh CL3000e | Manual - Page 238
the PCL 5c or RPCS Printer Driver" or p.62 "Installing the PostScript Printer Driver". Note ❒ If you want to use "LPR Port", "Microsoft TCP/ IP Printing" must be installed. Configuring the Protocols Configuring TCP/IP and IPP for Printing Follow these instructions to configure the Network Interface - Ricoh CL3000e | Manual - Page 239
Operating Instructions Administrator Reference 53 Reference For more information about how to make the above settings, see "Windows NT 4.0 Configuration" in Printer Client Reference that comes with this printer. If DHCP is used to assign IP addresses, see p.68 "Bidirectional transmission". Note ❒ - Ricoh CL3000e | Manual - Page 240
network services, see Windows NT Help. Configuring NetBEUI for Printing Follow these instructions to configure the Network Interface Board and Windows NT to use the NetBEUI protocol. Preparation To use NetBEUI, use the SmartNetMonitor for Client port. Configuring the printer Configure the printer to - Ricoh CL3000e | Manual - Page 241
Operating Instructions Administrator Reference 55 Configuring a Windows NT computer Install the NetBEUI protocol see Windows NT Help. B Change the Lana Number. Click the [Services] tab, click "NetBIOS Interface" in the [Network Services:] box , and then click [Properties:]. C Click the Lana Number - Ricoh CL3000e | Manual - Page 242
(Finnish), Svenska (Swedish) D Click [SmartNetMonitor for Client / Admin]. E Click to select [SmartNetMonitor for Client], and then click [Next >]. F Follow the instructions on the screen. Note ❒ If you are required to restart the computer after the installation of SmartNetMonitor for Admin, restart - Ricoh CL3000e | Manual - Page 243
Operating Instructions Administrator Reference 57 Installing the PCL 5c or RPCS Printer Driver A Close all applications that are running. B Insert the CD-ROM into the CD-ROM drive. Auto Run will start the installer. Important ❒ Never have two versions of the same printer driver installed on your - Ricoh CL3000e | Manual - Page 244
Operating Instructions Administrator Reference 58 G Select the printer model(s) you want to use. To change the printer name, change it in the [Change settings for 'Printer Name'] box. H Double-click the printer name to display the printer settings. Note ❒ The details shown for [Comment:], [Driver:], - Ricoh CL3000e | Manual - Page 245
Operating Instructions Administrator Reference 59 ❒ You cannot add an address partially similar to "Printing a Configuration Page". NetBEUI address appears "\\RNPxxxx\xxx" on a configuration page. Type the printer's network path name in form of "%%Computer name \Share name". Do not type "\\" as head - Ricoh CL3000e | Manual - Page 246
Instructions Administrator Reference 60 C As necessary, type the names to distinguish the printer in [IPP Port Name]. Type a different name from those of any existing port name. If you omit this, the address typed in [Printer URL] will be set as the IPP port name. D If a proxy server and IPP user - Ricoh CL3000e | Manual - Page 247
Operating Instructions Administrator Reference 61 N Configure the default printer as necessary. ❖ Default Printer Check [Default Printer] to set the printer as the default printer. O Click [Continue] to start printer driver installation. Note ❒ During installation, the [Digital Signature Not Found] - Ricoh CL3000e | Manual - Page 248
Operating Instructions Administrator Reference 62 Installing the PostScript Printer Driver A Close all applications that are running. B Insert the CD-ROM into the CD-ROM drive. Auto Run will start the installer. Important ❒ Never have two versions of the same printer driver installed on your system - Ricoh CL3000e | Manual - Page 249
Operating Instructions Administrator Reference 63 E Click [Next >]. F Select the port you want to use. • SmartNetMonitor • LPR Port SmartNetMonitor A Click [Create a new port:]. B Select [SmartNetMonitor], and then [New Port...]. C Select a printer you want to use. ❖ TCP/IP A Click [TCP/IP], and - Ricoh CL3000e | Manual - Page 250
Instructions Administrator Reference 64 B Click the printer you want to use, and then click [OK]. Note ❒ Printers that respond to a broadcast from the computer will be displayed. To print to a printer typed in [Printer URL] will be set as the IPP port name. D If a proxy server and IPP user name are - Ricoh CL3000e | Manual - Page 251
providing lpd" box. D Type "lp" in the "Name of printer or print queue on that server" box, and then click [OK]. G Confirm to select the name of the printer whose driver you want to install, and then click [Next >]. H Change the name of the printer if you want, and then click [Next >]. Configure the - Ricoh CL3000e | Manual - Page 252
Instructions Administrator Reference 66 Changing Port Settings Follow the steps to change SmartNetMonitor for Client settings, such as the proxy server settings or IPP URL. Note ❒ There are no settings for the NetBEUI protocol. A From the [Printers] window, click the icon of the printer User - Ricoh CL3000e | Manual - Page 253
options, paper size and feed direction with the printer driver when bidirectional transmission is disabled. Limitation ❒ To change the printer settings requires Full Control Access permission. Members of the Administra- tors and Power Users groups have Full Control Access permission by default - Ricoh CL3000e | Manual - Page 254
printer driver supports bidirectional transmission and updates the printer status automat- ically. ❒ The PCL 5c printer driver supports bidirectional transmission, you can update the printer status manually. ❒ The PostScript 3 printer driver does not support bidirectional transmission. To support - Ricoh CL3000e | Manual - Page 255
Instructions Administrator Reference 69 ❖ When connecting with the network • The printer must be set to bidirectional transmission. • SmartNetMonitor for Client included on the CD-ROM must be installed, and the TCP/IP proto- col must be used. • Under Windows NT 4.0 [Enable bidirectional support - Ricoh CL3000e | Manual - Page 256
] in the [Sharing] tab. Note ❒ If you use alternate drivers for Windows 95/98/Me client, service pack 4 or more is required. And install the appropriate printer driver for each client. D To share a printer with the users running a different version of Windows, click [Additional Driv- ers...]. Note - Ricoh CL3000e | Manual - Page 257
Operating Instructions Administrator Reference 4. NetWare Configuration 71 This chapter describes how to configure the printer to use as a print server or a remote printer in a NetWare environment. Configuring the NetWare Protocol using the Control Panel Note ❒ The IPX/SPX protocol must be - Ricoh CL3000e | Manual - Page 258
Operating Instructions Administrator Reference 72 C Press the {Enter #} key. The following message appears on the panel display. Host Interface: I/O Buffer D select protocols that are not used on your network. ❒ If you use Pure IP on NetWare 5.1, configure the printer to active the TCP/IP protocol. - Ricoh CL3000e | Manual - Page 259
Operating Instructions Administrator Reference 73 A Press the {U} or {T} key to display "Active Protocol", first select "Auto ", the frame type first detected by the printer is adopted. If the network can use more than two frame types, the printer may fail to select the correct frame type if "Auto " - Ricoh CL3000e | Manual - Page 260
Operating Instructions Administrator Reference 74 two seconds, the display returns to "Network Setup". E Press the {On Line} key. "Ready" appears on the panel display. Ready H Print the configuration Page". ❖ SmartNetMonitor for Admin Using a printer in a NetWare environment, configure the NetWare - Ricoh CL3000e | Manual - Page 261
Operating Instructions Administrator Reference 75 Note ❒ If you configure the NetWare provided with your operating system or the latest version. ❖ Printers listed by SmartNetMonitor for Admin SmartNetMonitor for Admin displays a list of printers, which are connected to the network. If you cannot find - Ricoh CL3000e | Manual - Page 262
Operating Instructions Administrator Reference 76 NetWare 3.x - Advanced Settings The actual procedures for configuring the printer differ depending on whether the Network Interface Board is configured as a print server or as a remote printer. This section describes how to configure it in the - Ricoh CL3000e | Manual - Page 263
Operating Instructions Administrator Reference 77 Installing SmartNetMonitor for Admin Install " to use this computer as a print server, or to p.79 "Setting Up as a Remote Printer" to use it as a remote printer. Setting Up as a Print Server A Log on to the file server as Supervisor or a Supervisor - Ricoh CL3000e | Manual - Page 264
Instructions ] box, and the printer name into the [Printer Name] box, and the [Printer Name] box, type the name of the NetWare printer. • printer power off and on. Note ❒ To confirm that the printer is configured correctly, type the following from the command prompt. F:> USERLIST ❒ If the printer - Ricoh CL3000e | Manual - Page 265
Operating Instructions Administrator Reference 79 Setting Up as a Remote Printer A Log on to the file server as Supervisor or a Supervisor equivalent. B Run the SmartNetMonitor for Admin. C Click the [Group] menu, and click [Search Device], and then select [IPX/SPX]. A list of printers appears. Note - Ricoh CL3000e | Manual - Page 266
Operating Instructions Administrator Reference 80 D In the [Remote Printer No.] box, type the printer number. Important ❒ Use the same printer number as that to be created in the printer server. E Click [OK] to close the property sheet. F After a confirmation dialog box appears, click [OK]. G On the - Ricoh CL3000e | Manual - Page 267
[Print Server Configuration Menu], select [Queues Serviced By Printer]. B Select the printer created in step J. C Press the {INSERT} key to select a queue serviced by the printer. Note ❒ You can select more than one queue at a time. D Follow the instructions on the screen to make other necessary - Ricoh CL3000e | Manual - Page 268
Operating Instructions Administrator Reference 82 M Start the print server by typing the following from the console of the NetWare Server. If it is running, restart it after exiting it. ❖ To exit CAREE: unload pserver ❖ To start CAREE: load pserver print_server_name Note ❒ If the printer works as - Ricoh CL3000e | Manual - Page 269
Operating Instructions Administrator Reference 83 NetWare 4.x, 5 - Advanced Settings The actual procedures for configuring the printer differ depending on whether the Network Interface Board is configured as a print server or as a remote printer. This section describes how to configure it in the - Ricoh CL3000e | Manual - Page 270
Operating Instructions Administrator Reference 84 Installing SmartNetMonitor for Admin Install " to use this computer as a print server, or to p.88 "Setting Up as a Remote Printer" to use it as a remote printer. Setting Up as a Print Server A Log on to the file server as Supervisor or a Supervisor - Ricoh CL3000e | Manual - Page 271
Operating Instructions Administrator Reference 85 D Select a printer you want to configure, and then click [NIB Setup DS". I Type the print server name into the [Print Server Name] box, and the printer name into the [Printer Name] box, and the print queue name into the [Print Queue Name] box, and the - Ricoh CL3000e | Manual - Page 272
the NIB Setup Tool exits. K Exit SmartNetMonitor for Admin. L Turn the printer power off and on. Note ❒ To confirm that the printer is configured correctly, type the following from the command prompt. F:> NLIST USER /A/B ❒ If the printer works as configured, the name of the print server appears as - Ricoh CL3000e | Manual - Page 273
Operating Instructions Administrator Reference 87 C In the [NDS Context:] box, type the context of the print server. By clicking [Browse], you can confirmation dialog box appears, click [OK]. E Exit SmartNetMonitor for Admin. After this step, go to step H on p.88 "Setting Up as a Remote Printer". - Ricoh CL3000e | Manual - Page 274
Operating Instructions Administrator Reference 88 Setting Up as a Remote Printer A Log on to the file server as Admin or an Admin equivalent. B Run the SmartNetMonitor for Admin. C Click the [Group] menu, and click [Search Device], and then select [IPX/SPX]. A list of printers appears. Note ❒ If you - Ricoh CL3000e | Manual - Page 275
Operating Instructions Administrator Reference 89 C In the [NDS Context] box Server Operation Mode] group, click [As Remote Printer]. E In the [Remote Printer No.] box, type the number of the printer. Important ❒ Use the same number as that of the printer to be created in the print server. F Click - Ricoh CL3000e | Manual - Page 276
Operating Instructions Administrator Reference 90 C In the [Print Queue name] box, type the click [OK]. C Click [Configuration], and in the [Printer type] box, select [Parallel] using the drop-down menu, and then click [Communication]. D Click [Manual load] in the [Communication type] group, and then - Ricoh CL3000e | Manual - Page 277
Operating Instructions Administrator Reference 91 B In the [Class of new object] box, click the step K, and then click [OK]. C In the [Printers] group, click the printer assigned in step B, and then click [Printer Number]. D Type the printer number, and then click [OK]. Important ❒ Use the same - Ricoh CL3000e | Manual - Page 278
Instructions Administrator Reference 5. Using SmartNetMonitor for Admin 92 Using SmartNetMonitor for Admin, you can not only monitor the status of network printers using the user codes. • Checks the results of print jobs executed from the computer. • Enables you to change the printer's network - Ricoh CL3000e | Manual - Page 279
Operating Instructions Administrator Reference 93 OS Microsoft Windows 95/98/Me Microsoft Windows for Windows XP TCP/IP provided with Windows NT IPX/SPX provided with Windows NT Client Service for NetWare provided with Windows NT Novell Client for Windows NT/2000 Note ❒ Select the appropriate - Ricoh CL3000e | Manual - Page 280
reading through all of the contents, click [I accept the agreement] to agree with the license agreement, and then click [Next >]. F Follow the instructions on the screen. Note ❒ If you are required to restart the computer after the installation of SmartNetMonitor for Admin, restart the computer and - Ricoh CL3000e | Manual - Page 281
Operating Instructions Administrator Reference 95 Changing the Network Interface Board Configuration A Run SmartNetMonitor for Admin. B Click the [Group] menu, point to [Search Device], and then select [TCP/IP] or [IPX/SPX]. A list of printers appears. Note ❒ Select the protocol of the printer you - Ricoh CL3000e | Manual - Page 282
Operating Instructions Administrator Reference 96 Locking the Menus on the Printer's Control Panel A Run SmartNetMonitor for Admin. B Click the [Group] menu, point to [Search Device], and then select [TCP/IP] or [IPX/SPX]. A list of printer appears. Note ❒ Select the protocol of the printer you want - Ricoh CL3000e | Manual - Page 283
Operating Instructions Administrator Reference 97 Changing the Paper Type A Run SmartNetMonitor for Admin. B Click the [Group] menu, point to [Search Device], and then select [TCP/IP] or [IPX/SPX]. A list of printer appears. Note ❒ Select the protocol of the printer you want to change its - Ricoh CL3000e | Manual - Page 284
Account Enhance Unit Type B, see "User Account Enhance Unit Type B" in the Option Setup Guide. A Run SmartNetMonitor for Admin. B Click the [Group] menu, point to [Search Device], and then select [TCP/IP] or [IPX/SPX]. A list of printer appears. Note ❒ Select the protocol of the printer you want - Ricoh CL3000e | Manual - Page 285
Operating Instructions Administrator Reference 99 Configuring the Energy Save Mode A Run SmartNetMonitor for Admin. B Click the [Group] menu, point to [Search Device], and then select [TCP/IP] or [IPX/SPX]. A list of printer appears. Note ❒ Select the protocol of the printer you want to change its - Ricoh CL3000e | Manual - Page 286
Operating Instructions Administrator Reference 100 Setting a Password A Run SmartNetMonitor for Admin. B Click the [Group] menu, point to [Search Device], and then select [TCP/IP] or [IPX/SPX]. A list of printer appears. Note ❒ Select the protocol of the printer you want to change its configuration. - Ricoh CL3000e | Manual - Page 287
to adjust the settings using a Web browser. Reference For more information about configuring the printer to use the TCP/IP protocol, see "CONFIGURING THE PRINTER FOR THE NETWORK" in the Quick Installation Guide. ❖ Operating system browser requirements OS Windows 95/98/Me Windows 2000 Windows XP - Ricoh CL3000e | Manual - Page 288
Operating Instructions Administrator Reference 102 Going to the Top Page After launching the Web Browser, type the IP address of the printer. See the ht- tp://webmonitor.netprinter.com/. In order to do this, you must register the IP address and the host name of the Network Interface Board with the - Ricoh CL3000e | Manual - Page 289
Operating Instructions Administrator Reference 103 2. Menu Buttons Buttons to configure the Network Interface Board and confirm the status of the printer. Note ❒ When you click [Network Config], a dialog box appears requesting the user name and a password. Type only the password in this dialog box. - Ricoh CL3000e | Manual - Page 290
Operating Instructions Administrator Reference 104 E Click the item you want to configure, and then optional 802.11b Interface Unit, and the optional 1394 Interface Unit. ❖ [SNMP] Configure the appropriate community settings here. Up to 10 types of community names can be registered. ❖ [NetWare] - Ricoh CL3000e | Manual - Page 291
Instructions Unit is installed. Verifying the Network Interface Board Settings A Start the Web browser. B Point your browser at the URL or IP address of the printer (e.g. http://XXX.XXX.XXX.XXX where the Xs are the number of the IP address). The status of the printer you chose appears - Ricoh CL3000e | Manual - Page 292
Operating Instructions Administrator Reference 106 D Click the item you want to check. The following items can be checked: ❖ [General] Shows general settings for the machine. ❖ [TCP/IP] Shows the TCP/IP-related settings for the Network Interface Board, the optional 802.11b Interface Unit, and the - Ricoh CL3000e | Manual - Page 293
Operating Instructions Administrator Reference 107 -Linking the address (URL) to the [Help] button to the Top Page, and then click [Network config]. C Type your password, (it is not necessary to type a user name), and then click [OK]. D Type the path to the Help files in the [Help URL] box. If you - Ricoh CL3000e | Manual - Page 294
Instructions Administrator Reference 7. Monitoring and Configuring the Printer 108 Changing Names and Comments You can change printer names and make a comment on printers to easily identify the printers listed on SmartNetMonitor for Client. The following utilities are used to change printer - Ricoh CL3000e | Manual - Page 295
Instructions Administrator Reference 109 SmartNetMonitor for Admin A Run SmartNetMonitor for Admin. B Click the [Group] menu, point to [Search Device], and select [TCP/IP] or [IPX/SPX]. A list of print- ers appears. Note ❒ Select the protocol of the printer name of the printer within 13 characters. - Ricoh CL3000e | Manual - Page 296
Operating Instructions Administrator Reference 110 NetBEUI A Click the [General] tab, and then type the comment into the [Comment] box. In the [Comment] box, type any comment on printers within 31 characters. B Click the [NetBEUI] tab. C Type the computer name into the [Computer Name] box. • In the - Ricoh CL3000e | Manual - Page 297
you want to change the settings)". The status of the selected printer is displayed on the Web browser. C Click [Configuration]. A dialog box that prompts you to type the user name and a password appears. D Type the user name and the password, and then click [OK]. Type only the password in this - Ricoh CL3000e | Manual - Page 298
Operating Instructions Administrator Reference 112 B Click the [IEEE 1394], and then type the name into the [Device Name:] box when you change the device name for IEEE 1394 (IP over 1394) interface. • In the [Device Name:] box, type the name of the printer within 13 characters. The factory default - Ricoh CL3000e | Manual - Page 299
Operating Instructions Administrator Reference 113 Displaying the Status of Printer You can view the status of printers using SmartNetMonitor for Admin, SmartNetMonitor for Client, or Web browser. SmartNetMonitor for Admin A Run SmartNetMonitor for Admin. B Click the [Group] menu, point to [Search - Ricoh CL3000e | Manual - Page 300
Operating Instructions Administrator Reference 114 SmartNetMonitor for Client Viewing the status of printers using SmartNetMonitor for Client, you must, in advance, configure SmartNetMonitor for Client so it monitors the printer whose status you want to view. Monitoring Printers A Run - Ricoh CL3000e | Manual - Page 301
Operating Instructions Administrator Reference 115 Displaying the Status of Printers A Run SmartNetMonitor for Client. B The status of printers is displayed on the SmartNetMonitor for Client icon on the task tray. Note ❒ For more information about the status icons, see Help. C Getting further - Ricoh CL3000e | Manual - Page 302
Function Menu Select Action / Error File(s) Select Action / Error File(s) Bypass Size Paper Type Tray Locking List/Test Print ⇒ p.129 Tray Priority Config. Page Menu List Color Demo Page PS Config. Page PCL Config.Page Maintenance ⇒ p.136 Hex Dump Color Regist. Image Density Registration - Ricoh CL3000e | Manual - Page 303
⇒ p.149 Operating Instructions Administrator Reference 117 Maint. Reset HDD Format *2 ROM Update *3 4C.Graphic Mode WL.LAN Signal *4 WL.LAN Defaults Print Area Key Repeat Menu Protect *5 Series Prnt.Job *5 MisfeedRecovery Prt. Err Report Auto Continue Memory Overflow Copies Printer Lang. Sub Paper - Ricoh CL3000e | Manual - Page 304
Category System ⇒ p.149 Host Interface ⇒ p.159 Operating Instructions Administrator Reference 118 Energy Saver 1 E. Saver2 Timer Unit of Measure Resolution B&W Page Detect Spool Printing *2 Letterhead Mode *5 E.Saver2 OnOff *5 I/O Buffer I/O Timeout Network Setup *7 IEEE 1394 Setup *8 IEEE 802.11b - Ricoh CL3000e | Manual - Page 305
Instructions Administrator Reference 119 Category Function Menu PCL Menu ⇒ p.171 Orientation Form Lines menu. *5 While the printer is On Line, press the {Enter #} Unit or 802.11b Interface Unit is installed. *8 The "IEEE 1394 Setup" menu appears only when the optional 1394 Interface Unit - Ricoh CL3000e | Manual - Page 306
Operating Instructions Administrator Reference 120 Accessing the Main Menu Press the { List/Test Print • Maintenance • System • Host Interface • PCL Menu • Language Note ❒ If the optional Printer Hard Disk is not installed, the "Sample Print" menu and the "Locked Print" menu cannot be displayed on - Ricoh CL3000e | Manual - Page 307
Instructions Administrator Reference 121 ❒ {T}: Press to go to the next page. ❒ {U}: Press to go back to the previous page. ❒ After making the printer settings, be sure to return to the previous menu by pressing the {Escape} key. ZHBS020E ❒ After making the printer settings, press the {On Line - Ricoh CL3000e | Manual - Page 308
about paper sizes that can be set in the bypass tray, see "Paper and Other Media Supported by This Printer" in the Maintenance Guide. 8 1/2 x 14, 8 1/2 x 11, 5 1/2 x 8 1/2, 7 1/4 x 10 1/2, 8 x 13, 8 1/2 x 13, 8 1/4 x 13, A4 (210x297), B5JIS (182x257), A5 (148x210), A6 (105x148), 16K (195x267 - Ricoh CL3000e | Manual - Page 309
3 or Bypass Tray. For more information about paper sizes that can be set in each tray, see the Maintenance Guide. ❖ Tray 1, Tray 2, Tray 3 Plain Paper, Recycled Paper, Special Paper, Color Paper, Letterhead, Preprinted, Prepunched, Bond Paper ❖ Bypass Tray Plain Paper, Recycled Paper, Special Paper - Ricoh CL3000e | Manual - Page 310
Priority Operating Instructions Administrator Reference 124 Description If you use different kinds of paper, you can lock a tray to prevent printing on wrong paper such as letterhead or colored paper. When "Auto Select" is selected in the Paper Source selections from the printer driver, the locked - Ricoh CL3000e | Manual - Page 311
Operating Instructions Administrator Reference 125 Changing the Paper Input Menu Tray Locking A Press the {Menu} key. ZHBS010E "Menu" appears on the panel display. B Press the {U} or {T} key to display "Paper Input", and then press the {Enter #} key. Menu: Paper Input - Ricoh CL3000e | Manual - Page 312
Operating Instructions Administrator Reference 126 C Press the {U} or {T} key to display "Tray Locking", and then press the {Enter #} key. Paper #} key. Tray 1: *Off Wait for two seconds. "Paper Input" appears on the panel display. F Press the {On Line} key. "Ready" appears on the panel display. - Ricoh CL3000e | Manual - Page 313
Tray Priority A Press the {Menu} key. Operating Instructions Administrator Reference 127 ZHBS010E "Menu" appears on the panel display. B Press the {U} or {T} key to display "Paper Input", and then press the {Enter #} key. Menu: - Ricoh CL3000e | Manual - Page 314
Operating Instructions Administrator Reference 128 E Press the {Enter #} key. Wait for two seconds. "Menu" appears on the panel display. F Press the {On Line} key. ZHBS050E "Ready" appears on the panel display. Ready - Ricoh CL3000e | Manual - Page 315
Config.Page Hex Dump Description You can print the current configuration of the printer. See p.130 "Printing a Configuration Page". You can print the Menu List which shows the function menus of this printer. You can print the Color Demo Page. You can print a list of the installed PS Fonts. You can - Ricoh CL3000e | Manual - Page 316
Operating Instructions Administrator Reference 130 Printing a Configuration Page Reference For more information, see p.133 "Interpreting the Configuration Page". A Press the {Menu} key. ZHBS010E "Menu" appears on the - Ricoh CL3000e | Manual - Page 317
C Press the {Enter #} key. Operating Instructions Administrator Reference 131 ZHBS040E The following message appears print the configuration page, check for an error message appears on the panel display. For more information about error messages, see "Troubleshooting" in the Maintenance Guide. - Ricoh CL3000e | Manual - Page 318
Operating Instructions Administrator Reference 132 E Press the {On Line} key. ZHBS050E "Ready" appears on the panel display. Ready - Ricoh CL3000e | Manual - Page 319
Operating Instructions Administrator Reference 133 Interpreting the Configuration Page System Reference ❖ Printer ID Shows the serial number assigned to the board by its manufacturer. ❖ Firmware Version • Firmware Shows the version number of the printer controller firmware. • Engine Shows the - Ricoh CL3000e | Manual - Page 320
Operating Instructions Administrator Reference 134 ❖ Options Shows the options that you installed. Paper Input Shows the settings made under the "Paper Input" menu. Reference For more information, - Ricoh CL3000e | Manual - Page 321
Operating Instructions Administrator Reference 135 PCL Menu Shows the settings made under the "PCL Menu". Reference For more information, about the "Host Interface" menu, see p.159 "Host Interface Menu". Interface Information Shows the interface information. Error Log Shows the log of printer errors. - Ricoh CL3000e | Manual - Page 322
Operating Instructions Administrator Reference 136 Maintenance Menu There are 13 menu items in the "Maintenance" menu. • Color Regist. • Image Density • Registration • PlainPaper Type • Maint. Reset • HDD Format • ROM Update • 4C.Graphic Mode • WL.LAN Signal • WL.LAN Defaults • Print Area • Key - Ricoh CL3000e | Manual - Page 323
Operating Instructions Administrator Reference 137 Maintenance Menu Parameters Menu Color Regist. Image Density Description You can adjust the color alignment for each color (black, cyan, magenta, yellow) Reference For more information about how to registration, see "Adjusting the Color - Ricoh CL3000e | Manual - Page 324
Instructions user to reset each internal unit counters such as the Transfer Belt and Fusing Unit. These counters can be reset at anytime, but are necessary at the time of unit reinstallation. For more information, see "Replacing Consumables" in the Maintenance Guide. You can format the Printer - Ricoh CL3000e | Manual - Page 325
Instructions Administrator Reference 139 Description This menu is not currently used. This setting adjusts how much each color of toner overlaps when printing. If characters or lines Normal The default setting [On] enables the user to scroll through menu items and settings by holding the key down - Ricoh CL3000e | Manual - Page 326
Operating Instructions Administrator Reference 140 Menu Menu Protect *1 Description On ❒ When the Job Reset key is pressed, all jobs sent to the machine will be canceled. *1 While the printer is On Line, press the {Enter #} key, and then press the {Escape} key. Finally, press the {Menu} key. You - Ricoh CL3000e | Manual - Page 327
Operating Instructions Administrator Reference 141 Changing the Maintenance Menu Protecting the menus A Check if the On Line indicator is on. If not, press the {On Line} key to enter the "Ready" con- dition. B Press the {Enter #} key, then the {Escape} key, and then the {Menu} key. ZHBS060E "Menu" - Ricoh CL3000e | Manual - Page 328
Operating Instructions Administrator Reference 142 C Press the {U} or {T} key to display the "Maintenance" menu, and then press the {Enter #} key. The following message appears on the panel display. Maintenance: Color Regist. D Press the {U} or {T} key to display "Menu Protect". Maintenance: Menu - Ricoh CL3000e | Manual - Page 329
Operating Instructions Administrator Reference 143 G Press the {On Line} key. ZHBS050E "Ready" appears on the panel display. Ready Removing Protect A Check if the On Line indicator is on. If not, press the {On Line} key to enter the "Ready" con- dition. B Press the {Enter #} key, then the {Escape} - Ricoh CL3000e | Manual - Page 330
Operating Instructions Administrator Reference 144 C Press the {U} or {T} key to display "Maintenance" menu, and then press the {Enter #} key. The following message appears on the panel display. Maintenance: Color Regist. D Press the {U} or {T} key to display "Menu Protect", and then press the { - Ricoh CL3000e | Manual - Page 331
Operating Instructions Administrator Reference 145 C Press the {Enter #} key. The following message appears on the panel display. Maintenance: Color Regist. D Press the {T} or {U} key to display "WL.LAN Signal". Maintenance: WL.LAN Signal E Press the {Enter #} key. One of the following messages - Ricoh CL3000e | Manual - Page 332
Operating Instructions Administrator Reference 146 Note ❒ If "WL.LAN Signal" is not displayed, " move the printer to a place where the signal can be received. ❒ Using wireless devices or microwave sources near the printer might affect the signal. F Press the {Escape} key. G Press the {On Line} key. - Ricoh CL3000e | Manual - Page 333
Operating Instructions Administrator Reference 147 Resetting the IEEE 802.11b (Wireless LAN) : Maintenance C Press the {Enter #} key. The following message appears on the panel display. Maintenance: Color Regist. D Press the {T} or {U} key to display "WL.LAN Defaults". Maintenance: WL.LAN Defaults - Ricoh CL3000e | Manual - Page 334
Operating Instructions Administrator Reference 148 E Press the {Enter #} key. WL.LAN Defaults Reset→Defaults F Press the {Enter #} key. The following message appears on the panel display. Defaults reset The wireless LAN setting value is reset. "Ready" appears on the panel display. Ready - Ricoh CL3000e | Manual - Page 335
Operating Instructions Administrator Reference 149 System Menu There are 14 menu items in the "System " menu. • MisfeedRecovery • Prt. Err Report • Auto Continue • Memory Overflow • Copies • Printer Lang. • Sub Paper Size • Page Size • Duplex • Energy Saver 1 • E. Saver2 Timer • Unit of Measure • - Ricoh CL3000e | Manual - Page 336
Operating Instructions Administrator Reference 150 System Parameters Menu MisfeedRecovery Prt. Err Report Description You can • On • Off Note ❒ Default: On You can select whether or not to have an error report printed when a printer error or memory error occurs. • On • Off Note ❒ Default: Off - Ricoh CL3000e | Manual - Page 337
Printer Lang. Operating Instructions Administrator Reference 151 Description You can set whether Auto Continue is enabled. When it is on, printing continues after a system error can select whether the memory overflow error report should be printed. • Not Print • Error Report Note ❒ Default: Not - Ricoh CL3000e | Manual - Page 338
Sub Paper Size Page Size Operating Instructions Administrator Reference 152 Description You can specify the printer language. • Auto Detect • PCL • PS Note ❒ Default: Auto Detect You can enable the Sub Paper Size feature. When you select "Auto ", the printer substitutes the paper of a certain size - Ricoh CL3000e | Manual - Page 339
Menu Energy Saver 1 E. Saver2 Timer Operating Instructions Administrator Reference 153 Description You can select whether the Power indi- cator turns off, while the On Line indicator stays on. You can set how many minutes the printer waits before switching to Energy Saver mode. Energy Saver mode - Ricoh CL3000e | Manual - Page 340
Menu Unit of Measure Resolution B&W Page Detect Operating Instructions Administrator Reference 154 Description You can select "mm" or "inch" for the Default: PCL 600 x 600 dpi, PS3 600 x 600 dpi You can specify whether the Black & White Page Detect feature is enabled. • On • Off Note ❒ Default: On - Ricoh CL3000e | Manual - Page 341
Instructions Administrator Reference 155 Menu Spool Printing Description You can select whether all of the print data is spooled to the Printer printer, transfers the print job, and then prints it. ❒ This menu appears Only when the optional Printer *1 While the printer is On Line, press the {Enter - Ricoh CL3000e | Manual - Page 342
Operating Instructions Administrator Reference 156 Changing the System Menu The following example describes how to change the settings for "E. Saver2 Timer". A Press {Menu}. ZHBS010E "Menu" appears on the panel display. B Press {U} or {T} to display "System ". Menu: System - Ricoh CL3000e | Manual - Page 343
C Press {Enter #}. Operating Instructions Administrator Reference 157 ZHBS040E The following message appears on the panel display. System : MisfeedRecovery D Press {U} or {T} to display "E. Saver2 Timer", and then press {Enter #}. System : E. Saver2 Timer - Ricoh CL3000e | Manual - Page 344
to select how many minutes the printer waits before switching to Energy Saver mode. The following message appears on the panel display. E. Saver2 Timer *30 minutes F Press {Enter #}. Wait for two seconds. "Menu" appears on the panel display. G Press {On Line}. ZHBS050E "Ready" appears on the panel - Ricoh CL3000e | Manual - Page 345
Operating Instructions Administrator Reference 159 Host Interface Menu There are 6 menu items in the "Host Interface" menu. • I/O Buffer • I/O Timeout • Network Setup • IEEE 1394 Setup • IEEE 802.11b • USB Setting Note ❒ For more information about the "Network Setup", see "Configuring the printer - Ricoh CL3000e | Manual - Page 346
Operating Instructions Administrator Reference 160 Host Interface Parameters Menu I/O Buffer I/O Timeout Description You can set the size of the I/O Buffer. Normally it is not necessary to change this setting. 128 KB, 256 KB, 512 KB Note ❒ Default: 128 KB You can set how many seconds the printer - Ricoh CL3000e | Manual - Page 347
Menu Network Setup Operating Instructions Administrator Reference 161 Description ❖ DHCP You can set how the Network Interface Board acquires TCP/IP settings. Note ❒ Default: On Reference See "Configuring the Printer for the Network" in the Quick Installation Guide. ❖ IP Address You can set the IP - Ricoh CL3000e | Manual - Page 348
Menu Operating Instructions Administrator Reference 162 Description ❖ Subnet Mask You can set the for the network. Note ❒ Default: All zero Reference See "Configuring the Printer for the Network" in the Quick Installation Guide. ❖ Gateway Address You can set the gateway address. Limitation ❒ When - Ricoh CL3000e | Manual - Page 349
Menu Operating Instructions Administrator Reference 163 Description ❖ Frame Type (NW) You can set the Frame type for NetWare. Note ❒ Default: Auto ❖ Active Protocol You can set the active protocol. TCP/IP, NetWare, NetBEUI, AppleTalk Note ❒ Default: All Active - Ricoh CL3000e | Manual - Page 350
Menu Operating Instructions Administrator Reference 164 Description ❖ Ethernet You can select the speed of the network that the printer is connected to. Auto , 10 Mbps, 100 Mbps Note ❒ Default: Auto Reference See "Configuring the Printer for the Network" in the Quick Installation Guide. ❖ LAN Type - Ricoh CL3000e | Manual - Page 351
Menu IEEE 1394 Setup *1 Operating Instructions Administrator Reference 165 Description You can make settings for using IEEE 1394. This menu appears only when the optional IEEE 1394 board is installed. ❖ IP - Ricoh CL3000e | Manual - Page 352
Menu IEEE 802.11b *2 Operating Instructions Administrator Reference 166 Description You can make settings for using the wireless LAN. This menu appears only when the optional 802.11b Interface Unit is installed. ❖ Comm. Mode You can set the transmission mode for IEEE 802.11b. Note ❒ Default: 802.11 - Ricoh CL3000e | Manual - Page 353
Operating Instructions Administrator Reference 167 Menu Description ❖ SSID You can set for SSID in Infrastructure mode and 802 transmission speed for USB. Note ❒ Default: Auto *1 Appears only when the optional 1394 Interface Unit is installed. *2 Appears only when the optional 802.11b Interface - Ricoh CL3000e | Manual - Page 354
Operating Instructions Administrator Reference 168 Changing the Host Interface Menu The following example describes how to change the setting for "I/O Timeout". A Press the {Menu} key. ZHBS010E "Menu" - Ricoh CL3000e | Manual - Page 355
C Press the {Enter #} key. Operating Instructions Administrator Reference 169 ZHBS040E The following message appears on the panel display. Host Interface: I/O Buffer D Press the {U} or {T} key to display "I/O Timeout". Host Interface: I/O Timeout E - Ricoh CL3000e | Manual - Page 356
Operating Instructions Administrator Reference 170 F Press the {U} or {T} key to select how many minutes the printer waits before ending a print job. G Press the {Enter #} key. Wait for two seconds. "Host Interface" appears on the panel display. H Press the {On Line} key. ZHBS050E "Ready" appears on - Ricoh CL3000e | Manual - Page 357
Operating Instructions Administrator Reference 171 PCL Menu There are 9 menu items in the "PCL Menu". • Orientation • Form Lines • Font Source • Font Number • Point Size • Font Pitch • Symbol Set • Ext. A4 Width • Append CR to LF PCL Parameters Menu Orientation Description You can set - Ricoh CL3000e | Manual - Page 358
Font Source Font Number Point Size Operating Instructions Administrator Reference 172 Description You can set the number of lines per page. 5-128 Note ❒ Default: 64 (Metric version), 60 (Inch version) You can set the location of the default font. • Resident • RAM • HDD Note ❒ Default: - Ricoh CL3000e | Manual - Page 359
Menu Font Pitch Symbol Set Ext. A4 Width Append CR to LF Operating Instructions Administrator Reference 173 Description You can set the number of characters per inch you want to use for the default font. 0.44 to 99.99 - Ricoh CL3000e | Manual - Page 360
Operating Instructions Administrator Reference 174 Changing the PCL Menu The following example describes how to change the setting for "Orientation". A Press the {Menu} key. ZHBS010E "Menu" appears on the panel display. - Ricoh CL3000e | Manual - Page 361
Operating Instructions Administrator Reference 175 B Press the {U} or {T} key to display "PCL Menu", and then press the {Enter #} key. ZHBS040E The following message appears on the panel - Ricoh CL3000e | Manual - Page 362
Operating Instructions Administrator Reference 176 E Press the {On Line} key. ZHBS050E "Ready" appears on the panel display. Ready - Ricoh CL3000e | Manual - Page 363
Operating Instructions Administrator Reference 177 Language Menu You can select the languages you use. Available language are as follows: English, German, French, Italian, Spanish, Dutch, Swedish, Norwegian, - Ricoh CL3000e | Manual - Page 364
Operating Instructions Administrator Reference 178 B Press the {U} or {T} key to display "Language". Menu: Language C Press the {Enter #} key. ZHBS040E The following message appears on the panel display. - Ricoh CL3000e | Manual - Page 365
Operating Instructions Administrator Reference 179 F Press the {On Line} key. ZHBS050E "Ready" appears on the panel display. Ready - Ricoh CL3000e | Manual - Page 366
printer. The factory default community names are "public" and "admin". You can get MIB information using these community names. Reference You can configure SNMP from the command line Interface Unit supports TCP/IP only. ❒ The kinds of supported MIBs differ depending on the printer. ❖ Supported MIBs - Ricoh CL3000e | Manual - Page 367
Operating Instructions Administrator Reference 181 Spool Printing With Spool Printing, the whole data of a print job is saved in the Printer Hard Disk before printing. To use this function, set it from the menu. See p.149 "System Menu". Important ❒ Do not turn off the printer or the computer when a - Ricoh CL3000e | Manual - Page 368
Operating Instructions Administrator Reference 182 -Viewing/Deleting spool jobs in a Web browser IP address of the machine is 192.168.0.10) Click "Admin Info", and then "Spool Printing Job List (Printer)" to display the spool jobs. To delete, check the box next to the name of the file you want to - Ricoh CL3000e | Manual - Page 369
Operating Instructions Administrator Reference 183 Remote Maintenance by telnet You can view the printer status and configure the Network on to do remote maintenance. A Use the IP address or the host name of the printer to start telnet. % telnet IP_address Note ❒ In order to use the host name instead - Ricoh CL3000e | Manual - Page 370
Operating Instructions Enter}. If you want to make additional changes, type "return" at the command line, and then press {Enter}. Note ❒ If the "Can not write NVRAM reset, the active print job which has already been sent to the printer will finish printing. However, jobs that have not been sent yet - Ricoh CL3000e | Manual - Page 371
Operating Instructions Administrator Reference 185 TCP/IP address Use the ifconfig command to *2 Available when the optional 1394 Interface Unit is installed. *3 You can specify an interface when installing the optional 802.11b Interface Unit. Parameter (no parameter) netmask broadcast Meaning - Ricoh CL3000e | Manual - Page 372
Operating Instructions Administrator Reference 186 ❖ Changing the Interface You can specify either the LAN interface or IEEE 802.11b interface when using the optional 802.11b Interface Unit. msh> ifconfig interface up Note ❒ You cannot specify the IEEE 1394 interface. The following is an example for - Ricoh CL3000e | Manual - Page 373
Instructions Administrator Reference 187 -Address ❖ Subnet Mask A number used to mathematically "mask" or hide the IP address on the network by eliminating those parts between 1 and 5. (Up to five access ranges can be registered and selected.) Example: To specify accessible IP addresses between 192. - Ricoh CL3000e | Manual - Page 374
Operating Instructions Administrator Reference 188 Note ❒ The access range restricts the workstations from which printing is possible by means of an ad- dress. If you do not - Ricoh CL3000e | Manual - Page 375
Operating Instructions Administrator Reference 189 Protocol Use the set command to allow/ web snmp ipp "up" means active and "down" means inactive. *1 Available when the optional 1394 Interface Unit is installed. Note ❒ If you prohibit remote access using TCP/IP and then log out, you cannot - Ricoh CL3000e | Manual - Page 376
Operating Instructions Administrator Reference 190 Printer status The following commands can be used to get information about the current status of the printer. msh> command Command status Information that is displayed Status of printer. Information about the print jobs. info Information about - Ricoh CL3000e | Manual - Page 377
Operating Instructions Administrator Reference 191 Reference For more information about the meaning of the data returned with this command, see p.214 "Configuring the Network Interface Board". System log information Use the syslog command to display information stored in the printer's system log. - Ricoh CL3000e | Manual - Page 378
Operating Instructions Administrator Reference 192 ❖ Display Shows the SNMP information and available protocols. msh> snmp ? msh> snmp [-p] [registered_number] read write trap no Type of access which is permitted Read only Read and write User is notified of trap messages. All access is denied. - Ricoh CL3000e | Manual - Page 379
Operating Instructions Administrator Reference 193 ❖ Protocol configuration You should use the or "read-write". Type "0" to have Network Interface Board accept requests from any host without requiring a specific type of access. Command syntax: msh> snmp number {ip | ipx} address Note ❒ To specify the - Ricoh CL3000e | Manual - Page 380
Operating Instructions Administrator Reference 194 IPP Use the ipp command to configure the IPP keeps trying to access the net- work printer to send print jobs when no connection could be made. • The "auth" setting indicates the user authorization mode. ❖ IPP timeout configuration Specifies how - Ricoh CL3000e | Manual - Page 381
Operating Instructions Administrator Reference 195 ❖ Configuring IPP user authorization Use the following command: msh> ipp user The following message appears. msh> Input user number (1 to 10): Type the number, user name and password. msh> IPP user name:user1 msh> IPP password:******* After - Ricoh CL3000e | Manual - Page 382
Operating Instructions Administrator Reference 196 Direct Printing Port The direct printing port allows printing directly from a computer, connected to the network, to the printer. Use the diprint command to change the direct printing port settings. ❖ View settings The following command displays the - Ricoh CL3000e | Manual - Page 383
Operating Instructions Administrator Reference 197 SMB Use the smb command to configure or delete the computer name or workgroup name for NetBEUI. msh >smb parameter Parameter smb - Ricoh CL3000e | Manual - Page 384
Operating Instructions Administrator Reference 198 Parameter route delete {host | net} destination of TTL is "1". A search is executed only within a local segment. If the router does not support multi-cast, the settings are not available even if the TTL value is increased. ❒ The acceptable TTL value - Ricoh CL3000e | Manual - Page 385
Operating Instructions Administrator Reference 199 Setting IEEE 802.11b To make setting for IEEE 802.11b, use the wiconfig command. Limitation ❒ You can make settings when installing the optional 802.11b Interface Unit. ❖ View settings The following command displays the current IEEE 802.11b - Ricoh CL3000e | Manual - Page 386
Operating Instructions Administrator Reference 200 Parameter ssid ID value channel frequency channel no. enc [on|off] key [key value] Value to be configured You can set for - Ricoh CL3000e | Manual - Page 387
Operating Instructions Administrator Reference 201 Parameter auth [open|shared] rate [auto|11m|5.5m|2m|1m] Value to be configured You can set the authorized mode when using - Ricoh CL3000e | Manual - Page 388
Operating Instructions Administrator Reference 202 ❖ Viewing setting The following command displays the WINS server IP address. msh> wins Example out put: wins: primary server 0.0.0.0 secondary server 0.0.0.0 Note ❒ - Ricoh CL3000e | Manual - Page 389
and IEEE 802.11b interface will have the same printer name. SNTP The printer clock can be synchronized with a NTP server clock using the Simple Network Time Protocol (SNTP). To change the SNTP settings, use the sntp command. Limitation ❒ SNTP supports the NTP servers running xnptd V3 and V4. - Ricoh CL3000e | Manual - Page 390
Operating Instructions Administrator Reference 204 ❖ Reference msh> sntp ❖ NTP Server Address Configuration You can specify the IP address of the NTP server. msh> sntp server IP_address ❖ Interval Configuration You can specify the interval at which the printer synchronizes with the operator- - Ricoh CL3000e | Manual - Page 391
Operating Instructions Administrator Reference 205 Changing the Password Use the passwd command to change the remote maintenance password. Important ❒ Be sure not to forget or lose the - Ricoh CL3000e | Manual - Page 392
the printer's status using the telnet command. ❖ telnet Use the status command. Messages Add Toner: Cyan Add Toner: Magenta Add Toner: Yellow Calibrating... Color Regist Error Energy Save Mode Hardware Problem Black PCU Hardware Problem Bypass Tray Hardware Problem Color PCU Hardware Problem DIMM - Ricoh CL3000e | Manual - Page 393
Problem Wireless Card Hex Dump Mode Offline Please Wait Processing... Ready Replace Black PCU Replace Color PCU Replace Fusing Unit Resetting Job... Toner is Almost Empty: Black Toner is Almost Empty: Cyan Toner is Almost Empty: Magenta Toner is Almost Empty: Yellow Waiting... Description An error - Ricoh CL3000e | Manual - Page 394
Operating Instructions Administrator Reference 208 Messages Warming Up... Waste Toner is Almost Full Description The printer is warming up. The waste toner is full. Printer configuration You can check the printer configuration using telnet. ❖ telnet Use the info command. Note ❒ "*" (asterisk) - Ricoh CL3000e | Manual - Page 395
Operating Instructions Administrator Reference 209 Printer Language No. Name Version Item ❖ *1 Input Tray: Name Tray X Bypass Tray Name ❖ *2 Input Tray: PaperSize Paper Size A4 (210 × 297 mm) B5JIS (182 × 257 mm) - Ricoh CL3000e | Manual - Page 396
Operating Instructions Administrator Reference 210 Paper Size 8 1/4 × 13 8 1/2 × 13 4 1/8 × 9 1/2 3 7/8 × 7 1/2 DL (110 × 220 mm) C5 Env (162 × 229 mm) 8 × 13 C6 Env (114 × 162 mm) 8K (267 × 390 - Ricoh CL3000e | Manual - Page 397
❖ *4 Output Tray: Name Standard Tray Name ❖ *5 Output Tray: Status Normal PaperExist OverFlow Error Status Operating Instructions Administrator Reference 211 Output Tray Description Description ---There is paper in the output tray Output tray is full of paper Other errors - Ricoh CL3000e | Manual - Page 398
Operating Instructions Administrator Reference 212 Understanding the Displayed Information status. • Active Printing or preparing for printing. • Waiting Waiting to be transferred to the printer. Owner Print request user name. Job Print request number. Files The name of the document. Total - Ricoh CL3000e | Manual - Page 399
The number of pages that is printed. The result of the print request. The time when the print request was received User ID that is to be configured in the printer driver. The name of the document for printing. *1 Appears the UserID and JobName information when entering the info command with the ID - Ricoh CL3000e | Manual - Page 400
Operating Instructions Administrator Reference 214 Configuring the Network Interface Board The Network Interface Board settings can be displayed by using the commands below. • telnet : Use the show - Ricoh CL3000e | Manual - Page 401
dhcp Address Netmask Broadcast Gateway Access Range[✩] *2 Operating Instructions Administrator Reference 215 Meaning AppleTalk protocol in selection. Network number. Macintosh printer name. The type of printer. Name of the zone that the printer belongs to. Up means active, Down means inactive - Ricoh CL3000e | Manual - Page 402
NDS/Bindery Packet negotiation Print job timeout Operating Instructions Administrator Reference 216 Meaning Primary WINS server address. of homepage. URL of help page. Protocol used with SNMP. Frame type. Remote printer number. Print server name. Name of the connect file server. Context of print - Ricoh CL3000e | Manual - Page 403
Channel Communication mode Rate WEP encryption Auth Encryption key Operating Instructions Administrator Reference 217 Meaning (this value is fixed) ( workgroup. Name of the computer. Comment. Share name (name of the printer type). SSID being used. Channels available for use. Channel being used. - Ricoh CL3000e | Manual - Page 404
Operating Instructions Administrator Reference 218 Item name Meaning IP over 1394 *1 *4 Device name Address setting (on/off). Shell mode Mode of the remote maintenance tool. *1 The optional 1394 Interface Unit supports TCP/IP only. *2 ✩ represents a target number between 1 and 5. *3 You can - Ricoh CL3000e | Manual - Page 405
Operating Instructions Administrator Reference 219 Message List This is a list of messages written in the printer's system log. account for this print server on the Net- Make sure that the print server is registered on the file Ware server or the password was incorrect. server. If a password is - Ricoh CL3000e | Manual - Page 406
registered in the print server. Change IP address from DHCP Server. The IP address changes when DHCP LEASE is renewed. To always assign the same IP address, set a static IP address to the DHCP server. child process exec error! (process name) Failed to start the network service. Turn the printer - Ricoh CL3000e | Manual - Page 407
Instructions Administrator Reference 221 Message Could not attach to FileServer - Ricoh CL3000e | Manual - Page 408
Operating Instructions Administrator Reference 222 Message Description and Solutions Exit pserver IEEE 802.11b current channel The current channel is displayed. The value chosen by the user is displayed in ad hoc mode. The channel used in the access point is displayed in infrastructure - Ricoh CL3000e | Manual - Page 409
Operating Instructions Administrator Reference 223 Message IEEE 802.11b mode IEEE 802.11b Tx Rate inetd start. < it does not overlap with another interface. The printer could not authenticate the name of the user attempting to cancel a job. Printing with ipp is - Ricoh CL3000e | Manual - Page 410
Instructions Administrator Reference 224 Message Description and Solutions job canceled. jobid=%d. The spooled job has been canceled due to an error or by user (NetWare) (In remote printer mode) NetWare service has started. nwstart start. (NetWare) The service for NetWare protocol stack - Ricoh CL3000e | Manual - Page 411
after checking the user name and host address (except for ROOT authorization). phy release file open failed. Replacing the Network Interface Board is required. Contact your sales or service representatives. Print queue cannot be serviced by printer 0, - Ricoh CL3000e | Manual - Page 412
. started. Direct print service has started. The print server received error during at- Cannot log in to the file server. The print server is not regtempt to log in to the network.Access to the network was istered or the password is specified. Register the print denied.Verify - Ricoh CL3000e | Manual - Page 413
WINS. WINS Server= NetBIOS Name= The printer name has been successfully registered in . WINS wrong scopeID The scope ID is wrong. Specify the correct scope ID. write error occurred. (diskfull) The hard disk became full while the spool - Ricoh CL3000e | Manual - Page 414
printer doing the filtering is printed on the printer configuration page. For more information about printing a configuration page, see the Option Setup Guide that comes with the printer. ❒ For more information about configuring the printer if the router cannot be configured, see the instructions - Ricoh CL3000e | Manual - Page 415
Operating Instructions Administrator Reference 229 Configuring the printer with NetWare A Follow the setup method in this manual, configure the file server. B Set the Frame type for a NetWare environment. Reference For more information about selecting a Frame type, see p.71 "Configuring the NetWare - Ricoh CL3000e | Manual - Page 416
Operating Instructions Administrator Reference 230 PostScript Printing from Windows When printing PostScript from Windows, see the PostScript 3 Supplement. NetWare Printing Form Feed You should not configure the form feed on NetWare. The form feed is controlled by the printer driver on Windows. If - Ricoh CL3000e | Manual - Page 417
under a DHCP environment. You can also register the printer NetBIOS name on a WINS server when it is running. Limitation ❒ DHCP cannot be used with IEEE 1394 (IP over 1394). Set a fixed IP address with the control panel, telnet or a Web browser. • See the Setup Guide. • See p.185 "TCP/IP address - Ricoh CL3000e | Manual - Page 418
Operating Instructions Administrator Reference 232 Note ❒ Printers that register the printer NetBIOS name on a WINS server must be configured for the WINS server. See p.201 "WINS". ❒ Supported DHCP server is Windows NT 4.0 Server Service Pack 4 or later, Windows 2000 Server and NetWare 5. ❒ If you - Ricoh CL3000e | Manual - Page 419
on. This enables the NetBIOS name of the printer to be specified from SmartNetMonitor for Admin even under a DHCP environment. This section describes how to configure the WINS server. Note ❒ The WINS Server is supported with Windows NT 4.0 Server Service Pack 4 or later, and Windows 2000 Servers - Ricoh CL3000e | Manual - Page 420
Operating Instructions Administrator Reference 234 E Click TCP/IP. F Set WINS to active and enter the IP address of the WINS server in Primary WINS Server and Secondary WINS Server. G Click Refresh. H Exit the Web browser. Using telnet A Connect to the remote printer using telnet. B Use the set - Ricoh CL3000e | Manual - Page 421
Operating Instructions Administrator Reference 235 Memory Capacity and Paper Size Standard 128 MB (Standard 192 MB (Standard + 64 MB) + 64 MB) + 128 MB) *1 To set resolution from each printer driver is as follows: • RPCS: [600 x 600 dpi] on [Resolution] • PCL 5c: [600 dpi] on [Resolution] • - Ricoh CL3000e | Manual - Page 422
Instructions Administrator Reference 236 *2 To set resolution from each printer driver is as follows: • RPCS: [1200 x 600 dpi] on [Resolution] • PostScript 3: [600dpi] on [Resolution] and [Standard] on [Gradation] Reference For more information about how to set the printer driver, see printer driver - Ricoh CL3000e | Manual - Page 423
Specifications Operating Instructions Administrator Reference 237 Mainframe ❖ Configuration: Desktop ❖ Print Process: Laser beam scanning & Electrophotographic printing Mono component toner development 4 drums tandem method ❖ Printing Speed: Monochrome: Maximum 20 pages per minute (A4K), Maximum - Ricoh CL3000e | Manual - Page 424
Operating Instructions Administrator Reference 238 Optional: • IEEE 1394 (SCSI print, IP over 1394) • IEEE 802.11b (Wireless LAN) • BluetoothTM • Basic Standard: • Parallel (Bidirectional IEEE1284) • USB (USB1.1, USB2.0 *1 ) *1 It requires a USB computer port and cable that support Optional: • - Ricoh CL3000e | Manual - Page 425
Operating Instructions Administrator Reference 239 ❖ Fonts: PCL 5c Agfa Font 35 Manager Intellifonts, 10 TrueType fonts, and 1 Bitmap font Agfa Font Manager available, 31 fonts PostScript 3 136 fonts ❖ Paper size: See "Paper and Other Media" in the Maintenance Guide. ❖ Paper Weight: See "Paper - Ricoh CL3000e | Manual - Page 426
(15.5 inches) ❖ Weight: Approximately 30 kg (66.1 lb) (toner cartridge and power cord included) ❖ Warm-up Time: Less than 30 seconds (23°C, 73F) *1 *1 When no error. ❖ Paper Input Capacity: Standard Paper Tray Bypass Tray Optional Paper Feed Units 530 sheet tray *1 100 sheet *2 530 sheet paper - Ricoh CL3000e | Manual - Page 427
Instructions Administrator Reference 241 ❖ Paper Output Capacity: Standard 250 sheets (80 g/m2 (20 lb.bond)) ❖ Memory: Standard 64 MB, up to 384 MB (with the optional Memory Unit use NetBEUI, use the SmartNetMonitor for Client port. Options PAPER FEED UNIT Type 3000 ❖ Dimensions (W × D × H): 410 × - Ricoh CL3000e | Manual - Page 428
Operating Instructions Administrator Reference 242 AD440 ❖ Dimensions (W × D × H): 355 × 237 × 69 mm (12 bond) ❖ Weight: Less than 0.74 kg (1.6 lb. bond) Printer Hard Disk Type 3000 ❖ Storage Capacity (Formatted): 10 GB ❖ Specifications: • Spool print data to collate • Spool Sample/Locked Print data - Ricoh CL3000e | Manual - Page 429
them, use Printer Utility for Mac. Memory Unit Type C 64/128/256MB ❖ Module Type: SO-DIMM (Small Outline Dual-in-line Memory Module) ❖ Memory Type: SDRAM (Synchronous Dynamic RAM) ❖ Number of Pins: 144 pins User Account Enhance Unit Type B ❖ Capacity: 64 KB ❖ Specifications: Store User Code (Up - Ricoh CL3000e | Manual - Page 430
Instructions Administrator Reference 244 Network Interface Board Type 3000 ❖ Topology: Ethernet (10Base-T/100Base-TX) ❖ Protocols: TCP/IP, NetBEUI, IPX/SPX, AppleTalk ❖ Interface Connector: RJ45 ❖ Required Cable: STP (Shielded Twisted-Pair) cable Category / Type 5 or better 1394 Interface Unit - Ricoh CL3000e | Manual - Page 431
: Non power supply Cable Power repeated (IEEE 1394a-2000 compliant) 802.11b Interface Unit TypeA (R-WL11) ❖ Transmission Spec.: Based on IEEE 802.11b (Wireless LAN) ❖ Protocol: TCP/IP, NetBEUI, IPX/SPX, AppleTalk Note ❒ SmartNetMonitor and WebStatusMonitor are supported. ❖ Data Transfer Speed: Auto - Ricoh CL3000e | Manual - Page 432
Operating Instructions Administrator Reference 246 ❖ Frequency Range: • Inch version: 2412-2462 Mhz (1-11 channels) • Metric version: 2412-2472 Mhz (1-13 channels) ❖ Transmittable Distance: 1Mbps 400m *1 2Mbps 270m *1 5. - Ricoh CL3000e | Manual - Page 433
Operating Instructions Administrator Reference 247 Information about Installed Software expat Use of the 1.95.2"), is subject to the following conditions: The product manufacturer provides warranty and support to the software of the product including expat 1.95.2 and the product manufacturer allows - Ricoh CL3000e | Manual - Page 434
Operating Instructions Administrator Reference 248 JPEG LIBRARY • The software installed on this product is based in part on the work of the Independent JPEG Group. NetBSD Copyright Notice of NetBSD For all users to use this product: This product contains NetBSD operating system: For the most part, - Ricoh CL3000e | Manual - Page 435
Instructions Administrator Reference 249 D Neither the name of The NetBSD Foundation nor the names of its contributors may be used to endorse or promote products derived from this software without specific NOT LIMITED TO, PROCUREMENT OF SUBSTITUTE GOODS OR SERVICES; LOSS OF USE, DATA, OR PROFITS; OR - Ricoh CL3000e | Manual - Page 436
Operating Instructions Administrator Reference 250 • This product includes software developed by Christopher G. Demetriou. • This product includes software developed by TooLs GmbH. • This product includes software developed by - Ricoh CL3000e | Manual - Page 437
Operating Instructions Administrator Reference 251 1394 Interface Unit Type 108 SmartNetMonitor for Admin, 109 Web Browser, 111 Color Demo Page, 129 Color Regist., 136 community name, 192 Config. Page, 129 the Status of Printer, 113 SmartNetMonitor for Admin, 113 SmartNetMonitor for Client, 114 Web - Ricoh CL3000e | Manual - Page 438
Operating Instructions Administrator Reference 252 E Energy Saver 1, 149 E.Saver2 OnOff, 149 E. Saver2 Timer, 149 Escape key, 121 Ext. A4 Width, 171 F Font Number, 171 Font Pitch, 171 fonts, 239 Font Source, 171 Form Lines, 171 G Getting Printer Information over the Network, 206 H HDD Format, 136 - Ricoh CL3000e | Manual - Page 439
Reset, 136 Making Printer Settings with the Control Panel, 116 memory, 241 Memory Capacity and Paper Size, 235 Memory Overflow, 149 Memory Unit Type C 64 Network Interface Board Type 3000, 244 Network Setup, 159 NIB, 241 O On Line key, 121 options, 241 Orientation, 171 P Page Size, 149 Paper Input, - Ricoh CL3000e | Manual - Page 440
Instructions Administrator Reference 254 precautions, 228 Print Area, 136 Printer Hard Disk Type 3000, 242 Printer Lang., 149 printer status, 190 Prt. Err Report, 149 PS Config. Page, 129 Pure IP, 86 R Registration, 136 remote printer sntp, 203 specifications, 237 Spool Printing, 149 subnet mask, 187 - Ricoh CL3000e | Manual - Page 441
Operating Instructions Administrator Reference 255 T TCP/IP for Printing Windows 2000, 14 Windows NT 4.0, 52 Windows XP, 34 telnet, 183 Autonet, 202 WINS, 201 Tray Locking, 122 Tray Priority, 122 U Unit of Measure, 149 USB Setting, 159 User Account Enhance Unit Type B, 243 Using a Web Browser, 101 - Ricoh CL3000e | Manual - Page 442
Operating Instructions Administrator Reference 256 Copyright © 2002 - Ricoh CL3000e | Manual - Page 443
Operating Instructions Administrator Reference 257 EE GB G081-6620 - Ricoh CL3000e | Manual - Page 444
Operating Instructions Client Reference 1 Introduction ...7 How to Read This Manual ...9 Confirming a Printer Driver 39 Installing the PostScript Printer Driver...41 Installing the Printer Driver Using USB 43 Windows 98/Me-Installing the Printer Driver Using USB 43 Installing the Printer Driver - Ricoh CL3000e | Manual - Page 445
Operating Instructions Client Reference 2 2. Windows 2000 Configuration Printing with a Print Server ... Printer Driver 72 Installing the PostScript Printer Driver...74 Installing the Printer Driver Using USB 77 Windows 2000-Installing the Printer Driver Using USB 77 Installing the Printer Driver - Ricoh CL3000e | Manual - Page 446
Operating Instructions Client Reference 3 Installing the Printer Driver Using IEEE 1394 110 Printing with SCSI Print ...110 Printing with IP over 1394...113 Setting Up Options ...115 4. Windows NT 4.0 Configuration Printing with a Print - Ricoh CL3000e | Manual - Page 447
Operating Instructions Client Reference 4 6. NetWare Configuration Windows 95/98/Me ...159 Windows 2000 ...162 Windows XP...165 Windows NT 4.0...168 7. Software and Utilities Included on the CD-ROM Software and Utilities Included on the CD-ROM 171 Printer Drivers for This Printer...173 - Ricoh CL3000e | Manual - Page 448
Sets ...224 Deleting a Sample Print File...226 Checking the Error Log ...228 Locked Print...230 Entering the Password ...232 Deleting the Locked Print File...234 Checking the Error log...236 10.Troubleshooting Checking the Printer Status ...238 SmartNetMonitor for Client ...238 Web Browser ...239 - Ricoh CL3000e | Manual - Page 449
Operating Instructions Client Reference 6 11.Appendix Color Guide ...240 Color Printing Basics ...240 Collate ...243 INDEX ...244 - Ricoh CL3000e | Manual - Page 450
read and follow the instructions in this manual. Please keep this manual in a handy place near the machine. Please read the Safety Information before using this machine. It contains important information related to USER SAFETY and PREVENTING EQUIPMENT PROBLEMS. Trademarks AppleTalk, EtherTalk - Ricoh CL3000e | Manual - Page 451
Operating Instructions Client Reference 8 • The product names of Windows NT® 4.0 are as follows: Microsoft® Windows NT® Server 4.0 • Microsoft® Windows NT® Workstation 4.0 - Ricoh CL3000e | Manual - Page 452
Client Reference How to Read This Manual 9 Symbols In this manual, the following symbols are used: R WARNING: This symbol indicates a potentially hazardous situation which, if instructions are not followed, could result in death or serious injury. R CAUTION: This symbol indicates a potentially - Ricoh CL3000e | Manual - Page 453
Operating Instructions Client Reference 10 [] Keys that appear on the machine's panel display. Keys and buttons that appear on the computer's display. {} Keys built into the machine's control panel. Keys on the computer's keyboard. - Ricoh CL3000e | Manual - Page 454
Operating Instructions Client Reference 11 Confirming a Network Environment Windows 2000, Windows XP, Windows NT (Server) NetWare (Server) Windows 95/98/Me Windows 2000 Windows XP Windows NT NetWare (Client) Macintosh UNIX ❖ Connecting Printer and Computer • Network connection (Ethernet cable, - Ricoh CL3000e | Manual - Page 455
Operating Instructions Client Reference 12 Windows Configuration ❖ Connecting a Print Server Print Server Windows 2000, Windows XP and Windows NT 4.0 Print Server Windows 95 /98/Me Windows 2000 - Ricoh CL3000e | Manual - Page 456
Operating Instructions Client Reference 13 ❖ Network Connection • Ethernet, IEEE 1394 (IP over 1394) Windows 95 /98/Me Windows 2000 Windows XP Windows NT 4.0 Macintosh - Ricoh CL3000e | Manual - Page 457
• IEEE 802.11b ❖ad hoc mode Operating Instructions Client Reference 14 ❖infrastructure mode access point - Ricoh CL3000e | Manual - Page 458
Ethernet Interface IEEE 802.11b 1 ❍ IEEE 1394 (IP over 1394) ❍ × × × ❍ means that the protocol is supported. × means that the protocol is not supported. *1 If the optional 802.11b Interface Unit Type A has been installed, you cannot use the ad hoc mode. • See p.25 "Printing without Using - Ricoh CL3000e | Manual - Page 459
Operating Instructions Client Reference 16 ❖ USB Connection • See p.43 "Installing the Printer Driver Using USB" in "Windows 95/ 98/ Me Configuration". • See p.77 "Installing the Printer Driver Using USB" in "Windows 2000 Configuration". • See p.109 "Installing the Printer Driver Using USB" in " - Ricoh CL3000e | Manual - Page 460
Operating Instructions Client Reference 17 ❖ IEEE 1394 Connection • See p.45 "Installing the Printer Driver Using IEEE 1394" in "Windows 95/ 98/ Me Configuration". • See p.78 "Installing the Printer Driver Using IEEE 1394" in "Windows 2000 Configuration". • See p.110 "Installing the Printer Driver - Ricoh CL3000e | Manual - Page 461
Operating Instructions Client Reference 18 Macintosh Configuration See p.145 "Macintosh Configuration". UNIX Configuration Concerning UNIX printing information, please visit our Web site or consult your authorized reseller. - Ricoh CL3000e | Manual - Page 462
Operating Instructions Client Reference 1. Windows 95/98/Me Configuration 19 Printing with a Print Server as a print server. To print from Windows 95/98/Me, you must install the printer driver and change the printer port to the print server. Windows 2000 Windows XP Windows NT 4.0 Print Server - Ricoh CL3000e | Manual - Page 463
Operating Instructions Client Reference 20 Installing the PCL 5c or RPCS Printer Driver Preparation To use the print server, install the printer driver by selecting "Network printer server", and then select the Windows 2000, Windows XP or Windows NT 4.0 shared printer. For more information about how - Ricoh CL3000e | Manual - Page 464
Operating Instructions Client Reference 21 D Select [PCL/RPCS Printer Drivers]. E The software license agreement appears in the [License Agreement] dialog box. After reading through all of the contents, click [I accept the agreement] to agree with - Ricoh CL3000e | Manual - Page 465
Operating Instructions Client Reference 22 N Configure the User Code and default printer as necessary. ❖ User Code The procedure to specify the "User Code" may differ depending on the printer language. • RPCS You can specify the "User Code" when installing the printer driver. You cannot register or - Ricoh CL3000e | Manual - Page 466
Operating Instructions Client Reference 23 Installing the PostScript Printer Driver A Close all applications that are running. B Insert the CD-ROM into the CD-ROM drive. Auto Run will start the installer. Important ❒ Never have two versions of the same printer driver installed on your system at the - Ricoh CL3000e | Manual - Page 467
test page, and then click [Finish]. The installation is complete. Note ❒ You can specify the "User Code" with the Printer Driver Properties after installing the printer driv- er. See printer driver's Help. Reference For more information about option settings, see p.47 "Setting Up Options". M Restart - Ricoh CL3000e | Manual - Page 468
the printer driver. Configuring the Protocols Configuring TCP/IP and IPP for Printing Follow these instructions to configure the printer and Windows make the above settings, see "Configuring the printer for the Network" in the Quick Installation Guide. If DHCP is used to assign IP addresses - Ricoh CL3000e | Manual - Page 469
Operating Instructions Client Reference 26 Note ❒ After setting the IP address, use the ping command to confirm that it has been set correctly. A Windows 95/98 Click [ - Ricoh CL3000e | Manual - Page 470
instructions to configure the printer and Windows 95/98/Me to use the NetBEUI protocol. Limitation ❒ To use NetBEUI, use the SmartNetMonitor for Client port. ❖ Configuring the printer Configure the printer see "Configuring the printer for the Network" in the Quick Installation Guide. ❖ Configuring a - Ricoh CL3000e | Manual - Page 471
Operating Instructions Client Reference 28 Installing Software Preparation If you are not using the print server, install SmartNetMonitor for Client, and then install the printer driver by selecting "SmartNetMonitor for Client". This enables peer-to-peer network printing with the TCP/IP, NetBEUI, or - Ricoh CL3000e | Manual - Page 472
click [Next >]. F Follow the instructions on the screen. Note ❒ If you are required to restart the computer after the installation of SmartNetMonitor for Admin, restart the computer and continue with necessary configurations. Installing the PCL 5c or RPCS Printer Driver A Close all applications that - Ricoh CL3000e | Manual - Page 473
Operating Instructions Client Reference 30 C Select a language to printer driver. G Check [Printer Name] to select the model(s) of printer you want to use. To change the printer name, change it in the [Change settings for 'Printer Name'] box. H Double-click the printer name to display the printer - Ricoh CL3000e | Manual - Page 474
Operating Instructions Client Reference 31 I Select SmartNetMonitor. SmartNetMonitor A Select [Port:], and then click [Add]. B Select [SmartNetMonitor], and then click [OK]. C Select a printer you want to use. ❖ TCP/IP A Click [TCP/IP], and then click [Search]. Available printers will be listed. B - Ricoh CL3000e | Manual - Page 475
Instructions Client Reference 32 Note ❒ Printers that respond to a broadcast from the computer will be displayed. To print to a printer not omit this, the address typed in [Printer URL] will be set as the IPP port name. D If a proxy server and IPP user name are used, click [Detailed Settings - Ricoh CL3000e | Manual - Page 476
Operating Instructions Client Reference 33 K Configure the User Code and default printer as necessary. ❖ User Code The procedure to specify the "User Code" may differ depending on the printer language. • RPCS You can specify the "User Code" when installing the printer driver. You cannot register or - Ricoh CL3000e | Manual - Page 477
Operating Instructions Client Reference 34 Installing the PostScript Printer Driver A Close all applications that are running. B Insert the CD-ROM into the CD-ROM drive. Auto Run will start the installer. Important ❒ Never have two versions of the same printer driver installed on your system at the - Ricoh CL3000e | Manual - Page 478
Operating Instructions Client Reference 35 E Click [Next]. F Click [Local Printer], and then click [Next]. A dialog box for selecting the printer manufacturer and model name appears. G Click to select the name of the printer whose driver you want to install, and then click [Next]. H In the [ - Ricoh CL3000e | Manual - Page 479
Operating Instructions Client Reference 36 B Click the printer you want to use, and then click [OK]. Note ❒ Printers that respond to an IP broadcast from the computer will be displayed. To print to a printer not listed here, click [Specify Address], and then type the IP address or host name. ❒ You - Ricoh CL3000e | Manual - Page 480
that the selected port is highlighted in [Printer to the following port], and then click [OK]. Note ❒ You can specify the "User Code" with the Printer Driver Properties after installing the printer driv- er. See the Help file for the printer driver. Reference For more information about option - Ricoh CL3000e | Manual - Page 481
Instructions Client Reference 38 R Restart the computer. Changing Port Settings Follow the steps to change SmartNetMonitor for Client settings, such as the proxy server settings or IPP URL. Note ❒ There are no settings for the NetBEUI protocol. A From the [Printers can configure User Settings, Proxy - Ricoh CL3000e | Manual - Page 482
Operating Instructions Client Reference 39 Printing with Parallel Connection To use a printer connected to the parallel interface, select "LPT1:" when installing the printer driver. Installing the PCL 5c or RPCS Printer Driver A Close all applications that are running. B Insert the CD-ROM into the - Ricoh CL3000e | Manual - Page 483
language. • RPCS You can specify the "User Code" when installing the printer driver. You cannot register or edit the "User Code" from the Printer Driver dialog box. To change the "User Code", you must uninstall the printer driver, and then register the new "User Code" during the re-install process - Ricoh CL3000e | Manual - Page 484
Operating Instructions Client Reference 41 K Click [Continue] to start printer driver installation. L When the [Select Program] dialog box appears, click [Finish]. M When the installation completion dialog box appears, click [Finish]. N Set up the options. Note ❒ You - Ricoh CL3000e | Manual - Page 485
Operating Instructions Client Reference 42 C Select a language to change the interface language, and then ), Suomi (Finnish), Svenska (Swedish) Note ❒ The printer driver with the selected language will be installed. The printer driver will be installed in English if you select the following - Ricoh CL3000e | Manual - Page 486
Client Reference 43 Installing the Printer Driver Using USB This section describes basic instructions for installing the printer drivers using USB. The printer drivers can be installed from the provided CD-ROM. Important ❒ Be sure that all other applications are closed and that the computer - Ricoh CL3000e | Manual - Page 487
Operating Instructions Client Reference 44 D Insert the CD-ROM provided into the CD-ROM If the CD-ROM drive is D, the folder will be "D:\Drivers\USBPRINT\WIN98ME". F Confirm the printer driver location, and then click [Next>]. "USB Printing Support" will be installed. G Click [Finish]. H Follow the - Ricoh CL3000e | Manual - Page 488
Client Reference 45 Installing the Printer Driver Using IEEE 1394 This section gives basic instructions for installing the printer drivers using IEEE 1394 interface. The printer drivers can be installed from the CD-ROM provided. Preparation To use a printer connected to the IEEE 1394 (IP - Ricoh CL3000e | Manual - Page 489
Operating Instructions Client Reference 46 Installing the Printer Driver To Print using SmartNetMonitor. See p.25 "Printing without Using a Print Server". Note ❒ When [Add New Hardware Wizard] starts every time you restart the computer with an operating system, which does not support SCSI print or - Ricoh CL3000e | Manual - Page 490
Click the [Accessories] tab. Note ❒ If you use the RPCS printer driver, Click [Printer Configuration...] under the Print Settings tab. E Select options you have the printer by a computer. You can also confirm the printer status from your computer. • Bidirectional transmission is supported by - Ricoh CL3000e | Manual - Page 491
printer driver supports bidirectional transmission and updates the printer status automat- ically. ❒ The PCL 5c printer driver supports bidirectional transmission, you can update the printer status manually. ❒ The PostScript 3 printer driver does not support bidirectional transmission. To support - Ricoh CL3000e | Manual - Page 492
Operating Instructions Client Reference 49 ❖ When connecting with IEEE 1394 • The printer must be connected to the IEEE 1394 connector of a computer using the IEEE 1394 interface cable. ❖ When connecting with USB The printer must be connected to the USB connector of a computer using the USB - Ricoh CL3000e | Manual - Page 493
Operating Instructions Client Reference 50 Using Adobe PageMaker Version 6.0, 6.5 or 7.0 If you PPD file to the PageMaker folder. The PPD file is the file with extension ".ppd" in the folder "DRIVERS\PS\WIN9X_ME\(Language)\DISK1\" on the CD-ROM. The "WIN9X_ME" folder, inside the "PS" folder is for - Ricoh CL3000e | Manual - Page 494
Operating Instructions Client Reference 2. Windows 2000 Configuration 51 Printing with a Print Server Printing XP, Windows NT 4.0. To print from Windows 2000, you must install the printer driver and change the printer port to the print server. Windows 2000 Windows XP Windows NT 4.0 Print Server - Ricoh CL3000e | Manual - Page 495
Operating Instructions Client Reference 52 Installing the PCL 5c or RPCS Printer Driver A Close all applications that are running. B Insert the CD-ROM into the CD-ROM drive. Auto Run will start the installer. Important ❒ Never have two versions of the same printer driver installed on your system at - Ricoh CL3000e | Manual - Page 496
:]. N Configure the User Code and default printer as necessary. ❖ User Code When using RPCS, you can specify the "User Code" with the Printer Driver Properties after installing the printer driver. See printer driver's Help. ❖ Default Printer Check [Default Printer] to set the printer as the default - Ricoh CL3000e | Manual - Page 497
Operating Instructions Client Reference 54 O Click [Continue] to start printer driver installation. Note ❒ During installation, the [Digital option settings, see p.82 "Setting Up Options". Installing the PostScript Printer Driver A Close all applications that are running. B Insert the CD-ROM - Ricoh CL3000e | Manual - Page 498
Operating Instructions Client Reference 55 Note ❒ Auto Run might not automatically work with : Cestina, Magyar, Polski, Portugues, Suomi D Click [PostScript 3 Printer Driver]. "Add Printer Wizard" starts. E Click [Next]. F Click [Network printer], and then click [Next]. G Click [Next]. H Double-click - Ricoh CL3000e | Manual - Page 499
Instructions Client Reference 56 K Click [Next>]. Configure the default printer as necessary. Check [Yes] to set the printer as the default printer. L Click [Finish]. The installation is complete. Note ❒ You can specify the "User Code" with the Printer Driver Properties after installing the printer - Ricoh CL3000e | Manual - Page 500
PCL 5c or RPCS Printer Driver" or p.66 "Installing the PostScript Printer Driver". Note ❒ If you want to use "LPR Port", "Print Services for UNIX" must be installed. Configuring the Protocols Configuring TCP/IP and IPP for Printing Follow these instructions to configure the printer and Windows 2000 - Ricoh CL3000e | Manual - Page 501
Operating Instructions Client Reference 58 Reference For more information about how to make the above settings, see "Configuring the printer for the Network" in the Quick Installation Guide. If DHCP is used to assign IP addresses, see Appendix, "When Using DHCP" in the Administrator Reference. Note - Ricoh CL3000e | Manual - Page 502
the network administrator. Configuring NetBEUI for Printing Follow these instructions to configure Network Interface Board and Windows 2000 to use make the above settings, see "Configuring the printer for the Network" in the Quick Installation Guide. ❖ Configuring a Windows 2000 computer Follow - Ricoh CL3000e | Manual - Page 503
Operating Instructions Client Reference 60 Note ❒ If the check box of the NetBEUI protocol is you are not using the print server, install SmartNetMonitor for Client, and then install the printer driver by selecting "SmartNetMonitor for Client". This enables peer-to-peer network printing with the TCP - Ricoh CL3000e | Manual - Page 504
click [Next >]. F Follow the instructions on the screen. Note ❒ If you are required to restart the computer after the installation of SmartNetMonitor for Admin, restart the computer and continue with necessary configurations. Installing the PCL 5c or RPCS Printer Driver A Close all applications that - Ricoh CL3000e | Manual - Page 505
Operating Instructions Client Reference 62 D Select [PCL/RPCS Printer Drivers]. E The software license agreement appears in the [License Agreement] dialog box. After reading through all of the contents, click [I accept the agreement] to agree with - Ricoh CL3000e | Manual - Page 506
Operating Instructions Client Reference 63 C Select a printer you want to use. ❖ TCP/IP A Click [TCP/IP], and then click [Search]. Available printers will be listed. B Click the printer you want to use, and then click [OK]. Note ❒ Printers that respond to an IP broadcast from the computer will be - Ricoh CL3000e | Manual - Page 507
Type a different name from those of any existing port name. If you omit this, the address typed in [Printer URL] will be set as the IPP port name. D If a proxy server and IPP user name are used, click [Detailed Settings], and then configure the necessary settings. Note ❒ For more information about - Ricoh CL3000e | Manual - Page 508
J Make sure the location for the selected printer is shown after [Port:]. K Configure the default printer as necessary. ❖ Default Printer Check [Default Printer] to set the printer as the default printer. L Click [Continue] to start printer driver installation. M When the [Select Program] dialog box - Ricoh CL3000e | Manual - Page 509
Operating Instructions Client Reference 66 Installing the PostScript Printer Driver A Close all applications that are running. B Insert the CD-ROM into the CD-ROM drive. Auto Run will start the installer. Important ❒ Never have two versions of the same printer driver installed on your system at the - Ricoh CL3000e | Manual - Page 510
Operating Instructions Client Reference 67 E Click [Next >]. F Select [Local printer], and then click [Next>]. G Select the port you want to use. • SmartNetMonitor • IP broadcast from the computer will be displayed. To print to a printer not listed here, click [Specify Address], and then type the IP - Ricoh CL3000e | Manual - Page 511
necessary, type the names to distinguish the printer in [IPP Port Name]. Type a different name from those of any existing port name. If you omit this, the address typed in [Printer URL] will be set as the IPP port name. D If a proxy server and IPP user name are used, click [Detailed Settings], and - Ricoh CL3000e | Manual - Page 512
Operating Instructions Client Reference 69 Note ❒ For more information about these settings, of printer or print queue on that server" box, and then click [OK]. H Confirm to select the name of the printer whose driver you want to install, and then click [Next >]. I Change the name of the printer if - Ricoh CL3000e | Manual - Page 513
Instructions Client Reference 70 J Click [Next >]. K Select whether or not you want to print a test page, and then click [Next>]. L Click [Finish]. Start printer driver can specify the "User Code" with the printer properties after installing the printer driver. See printer driver's Help. Reference - Ricoh CL3000e | Manual - Page 514
Instructions Client Reference 71 Changing Port Settings Follow the steps to change SmartNetMonitor for Client settings, such as the proxy server settings or IPP URL. Note ❒ There are no settings for the NetBEUI protocol. A From the [Printers] window, click the icon of the printer User Settings - Ricoh CL3000e | Manual - Page 515
Operating Instructions Client Reference 72 Printing with Parallel Connection Preparation To use a printer connected to the parallel interface, select "LPT1:" when installing the printer driver. Installing the PCL 5c or RPCS Printer Driver A Close all applications that are running. B Insert the CD- - Ricoh CL3000e | Manual - Page 516
Operating Instructions Client Reference 73 D Select [PCL/RPCS Printer Drivers]. E The software license agreement appears in the [License Agreement] dialog box. After reading through all of the contents, click [I accept the agreement] to agree with - Ricoh CL3000e | Manual - Page 517
Operating Instructions Client Reference 74 L When the [Select Program] dialog box appears, click Important ❒ Never have two versions of the same printer driver installed on your system at the same time. When upgrading to a new version of the printer driver, delete the old version, and then install - Ricoh CL3000e | Manual - Page 518
Operating Instructions Client Reference 75 C Select a language to change the interface language, and then ), Suomi (Finnish), Svenska (Swedish) Note ❒ The printer driver with the selected language will be installed. The printer driver will be installed in English if you select the following - Ricoh CL3000e | Manual - Page 519
Operating Instructions Client Reference 76 J Set up the options. Reference For more information about option settings, see p.82 "Setting Up Options". K Restart the computer. - Ricoh CL3000e | Manual - Page 520
Support] will be installed automatically. If the printer driver is already installed, the "plug and play" is displayed, and the printer with its port directed to the USB cable is added to the "Printers" folder. A Install the printer driver by referring to the instructions for installing the printer - Ricoh CL3000e | Manual - Page 521
. Important ❒ The optional 1394 Interface Unit Type 4510 can only be used with Service Pack 1 (SP1) or later. If the Service Pack is not installed, the connectable SCSI print device in a 1394 bus is only one. The client cannot install the printer driver without using an account with Administrators - Ricoh CL3000e | Manual - Page 522
port, select the "1394_00n" port by following the procedures of installing a printer driver. ❒ When the printer connected via the optional 1394 Interface Unit Type 4510 is installed properly, the appearance of the icon in the printer folder changes according to whether the cable is plugged in or not - Ricoh CL3000e | Manual - Page 523
Operating Instructions Client Reference 80 G Select the printer driver that you want to use. The following are locations where printer driv- ers are stored: • RPCS \DRIVERS\RPCS\WIN2K_XP\(Language)\DISK1 • PCL 5c \DRIVERS\PCL5C\WIN2K_XP\(Language)\DISK1 • PostScript 3 \DRIVERS\PS\WIN2K_XP\(Language - Ricoh CL3000e | Manual - Page 524
Instructions Client Reference 81 ❒ If you do not want to install the printer when [Found New Hardware Wizard] starts with an operating system, which supports Hardware Wizard in the control Panel can be able to complete the driver installations.] check box, and then click [Finish]. ❒ When [Found - Ricoh CL3000e | Manual - Page 525
is automatically sent to the printer by a computer. You can also confirm the printer status from your computer. • Bidirectional transmission is supported by Windows 95/98/Me, Windows 2000, Windows XP and Windows NT 4.0. • If you use the RPCS printer driver and bidirectional transmission is enabled - Ricoh CL3000e | Manual - Page 526
Operating Instructions Client Reference 83 Note ❒ The RPCS printer driver supports bidirectional transmission and updates the printer status automat- ically. ❒ The PCL 5c printer driver supports bidirectional transmission, you can update the printer status manually. ❒ The PostScript 3 printer driver - Ricoh CL3000e | Manual - Page 527
Operating Instructions Client Reference 84 ❖ When connecting with IEEE 1394 • The printer must be connected to the IEEE bidirectional support] must be selected and [Enable printer pooling] must not be selected on the [port] tab with RPCS printer driver. ❖ When connecting with USB The printer must be - Ricoh CL3000e | Manual - Page 528
Operating Instructions Client Reference 3. Windows XP Configuration 85 Printing with a Print Server Printing XP, Windows NT 4.0. To print from Windows XP, you must install the printer driver and change the printer port to the print server. Windows 2000 Windows XP Windows NT 4.0 Print Server Windows - Ricoh CL3000e | Manual - Page 529
Operating Instructions Client Reference 86 Installing the PCL 5c or RPCS Printer Driver A Close all applications that are running. B Insert the CD-ROM into the CD-ROM drive. Auto Run will start the installer. Important ❒ Never have two versions of the same printer driver installed on your system at - Ricoh CL3000e | Manual - Page 530
sure the location for the selected printer is shown after [Port:]. N Configure the default printer as necessary. ❖ Default Printer Check [Default Printer] to set the printer as the default printer. O Click [Continue] to start printer driver installation. Note ❒ During installation, the [Hardware - Ricoh CL3000e | Manual - Page 531
Operating Instructions Client Reference 88 P When the [Select Program] dialog box appears, click [Finish]. Q For more information about option settings, see p.115 "Setting Up Options". Installing the PostScript Printer Driver A Close all applications that are running. B Insert the CD-ROM into the CD- - Ricoh CL3000e | Manual - Page 532
Operating Instructions Client Reference 89 C Select a language to change the interface language, and to use as a print server in the "Shared printers:" window. I Select the printer you want to use, and then click [Next]. J Start printer driver installation. Note ❒ During installation, the [Hardware - Ricoh CL3000e | Manual - Page 533
Instructions Client Reference 90 K Click [Next>]. Configure the default printer as necessary. Check [Yes] to set the printer as the default printer. L Click [Finish]. The installation is complete. Note ❒ You can specify the "User Code" with the Printer Driver Properties after installing the printer - Ricoh CL3000e | Manual - Page 534
PCL 5c or RPCS Printer Driver" or p.98 "Installing the PostScript Printer Driver". Note ❒ If you want to use "LPR Port", "Print Services for UNIX" must be installed. Configuring the Protocols Configuring TCP/IP and IPP for Printing Follow these instructions to configure the printer and Windows XP to - Ricoh CL3000e | Manual - Page 535
Operating Instructions Client Reference 92 Reference For more information about how to make the above settings, see "Configuring the printer for the Network" in the Quick Installation Guide. If DHCP is used to assign IP addresses, see Appendix, "When Using DHCP" in the Administrator Reference. To - Ricoh CL3000e | Manual - Page 536
Operating Instructions Client Reference 93 D Confirm that "Internet Protocol (TCP/IP)" is selected in are not using the print server, install SmartNetMonitor for Client, and then install the printer driver by selecting "SmartNetMonitor for Client". This enables peer-to-peer network printing with the - Ricoh CL3000e | Manual - Page 537
[Next >]. F Follow the instructions on the screen. Note ❒ If you are required to restart the computer after the installation of SmartNetMonitor for Client, re- start the computer and continue with necessary configurations. Installing the PCL 5c or RPCS Printer Driver A Close all applications that - Ricoh CL3000e | Manual - Page 538
Operating Instructions Client Reference 95 C Select a language to change the interface language, a printer drivers you want to use when the "Printer Program" dialog box appears. You can select more than one printer driver. G Select the printer model(s) you want to use. To change the printer name, - Ricoh CL3000e | Manual - Page 539
Operating Instructions Client Reference 96 SmartNetMonitor A Click [Add]. B Select [SmartNetMonitor], and then click [OK]. C Select a printer you want to use. ❖ TCP/IP A Click [TCP/IP], and then click [Search]. Available printers will be listed. B Click the printer you want to use, and then click [ - Ricoh CL3000e | Manual - Page 540
Operating Instructions Client Reference 97 C As necessary, type the names to distinguish the printer in [IPP Port Name]. Type a different name from those of any existing port name. If you omit this, the address typed in [Printer URL] will be set as the IPP port name. D If a proxy server and IPP user - Ricoh CL3000e | Manual - Page 541
Operating Instructions Client Reference 98 K Configure the default printer as necessary. ❖ Default Printer Check [Default Printer] to set the printer as the default printer. L Click [Continue] to start printer driver installation. M When the [Select Program] dialog box appears, click [Finish]. Note - Ricoh CL3000e | Manual - Page 542
Operating Instructions Client Reference 99 Important ❒ Never have two versions of the same printer driver installed on your system at the same time. When upgrading to a new version of the printer driver, delete the old version, and then install the new one. Note ❒ Auto Run might not automatically - Ricoh CL3000e | Manual - Page 543
Operating Instructions Client Reference 100 SmartNetMonitor A Click [Create a new port:]. B Select [SmartNetMonitor], and then click [Next >]. C Select a printer you want to use. ❖ TCP/IP A Click [TCP/IP], and then click [Search]. Available printers will be listed. B Click the printer you want to - Ricoh CL3000e | Manual - Page 544
Instructions Client Reference 101 C As necessary, type the names to distinguish the printer in [IPP Port Name]. Type a different name from those of any existing port name. If you omit this, the address typed in [Printer URL] will be set as the IPP port name. D If a proxy server and IPP user - Ricoh CL3000e | Manual - Page 545
Operating Instructions Client Reference 102 H Confirm to select the name of the printer whose driver you want to install, and then click [Next >]. I Change the name of the printer if you want, and then click [Next >]. Configure the default printer as necessary. Check [Yes] to set the printer as the - Ricoh CL3000e | Manual - Page 546
Instructions Client Reference 103 Changing Port Settings Follow the steps to change SmartNetMonitor for Client settings, such as the proxy server settings or IPP URL. A From the [Printers] window, click the icon of the printer For IPP, you can configure User Settings, Proxy Settings and Timeout - Ricoh CL3000e | Manual - Page 547
Operating Instructions Client Reference 104 Printing with Parallel Connection Preparation To use a printer connected to the parallel interface, select "LPT1:" when installing the printer driver. Installing the PCL 5c or RPCS Printer Driver A Close all applications that are running. B Insert the CD- - Ricoh CL3000e | Manual - Page 548
Operating Instructions Client Reference 105 D Select [PCL/RPCS Printer Drivers]. E The software license agreement appears in the [License Agreement] dialog box. After reading through all of the contents, click [I accept the agreement] to agree with - Ricoh CL3000e | Manual - Page 549
Operating Instructions Client Reference 106 L When the [Select Program] dialog box appears, click [Finish]. M For more information about option settings, see p.115 "Setting Up Options". Installing the PostScript Printer Driver A Close all applications that are running. B Insert the CD-ROM into the CD - Ricoh CL3000e | Manual - Page 550
Operating Instructions Client Reference 107 C Select a language to change the interface language, whether or not you want to print a test page, and then click [Finish]. Start printer driver installation. Note ❒ During installation, the [Hardware Installation] dialog box may appear. In this case - Ricoh CL3000e | Manual - Page 551
Operating Instructions Client Reference 108 K Set up the options. Reference For more information about option settings, see p.115 "Setting Up Options". L Restart the computer. - Ricoh CL3000e | Manual - Page 552
USB Printing Support] will be installed automatically. If the printer driver is already installed, the "plug and play" is displayed, and the printer with printer driver by following the procedure below. A Install the printer driver by referring to the instructions for installing the printer driver - Ricoh CL3000e | Manual - Page 553
Client Reference 110 Installing the Printer Driver Using IEEE 1394 This section gives basic instructions for installing the printer drivers using IEEE 1394 interface. The printer drivers can be installed from the CD-ROM provided. Important ❒ Be sure that all other applications are closed - Ricoh CL3000e | Manual - Page 554
Operating Instructions Client Reference 111 Installing the Printer Driver Note ❒ If you want to install another printer driver after setting the "1394_00n" port, select the "1394_00n" port by following the procedures of installing a printer driver. ❒ When the printer connected via the optional 1394 - Ricoh CL3000e | Manual - Page 555
Operating Instructions Client Reference 112 F Select the printer driver that you want to use. The following are locations where printer driv- ers are stored: • RPCS \DRIVERS\RPCS\WIN2K_XP\(Language)\DISK1 • PCL 5c \DRIVERS\PCL5C\WIN2K_XP\(Language)\DISK1 • PostScript 3 \DRIVERS\PS\WIN2K_XP\(Language - Ricoh CL3000e | Manual - Page 556
Operating Instructions Client Reference 113 ❒ If you do not want to install the printer when [Found New Hardware Wizard] starts with an operating system, which supports SCSI print, inactivate the device by following the procedures. A In the [Found New Hardware Wizard] dialog box, confirm that [This - Ricoh CL3000e | Manual - Page 557
Operating Instructions Client Reference 114 Note ❒ The maximum number of simultaneous print requests when connecting with IP over 1394 includes the print requests from the Ethernet interface. For more information, see the Administrator Reference. Installing the Printer Driver To Print using - Ricoh CL3000e | Manual - Page 558
is automatically sent to the printer by a computer. You can also confirm the printer status from your computer. • Bidirectional transmission is supported by Windows 95/98/Me, Windows 2000, Windows XP and Windows NT 4.0. • If you use the RPCS printer driver and bidirectional transmission is enabled - Ricoh CL3000e | Manual - Page 559
Instructions Client Reference 116 Note ❒ The RPCS printer driver supports bidirectional transmission and updates the printer status automat- ically. ❒ The PCL 5c printer driver supports bidirectional transmission, you can update the printer status manually. ❒ The PostScript 3 printer driver - Ricoh CL3000e | Manual - Page 560
Operating Instructions Client Reference 117 ❖ When connecting with IEEE 1394 • The printer must be connected to the bidirectional support] must be selected and [Enable printer pooling] must not be selected on the [port] tab with RPCS printer driver. ❖ When connecting with USB The printer must - Ricoh CL3000e | Manual - Page 561
Operating Instructions Client Reference 4. Windows NT 4.0 Configuration 118 Printing with a Print Server XP, Windows NT 4.0. Printing from Windows NT 4.0, you must install the printer driver and change the printer port to the print server. Windows 2000 Windows XP Windows NT 4.0 Print Server - Ricoh CL3000e | Manual - Page 562
Operating Instructions Client Reference 119 Installing the PCL 5c or RPCS Printer Driver A Close all applications that are running. B Insert the CD-ROM into the CD-ROM drive. Auto Run will start the installer. Important ❒ Never have two versions of the same printer driver installed on your system at - Ricoh CL3000e | Manual - Page 563
Make sure the location for the selected printer is shown after [Port:]. N Configure the default printer as necessary. ❖ Default Printer Check [Default Printer] to set the printer as the default printer. O Click [Continue] to start printer driver installation. Note ❒ During installation, the [Digital - Ricoh CL3000e | Manual - Page 564
Operating Instructions Client Reference 121 P When the [Select Program] dialog box appears, click [Finish]. Q For more information about option settings, see p.143 "Setting Up Options". Installing the PostScript Printer Driver A Close all applications that are running. B Insert the CD-ROM into the CD - Ricoh CL3000e | Manual - Page 565
Operating Instructions Client Reference 122 C Select a language to change the interface language, and , Magyar, Polski, Portugues, Suomi D Click [PostScript 3 Printer Driver]. "Add Printer Wizard" starts. E Click [Next]. F Click [Network printer], and then click [Next]. G Click [Next]. H Double - Ricoh CL3000e | Manual - Page 566
Operating Instructions Client Reference 123 L Select whether or not you want to print a test page, and then click [Finish]. The installation is complete. Note ❒ You can specify the "User Code" with the Printer Driver Properties after installing the printer driv- er. See printer driver's Help. - Ricoh CL3000e | Manual - Page 567
5c or RPCS Printer Driver" or p.134 "Installing the PostScript Printer Driver". Note ❒ If you want to use "LPR Port", "Microsoft TCP/ IP Printing" must be installed. Configuring the Protocols Configuring TCP/IP and IPP for Printing Follow these instructions to configure the printer and Windows NT - Ricoh CL3000e | Manual - Page 568
Operating Instructions Client Reference 125 Reference For more information about how to make the above settings, see "Configuring the printer for the Network" in the Quick Installation Guide. If DHCP is used to assign IP addresses, see Appendix, "When Using DHCP" in the Administrator Reference. Note - Ricoh CL3000e | Manual - Page 569
configuring network services, see Windows NT 4.0 Help. Configuring NetBEUI for Printing Follow these instructions to configure the printer and make the above settings, see "Configuring the printer for the Network" in the Quick Installation Guide. ❖ Configuring a Windows NT 4.0 computer Install - Ricoh CL3000e | Manual - Page 570
Operating Instructions Client Reference 127 B Change the Lana Number. Click the [Services] tab, click "NetBIOS Interface" in the [Network Services:] box, and click [Properties]. C Click the Lana Number corresponding to the Nbf protocol of the [Network Route] headline, and click [Edit]. D Type "0" as - Ricoh CL3000e | Manual - Page 571
Operating Instructions Client Reference 128 Installing Software Preparation If you are not using the print server, install SmartNetMonitor for Client, and then install the printer driver by selecting "SmartNetMonitor for Client". This enables peer-to-peer network printing with the TCP/IP, NetBEUI, - Ricoh CL3000e | Manual - Page 572
click [Next >]. F Follow the instructions on the screen. Note ❒ If you are required to restart the computer after the installation of SmartNetMonitor for Admin, restart the computer and continue with necessary configurations. Installing the PCL 5c or RPCS Printer Driver A Close all applications that - Ricoh CL3000e | Manual - Page 573
Operating Instructions Client Reference 130 C Select a language to change the interface language, a printer drivers you want to use when the "Printer Program" dialog box appears. You can select more than one printer driver. G Select the printer model(s) you want to use. To change the printer name, - Ricoh CL3000e | Manual - Page 574
Operating Instructions Client Reference 131 SmarteNet Port A Click [Add]. B Select [SmartNetMonitor], and then click [OK]. C Select a printer you want to use. ❖ TCP/IP A Click [TCP/IP], and then click [Search]. Available printers will be listed. B Click the printer you want to use, and then click [ - Ricoh CL3000e | Manual - Page 575
Operating Instructions Client Reference 132 Note ❒ Printers that respond to a broadcast from the computer will be displayed. To print to a printer omit this, the address typed in [Printer URL] will be set as the IPP port name. D If a proxy server and IPP user name are used, click [Detailed Settings - Ricoh CL3000e | Manual - Page 576
Make sure the location for the selected printer is shown after [Port:]. K Configure the default printer as necessary. ❖ Default Printer Check [Default Printer] to set the printer as the default printer. L Click [Continue] to start printer driver installation. Note ❒ During installation, the [Digital - Ricoh CL3000e | Manual - Page 577
Operating Instructions Client Reference 134 Installing the PostScript Printer Driver A Close all applications that are running. B Insert the CD-ROM into the CD-ROM drive. Auto Run will start the installer. Important ❒ Never have two versions of the same printer driver installed on your system at the - Ricoh CL3000e | Manual - Page 578
Operating Instructions Client Reference 135 E Click [Next]. F Select the port you want to use. • SmartNetMonitor • LPR Port SmartNetMonitor A Click [Add Port:]. B Select [SmartNetMonitor], and then [New Port...]. C Select a printer you want to use. ❖ TCP/IP A Click [TCP/IP], and then click [Search]. - Ricoh CL3000e | Manual - Page 579
Operating Instructions Client Reference 136 Note ❒ Printers that respond to a broadcast from the computer will be displayed. To print to a printer omit this, the address typed in [Printer URL] will be set as the IPP port name. D If a proxy server and IPP user name are used, click [Detailed Settings] - Ricoh CL3000e | Manual - Page 580
to print a test page, and then click [Finish]. Start printer driver installation. J Set up the options. Note ❒ You can specify the "User Code" with the Printer Properties after installing the printer driver. See printer driver's Help. Reference For more information about option settings, see p.143 - Ricoh CL3000e | Manual - Page 581
Instructions Client Reference 138 Changing Port Settings Follow the steps to change SmartNetMonitor for Client settings, such as the proxy server settings or IPP URL. Note ❒ There are no settings for the NetBEUI protocol. A From the [Printers] window, click the icon of the printer User Settings - Ricoh CL3000e | Manual - Page 582
Operating Instructions Client Reference 139 Printing with Parallel Connection Preparation To use a printer connected to the parallel interface, select "LPT1:" when installing the printer driver. Installing the PCL 5c or RPCS Printer Driver Preparation The target printer must be turned on before - Ricoh CL3000e | Manual - Page 583
Operating Instructions Client Reference 140 D Select [PCL/RPCS Printer Drivers]. E The software license agreement appears in the [License Agreement] dialog box. After reading through all of the contents, click [I accept the agreement] to agree with - Ricoh CL3000e | Manual - Page 584
Operating Instructions Client Reference 141 L When the [Select Program] dialog box appears, click [Finish]. M For more information about option settings, see p.143 "Setting Up Options". Installing the PostScript Printer Driver A Close all applications that are running. B Insert the CD-ROM into the CD - Ricoh CL3000e | Manual - Page 585
Operating Instructions Client Reference 142 C Select a language to change the interface language, and then ), Suomi (Finnish), Svenska (Swedish) Note ❒ The printer driver with the selected language will be installed. The printer driver will be installed in English if you select the following - Ricoh CL3000e | Manual - Page 586
is automatically sent to the printer by a computer. You can also confirm the printer status from your computer. • Bidirectional transmission is supported by Windows 95/98/Me, Windows 2000, Windows XP and Windows NT 4.0. • If you use the RPCS printer driver and bidirectional transmission is enabled - Ricoh CL3000e | Manual - Page 587
Instructions Client Reference 144 Note ❒ The RPCS printer driver supports bidirectional transmission and updates the printer status automat- ically. ❒ The PCL 5c printer driver supports bidirectional transmission, you can update the printer status manually. ❒ The PostScript 3 printer driver - Ricoh CL3000e | Manual - Page 588
Operating Instructions Client Reference 5. manual that comes with your version of the Mac OS for more information. Limitation ❒ For use with Mac OS 8.6 or later. (Mac OS X Classic environment is supported.) ❒ For use with a Macintosh, Power PC is required. Note ❒ The PostScript 3 printer driver - Ricoh CL3000e | Manual - Page 589
Operating Instructions Client Reference 146 Installing the Printer Driver and Software Preparation If the AdobePS installation starts under Mac OS X, the desktop automatically changes to the Classic environment. If you want to set a printer with Mac OS X, see ⇒ p.154 "Mac OS X". Installing the - Ricoh CL3000e | Manual - Page 590
Operating Instructions Client Reference 147 PPD File A Double-click the CD-ROM icon. B Double-click the [Mac OS 8 and 9] folder. C Double-click the [Printer Descriptions] folder. D Double-click the folder of the language you use. E Open [Disk1]. F Drag the PPD file and the Plugin file into [Printer - Ricoh CL3000e | Manual - Page 591
Operating Instructions Client Reference 148 D Click [Create]. E Click the printer you want to use, and then click [Select]. The PPD file is set up, and the [Adobe PS] icon appears at the left of the printer name in the list. Next, follow the procedure on p.149 "Setting Up Options" to make the option - Ricoh CL3000e | Manual - Page 592
Operating Instructions Client Reference 149 Setting Up Options A On the [Apple] menu, select [Chooser]. B Click the [Adobe PS] icon. C In the [Select the PostScript Printer:] list, click the name of the printer you want to use, and then click [Setup]. D Click [Configure]. A list of options appears. - Ricoh CL3000e | Manual - Page 593
Operating Instructions Client Reference 150 Installing the ColorSync profile ColorSync profile makes it possible for the printer to print colors of similar intensity to those that appear on your computer display. You must install the ColorSync profile to use this feature. Note ❒ The ColorSync - Ricoh CL3000e | Manual - Page 594
-click the CD-ROM icon. D Double-click the [Mac OS 8 and 9] folder. E Double-click the [ATM] folder. F Double-click the [ATM 4.6.2 installer] icon. G Follow the instructions on the screen. H When the procedure is complete, restart the computer. ATM will be completely installed only after restarting. - Ricoh CL3000e | Manual - Page 595
Operating Instructions Client Reference 152 I Select [Control Panel] from the Apple menu, and then select [~ATM]. J Open the ATM control panel. Note ❒ For more information about installation, see the User's Guide in the ATM folder. Installing screen fonts The screen fonts described below can be - Ricoh CL3000e | Manual - Page 596
I Click [OK]. The fonts are installed. J Restart the Macintosh. Operating Instructions Client Reference 153 - Ricoh CL3000e | Manual - Page 597
Operating Instructions Client Reference 154 Mac OS X This section describes how to configure a Mac OS X to use Ether Talk. The following procedure describes how to configure Mac OS X 10.1. If you are not using Mac OS X 10.1, see the manual that comes with your version of the Mac OS X for more - Ricoh CL3000e | Manual - Page 598
Operating Instructions Client Reference 155 Setting Up the PPD File A Run Print Center. B Click [Add Printer]. Select [AppleTalk] in the first pop-up menu. If the zone has been set, select the zone in the second pop-up menu. C Select the PPD file of the model you are using from the "Printer Model:" - Ricoh CL3000e | Manual - Page 599
Operating Instructions Client Reference 156 Configuring Macintosh Changing to EtherTalk Follow the procedure to configure a Macintosh to use EtherTalk. Reference For more information about installing the software required for EtherTalk, see the Macintosh manuals. Mac OS A Open [Control Panel], and - Ricoh CL3000e | Manual - Page 600
Operating Instructions Client Reference 157 Mac OS X Preparation You need an administrator name and a the Printer for the Network with the Control Panel" in the Quick Installation Guide. Changing the Printer Name If the network has several same model printers, the names will be the same. Printers - Ricoh CL3000e | Manual - Page 601
Operating Instructions Client Reference 158 Changing the Zone It may be necessary to change the zone configuration. To install from Web Status Monitor, see the Administrator Reference. - Ricoh CL3000e | Manual - Page 602
Operating Instructions Client Reference 6. NetWare Configuration 159 This chapter describes how to set up /Me Follow the procedure to set up a Windows 95/98/Me client. After installing the printer driver, change the print port to NetWare queue. Preparation Log on to the NetWare file server before - Ricoh CL3000e | Manual - Page 603
Operating Instructions Client Reference 160 B Click [Start], point to [Settings], and then click [Printers]. C In the [Printers] window, click the icon of the printer you want to use. On the [File] menu, click [Properties]. D Click the [Details] tab, and then click [Add Port]. E Click [Network], and - Ricoh CL3000e | Manual - Page 604
Operating Instructions Client Reference 161 When using the PostScript 3 printer driver Follow these steps to set up for the PostScript 3 printer driver. A Click the [PostScript] tab. B Click [Advanced]. C Click to clear the [Send CTRL+D before job] and [Send CTRL+D after job] check boxes. L Click [ - Ricoh CL3000e | Manual - Page 605
Operating Instructions Client Reference 162 Windows 2000 Follow the procedure to set Places] icon on the desktop and navigate to the queue you want to use, and then double-click it. The printers dialog box appears. B Click [No]. C Close all applications that are running. D Insert the CD-ROM into the - Ricoh CL3000e | Manual - Page 606
Operating Instructions Client Reference 163 Using the PCL 5c or RPCS Printer Driver A Select [PCL/RPCS Printer Drivers]. B The software license agreement appears in the [License Agreement] dialog box. After reading through all of the contents, click [I accept the agreement] to agree with - Ricoh CL3000e | Manual - Page 607
Client Reference 164 F Follow the instructions on the screen. -If a message is displayed during installation of the printer driver When there is a driver in the computer that is newer than the one currently being installed, a message dialog box appears. In such a case, you cannot install - Ricoh CL3000e | Manual - Page 608
Operating Instructions Client Reference 165 Windows XP Follow the procedure to set Network Places] icon, and then navigate to the queue you want to use, and then double-click it. The printers dialog box appears. B Click [Cancel]. C Close all applications that are running. D Insert the CD-ROM into - Ricoh CL3000e | Manual - Page 609
Driver A Click [PostScript 3 Printer Driver]. "Add Printer Wizard" starts. B Click [Next]. C Click [Local Printer], and then click [Next]. D From the [Use the following port:] list box, select the queue you selected in step A. E Click [Next].Go to step F. F Follow the instructions on the screen - Ricoh CL3000e | Manual - Page 610
Operating Instructions Client Reference 167 -If a message is displayed during installation of the printer driver When there is a driver in the computer that is newer than the one currently being installed, a message dialog box appears. In such a case, you cannot install with the Auto - Ricoh CL3000e | Manual - Page 611
Operating Instructions Client Reference 168 Windows NT 4.0 Follow the procedure to set up Places] icon on the desktop and navigate to the queue you want to use, and then double-click it. The printers dialog box appears. B Click [No]. C Close all applications that are running. D Insert the CD-ROM into - Ricoh CL3000e | Manual - Page 612
Operating Instructions Client Reference 169 Using the PCL 5c or RPCS Printer Driver A Select [PCL/RPCS Printer Drivers]. B The software license agreement appears in the [License Agreement] dialog box. After reading through all of the contents, click [I accept the agreement] to agree with - Ricoh CL3000e | Manual - Page 613
Operating Instructions Client Reference 170 -If a message is displayed during installation of the printer driver When there is a driver in the computer that is newer than the one currently being installed, a message dialog box appears. In such a case, you cannot install with the Auto - Ricoh CL3000e | Manual - Page 614
are three CD-ROMs that come with this printer. These are labeled "Operating Instructions", "Printer Drivers and Utilities" and "Desk Top Binder V2 Unit Type 4510. For more information, see the Readme file or the manual that comes with the optional 1394 Interface Unit Type 4510. ❖ USB Printing Support - Ricoh CL3000e | Manual - Page 615
Operating Instructions Client Reference 172 Viewing the Contents of the CD-ROM Follow the steps to view the contents of the CD-ROM. A Insert the CD-ROM into the CD-ROM drive. Auto Run will start the installer. B Click [Browse This CD-ROM]. Explorer starts and displays the contents of the CD-ROM. - Ricoh CL3000e | Manual - Page 616
Operating Instructions Client Reference 173 Printer Drivers for This Printer Printing requires installation of a printer driver for your operating system. The following drivers are included on the CD-ROM that comes with this printer. Operating system Windows 95 *1 Windows 98 *2 Windows Me *3 - Ricoh CL3000e | Manual - Page 617
Instructions Client Reference 174 *7 Required version is 8.6 or later. (Mac OS X Classic environment is supported.) *8 Requires Service Pack 6 or later. *9 The Adobe PostScript printer drivers and PostScript Printer Description (PPD) files are included on the CD-ROM labeled "Printer Drivers - Ricoh CL3000e | Manual - Page 618
⇒ p.215 "Windows NT 4.0 - Accessing the Printer Properties" ⇒ p.218 "Macintosh - Setting up for Printing" ❖ PPD files The PPD files are included on the CD-ROM that comes with this printer. The PPD files allow the printer driver to enable the printer specific functions. See p.218 "Macintosh - Setting - Ricoh CL3000e | Manual - Page 619
Instructions Client Reference 176 SmartNetMonitor for Admin SmartNetMonitor for Admin is software that uses the TCP/IP and IPX/SPX protocols to monitor the printers in a network. It can monitor multiple network printers Service for NetWare provided with Windows NT Novell Client for Windows NT/2000 - Ricoh CL3000e | Manual - Page 620
Operating Instructions Client Reference 177 ❖ What can it do? SmartNetMonitor for Admin is of print jobs executed from the computer. Note ❒ Using this function requires the User Account Enhance Unit Type B. Reference For the operations of the system administrator, see "Using SmartNetMonitor for - Ricoh CL3000e | Manual - Page 621
Operating Instructions Client Reference 178 SmartNetMonitor for Client SmartNetMonitor for Client is software equipped with the following functions. We recommend all users of this printer to install this software. • Provides the function to print in a Peer-to-Peer network, using the TCP/IP - Ricoh CL3000e | Manual - Page 622
Instructions /SPX provided with Windows NT NetBEUI provided with Windows NT Client Service for NetWare provided with Windows NT Novell Client for Windows NT/ , using the user codes. • Checks the results of print jobs executed from the computer. • Enables you to change the printer's network settings. - Ricoh CL3000e | Manual - Page 623
options necessary for printing, such as the Paper Feed Unit, are not installed on the substitute printer, that function is disabled. ❒ Load paper of the same size on both the printer for Recovery/Parallel Printing and the printer for giving print commands. When specifying a particular Paper Tray - Ricoh CL3000e | Manual - Page 624
Operating Instructions Client Reference 8. Setting up the Printer Driver and Canceling a Print Job 181 PCL 5c - Accessing the Printer Properties Windows 95/98/Me - Accessing the Printer Properties There are two methods you can use to open the Printer Properties dialog box. Making default printer - Ricoh CL3000e | Manual - Page 625
Operating Instructions Client Reference 182 -If a message is displayed during installation of the printer driver When there is a driver in the DRIVERS\PCL5C\WIN9X_ME\(Language)\DISK1 Making printer settings from an application To make the printer settings for a specific application, open the Printer - Ricoh CL3000e | Manual - Page 626
printing. Windows 2000 - Accessing the Printer Properties Making printer default settings - Printer Properties Limitation ❒ To change the printer settings requires Manage Printers permission. Members of the Administrators and Power Users groups have Manage Printers permission by default. When you - Ricoh CL3000e | Manual - Page 627
Operating Instructions Client Reference 184 Note ❒ When you open the Printer Properties dialog box for the first time after installing the RPCS printer driver, the confirmation window appears. After that, the initial display of the Printer Properties dialog box appears. D Make the necessary settings - Ricoh CL3000e | Manual - Page 628
Operating Instructions Client Reference 185 Making printer default settings - Printing Preferences Properties Limitation ❒ To change the printer settings requires Manage Printers permission. Members of the Administrators and Power Users groups have Manage Printers permission by default. When you set - Ricoh CL3000e | Manual - Page 629
Operating Instructions Client Reference 186 Making printer settings from an application To make the printer settings for a specific application, open the Printing Preferences Properties from that application. The following example describes how to make settings for the WordPad application that comes - Ricoh CL3000e | Manual - Page 630
Operating Instructions Client Reference 187 Windows XP - Accessing the Printer Properties Making printer default settings - Printer Properties Limitation ❒ To change the printer settings requires Manage Printers permission. Members of the Administrators and Power Users groups have Manage Printers - Ricoh CL3000e | Manual - Page 631
quit it. • PCL 5c DRIVERS\PCL5C\WIN2K_XP\(Language)\DISK1 Making printer default settings - Printing Preferences Properties Limitation ❒ To change the printer settings requires Manage Printers permission. Members of the Administrators and Power Users groups have Manage Printers permission by default - Ricoh CL3000e | Manual - Page 632
[OK]. Note ❒ Settings you make here are used as the default settings for all applications. Making printer settings from an application To make the printer settings for a specific application, open the Printing Preferences Properties from that application. The following example describes how to make - Ricoh CL3000e | Manual - Page 633
Instructions Client Reference 190 Windows NT 4.0 - Accessing the Printer Properties Making default printer settings - Printer Properties Limitation ❒ To change the printer settings requires Full Control permission. Members of Administrators, Server Operators, Print Operators, and Power Users - Ricoh CL3000e | Manual - Page 634
Operating Instructions Client Reference 191 -If a message is displayed during installation of the printer driver When there is a driver in the computer that is newer than the one currently being installed, a message dialog box appears. In such a case, you cannot install with the Auto - Ricoh CL3000e | Manual - Page 635
Operating Instructions Client Reference 192 Making default printer settings - Default Document Properties Limitation ❒ To change the printer settings requires Full Control access permission. Members of the Administra- tors, Server Operators, Print Operators, and Power Users groups have Full Control - Ricoh CL3000e | Manual - Page 636
Instructions Client Reference 193 Making printer settings from an application To make the printer settings for a specific application, open the Printer the application you are using. ❒ With some applications, the printer driver settings are not used, and the application's own default settings are - Ricoh CL3000e | Manual - Page 637
There are two windows types you can use to open the Printer Properties dialog box. "Multi-tab" is used as an example in this manual. See Help for information about changing the windows types. ❖ Multi-tab This is the window type for users who often change print settings in order to make various - Ricoh CL3000e | Manual - Page 638
Operating Instructions Client Reference 195 B Click to select the icon of the printer you want to use. C On the [File] menu, click [Properties]. Note ❒ When you open the Printer Properties dialog box for the first time after installing the RPCS printer driver, the confirmation window appears. After - Ricoh CL3000e | Manual - Page 639
Instructions Client Reference 196 Making printer settings from an application To make the printer settings for a specific application, open the Printer the application you are using. ❒ With some applications, the printer driver settings are not used, and the application's own default settings are - Ricoh CL3000e | Manual - Page 640
Operating Instructions Client Reference 197 Windows 2000 - Accessing the Printer Properties Making printer default settings - Printer Properties Limitation ❒ To change the printer settings requires Manage Printers permission. Members of the Administrators and Power Users groups have Manage Printers - Ricoh CL3000e | Manual - Page 641
to quit it. • RPCS DRIVERS\RPCS\WIN2K_XP\(Language)\DISK1 Making printer default settings - Printing Preferences Properties Limitation ❒ To change the printer settings requires Manage Printers permission. Members of the Administrators and Power Users groups have Manage Printers permission by default - Ricoh CL3000e | Manual - Page 642
[OK]. Note ❒ Settings you make here are used as the default settings for all applications. Making printer settings from an application To make the printer settings for a specific application, open the Printing Preferences Properties from that application. The following example describes how to make - Ricoh CL3000e | Manual - Page 643
Operating Instructions Client Reference 200 Windows XP - Accessing the Printer Properties Making printer default settings - Printer Properties Limitation ❒ To change the printer settings requires Manage Printers permission. Members of the Administrators and Power Users groups have Manage Printers - Ricoh CL3000e | Manual - Page 644
to quit it. • RPCS DRIVERS\RPCS\WIN2K_XP\(Language)\DISK1 Making printer default settings - Printing Preferences Properties Limitation ❒ To change the printer settings requires Manage Printers permission. Members of the Administrators and Power Users groups have Manage Printers permission by default - Ricoh CL3000e | Manual - Page 645
[OK]. Note ❒ Settings you make here are used as the default settings for all applications. Making printer settings from an application To make the printer settings for a specific application, open the Printing Preferences Properties from that application. The following example describes how to make - Ricoh CL3000e | Manual - Page 646
Instructions Client Reference 203 Windows NT 4.0 - Accessing the Printer Properties Making default printer settings - Printer Properties Limitation ❒ To change the printer settings requires Full Control permission. Members of Administrators, Server Operators, Print Operators, and Power Users - Ricoh CL3000e | Manual - Page 647
Operating Instructions Client Reference 204 -If a message is displayed during installation of the printer driver When there is a driver in the computer that is newer than the one currently being installed, a message dialog box appears. In such a case, you cannot install with the Auto - Ricoh CL3000e | Manual - Page 648
applications. Making printer settings from an application To make the printer settings for a specific application, open the Printer Properties dialog box the application you are using. ❒ With some applications, the printer driver settings are not used, and the application's own default settings are - Ricoh CL3000e | Manual - Page 649
methods you can use to open the Printer Properties dialog box. Making default printer settings To make the printer default settings, first open the Printer Properties dialog box from the [Printers] window. Note ❒ With some applications, the printer driver settings are not used, and the application - Ricoh CL3000e | Manual - Page 650
Operating Instructions Client Reference 207 D Make the necessary settings, and then click [OK]. E Click [OK]. -If a message is displayed during installation of the printer driver When there is a driver in the computer that is newer than the one currently being installed, a message dialog box appears - Ricoh CL3000e | Manual - Page 651
Instructions Client Reference 208 Making printer settings from an application To make the printer settings for a specific application, open the Printer the application you are using. ❒ With some applications, the printer driver settings are not used, and the application's own default settings are - Ricoh CL3000e | Manual - Page 652
Operating Instructions Client Reference 209 Windows 2000 - Accessing the Printer Properties Making printer default settings - Printer Properties Limitation ❒ To change the printer settings requires Manage Printers permission. Members of the Administrators and Power Users groups have Manage Printers - Ricoh CL3000e | Manual - Page 653
it. • PostScript 3 DRIVERS\PS\WIN2K_XP(Language)\DISK1 Making printer default settings - Printing Preferences Properties Limitation ❒ To change the printer settings requires Manage Printers permission. Members of the Administrators and Power Users groups have Manage Printers permission by default - Ricoh CL3000e | Manual - Page 654
[OK]. Note ❒ Settings you make here are used as the default settings for all applications. Making printer settings from an application To make the printer settings for a specific application, open the Printing Preferences Properties from that application. The following example describes how to make - Ricoh CL3000e | Manual - Page 655
Operating Instructions Client Reference 212 Windows XP - Accessing the Printer Properties Making printer default settings - Printer Properties Limitation ❒ To change the printer settings requires Manage Printers permission. Members of the Administrators and Power Users groups have Manage Printers - Ricoh CL3000e | Manual - Page 656
it. • PostScript 3 DRIVERS\PS\WIN2K_XP\(Language)\DISK1 Making printer default settings - Printing Preferences Properties Limitation ❒ To change the printer settings requires Manage Printers permission. Members of the Administrators and Power Users groups have Manage Printers permission by default - Ricoh CL3000e | Manual - Page 657
[OK]. Note ❒ Settings you make here are used as the default settings for all applications. Making printer settings from an application To make the printer settings for a specific application, open the Printing Preferences Properties from that application. The following example describes how to make - Ricoh CL3000e | Manual - Page 658
Instructions Client Reference 215 Windows NT 4.0 - Accessing the Printer Properties Making default printer settings - Printer Properties Limitation ❒ To change the printer settings requires Full Control permission. Members of Administrators, Server Operators, Print Operators, and Power Users - Ricoh CL3000e | Manual - Page 659
Operating Instructions Client Reference 216 -If a message is displayed during installation of the printer driver When there is a driver in the computer that is newer than the one currently being installed, a message dialog box appears. In such a case, you cannot install with the Auto - Ricoh CL3000e | Manual - Page 660
applications. Making printer settings from an application To make the printer settings for a specific application, open the Printer Properties dialog box the application you are using. ❒ With some applications, the printer driver settings are not used, and the application's own default settings are - Ricoh CL3000e | Manual - Page 661
Instructions Client Reference 218 C Make the necessary settings, and then click [OK]. D Click [OK] to start printing. Macintosh - Setting up for Printing Making paper settings from an application A Open the file you want to print. B On the [File] menu, click [Page Setup]. C Confirm that the printer - Ricoh CL3000e | Manual - Page 662
Operating Instructions Client Reference 219 Setting up for printing from an application A Open the file you want to print. B On the [File] menu, click [Print]. C Confirm that the printer is selected in the [Printer] box, and then make the printer settings. D After configuring the settings, click [ - Ricoh CL3000e | Manual - Page 663
Canceling a Print Job Operating Instructions Client Reference 220 Windows 95/98/Me, Windows 2000, Windows XP, Windows NT 4.0 - Canceling a Print Job A Double-click the printer icon on the Windows taskbar. A window appears, showing all the print jobs that are currently queuing to be printed. Check - Ricoh CL3000e | Manual - Page 664
Operating Instructions Client Reference 221 Macintosh - Canceling a Print Job A Double-click the printer's icon on the desktop. This procedure cancels the print job that is being processed by the printer. In some cases, the printer may already be processing data for the next series of print jobs - Ricoh CL3000e | Manual - Page 665
use this function, the optional Hard Disk Drive must be installed on the printer. Reference For more information about settings for printer driver, see the printer driver's Help file. Note ❒ You can identify the file you want to print by the User ID and the time when the job was stored. ❒ The actual - Ricoh CL3000e | Manual - Page 666
The [Print] dialog box appears. B Select the printer you want to use in the [Name] list box, and then click [Properties]. The Printer Properties dialog box appears. C From the [Job Type:] box, select [Sample Print]. D In the [User ID:] box, type a User ID of up to eight alphanumeric characters. Note - Ricoh CL3000e | Manual - Page 667
Operating Instructions Client Reference 224 Printing the Remaining Sets A Press {Menu}. ZHBS010E "Menu" appears on the panel display. B Press {U} or {T} to display "Sample Print", and then press {Enter #}. Menu: Sample Print The User ID and the time when the job was stored are displayed. C Press {U} - Ricoh CL3000e | Manual - Page 668
Operating Instructions Client Reference 225 D Confirm that "Print File" is displayed, and then press {Enter #}. Select Action: Print File The remaining sets are displayed. Note ❒ To cancel - Ricoh CL3000e | Manual - Page 669
Operating Instructions Client Reference 226 Deleting a Sample Print File A Press {Menu}. ZHBS010E "Menu" appears on the panel display. B Press {U} or {T} to display the "Sample Print" menu, and - Ricoh CL3000e | Manual - Page 670
Operating Instructions Client Reference 227 D Press {U} or {T} to display "Delete File", and then press {Enter #}. Select Action: Delete delete the file. The following message appears on the panel display. 08:56 ABCD1234 Press# to Delete F Press {On Line}. "Ready" appears on the panel display. Ready - Ricoh CL3000e | Manual - Page 671
of the newest jobs. If you turn off the power switch, the errors will be deleted. A Press {Menu}. ZHBS010E "Menu" appears on the panel display. B Press {U} or {T} to display "Sample Print", and then press {Enter #}. Menu: Sample Print The User ID and the time when the job was stored are displayed. - Ricoh CL3000e | Manual - Page 672
Operating Instructions Client Reference 229 C Press {U} or {T} to display "Error File(s)", and then press {Enter #}. Sample Print: Error File(s) D Press {U} or {T} to check the log. Error File(s): 06:52 AB5D1234 After you finish checking the error log, press {Escape}. The display returns to the - Ricoh CL3000e | Manual - Page 673
Operating Instructions Client Reference 230 Locked Print Use this function to maintain must be installed on the printer. Reference For more information about printer driver settings, see the printer driver's Help file. Note ❒ You can identify the file you want to print by the User ID and the time - Ricoh CL3000e | Manual - Page 674
Instructions Client Reference 231 C From the [Job Type:] box, select [Locked Print]. D In the [User ID:] box, type a User ID of up to eight alphanumeric characters. Note ❒ This is used to identify the user associated with a job. ❒ The User cases. You can check the error log for jobs that were not - Ricoh CL3000e | Manual - Page 675
Entering the Password A Press {Menu}. Operating Instructions Client Reference 232 ZHBS010E "Menu" appears on the panel display. B Press {U} or {T} to display "Locked Print", and then press {Enter #}. Menu: Locked Print The User ID and the time when the job was stored are displayed. C Press {U} or - Ricoh CL3000e | Manual - Page 676
Operating Instructions Client Reference 233 D Enter the password. A Press {U} or {T} to enter the left most digit of the password, and then press {Enter #}. Password: [0---] B The next digit - Ricoh CL3000e | Manual - Page 677
Operating Instructions Client Reference 234 Deleting the Locked Print File A Press {Menu}. ZHBS010E "Menu" appears on the panel display. B Press {U} or {T} to display the "Locked Print" menu, - Ricoh CL3000e | Manual - Page 678
Operating Instructions Client Reference 235 D Enter the password of the Locked Print file. A Press {U} or {T} to enter the left most digit want change the Locked Print file, press {Escape}. F Press {Enter #}. "Deleted" appears on the panel display, and then the printer returns to the previous menu. - Ricoh CL3000e | Manual - Page 679
up to 20 of the newest jobs. If you turn off the printer power, the errors will be deleted. A Press {Menu}. ZHBS010E "Menu" appears on the panel display. B Press {U} or {T} to display "Locked Print", and then press {Enter #}. Menu: Locked Print The User ID and the time when the job was stored are - Ricoh CL3000e | Manual - Page 680
Operating Instructions Client Reference 237 C Press {U} or {T} to display "Error File(s)", and then press {Enter #}. Locked Print: Error File(s) D Press {U} or {T} to check the log. Error File(s): 06:52 AB5D1234 After you finish checking the error log, press {Escape}. The display returns to the - Ricoh CL3000e | Manual - Page 681
Operating Instructions Client Reference 10. Troubleshooting 238 Checking the Printer Status SmartNetMonitor for Client A the displayed menu. The [SmartNetMonitor for Client-Options] window is displayed. C Select the printer you want to use, check [To be Monitored], and then click [OK]. D Right - Ricoh CL3000e | Manual - Page 682
Operating Instructions Client Reference 239 Web Browser A Start up the web browser. B Type "http://(the IP address of the printer you want the status to be displayed)" for the ad- dress. The status of the selected printer is displayed on the web browser. C Click [Status] to find the amount of paper - Ricoh CL3000e | Manual - Page 683
11. Appendix Color Guide Operating Instructions Client Reference 240 Color Printing Basics Additive (Emitted) and Subtractive (Reflected) Color Models All lights are a mixture of red, green, and blue, which are normally called the RGB color model. When red, green, and blue are of equal intensities - Ricoh CL3000e | Manual - Page 684
Instructions Client Reference 241 Printed color is a mixture of cyan, magenta, and yellow, which are normally called the CMY color model. When mixed in equal proportions the CMY color model produces black. Note ❒ CMY is also called subtractive or reflective color. The printer uses CMY toner - Ricoh CL3000e | Manual - Page 685
black. For example, if the image is created with cyan only, there is no problem in printing all of it with cyan toner. However, full-color images are actually comprised of 10,000s of fine colors. These fine colors can be expressed by changing the ratio of CMYK toner particles to be printed per unit - Ricoh CL3000e | Manual - Page 686
Collate Operating Instructions Client Reference 243 Reference For more information about collate and job separation, see the printer driver's Help file. ❖ Collate Outputs can be assembled as sets in sequential order. Limitation ❒ To use these functions, the optional Memory Unit of at least 128 MB - Ricoh CL3000e | Manual - Page 687
the Zone (Macintosh), 158 Changing to EtherTalk, 156 Checking the Error Log, 228 Checking the Error log, 236 Checking the Printer Status, 238 CMY, 241 CMY color model, 241 Collate, 243 Color Guide, 240 color models, 240 Color Printing Basics, 240 configuration Macintosh, 145 NetWare, 159 Windows - Ricoh CL3000e | Manual - Page 688
/Me, 39 Windows NT 4.0, 139 Windows XP, 104 R RGB, 240 RGB color model, 240 S Sample Print, 222 Setting Up Options Windows 2000, 82 Windows 95/98/Me, 47 Windows NT 4.0, 143 Windows XP, 115 Setting up the Printer Driver and Canceling a Print Job, 181 SmartNetMonitor for Admin, 176 SmartNetMonitor for - Ricoh CL3000e | Manual - Page 689
Operating Instructions Client Reference 246 T troubleshooting, 238 U USB Printing Support, 171 W Windows 2000, 51 printer properties, PostScript 3, 209 printer properties, RPCS, 183, 197 Windows 95/98/Me printer properties, PostScript 3, 206 printer properties, RPCS, 181, 194 Windows 95/98/Me - Ricoh CL3000e | Manual - Page 690
Operating Instructions Client Reference 247 Copyright © 2002 - Ricoh CL3000e | Manual - Page 691
Operating Instructions Client Reference 248 EE GB G081-6610
-
 1
1 -
 2
2 -
 3
3 -
 4
4 -
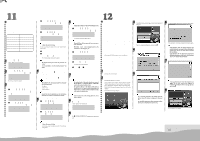 5
5 -
 6
6 -
 7
7 -
8
-
9
-
10
-
11
-
12
-
13
-
14
-
15
-
16
-
17
-
18
-
19
-
20
-
21
-
22
-
23
-
24
-
25
-
26
-
27
-
28
-
29
-
30
-
31
-
32
-
33
-
34
-
35
-
36
-
37
-
38
-
39
-
40
-
41
-
42
-
43
-
44
-
45
-
46
-
47
-
48
-
49
-
50
-
51
-
52
-
53
-
54
-
55
-
56
-
57
-
58
-
59
-
60
-
61
-
62
-
63
-
64
-
65
-
66
-
67
-
68
-
69
-
70
-
71
-
72
-
73
-
74
-
75
-
76
-
77
-
78
-
79
-
80
-
81
-
82
-
83
-
84
-
85
-
86
-
87
-
88
-
89
-
90
-
91
-
92
-
93
-
94
-
95
-
96
-
97
-
98
-
99
-
100
-
101
-
102
-
103
-
104
-
105
-
106
-
107
-
108
-
109
-
110
-
111
-
112
-
113
-
114
-
115
-
116
-
117
-
118
-
119
-
120
-
121
-
122
-
123
-
124
-
125
-
126
-
127
-
128
-
129
-
130
-
131
-
132
-
133
-
134
-
135
-
136
-
137
-
138
-
139
-
140
-
141
-
142
-
143
-
144
-
145
-
146
-
147
-
148
-
149
-
150
-
151
-
152
-
153
-
154
-
155
-
156
-
157
-
158
-
159
-
160
-
161
-
162
-
163
-
164
-
165
-
166
-
167
-
168
-
169
-
170
-
171
-
172
-
173
-
174
-
175
-
176
-
177
-
178
-
179
-
180
-
181
-
182
-
183
-
184
-
185
-
186
-
187
-
188
-
189
-
190
-
191
-
192
-
193
-
194
-
195
-
196
-
197
-
198
-
199
-
200
-
201
-
202
-
203
-
204
-
205
-
206
-
207
-
208
-
209
-
210
-
211
-
212
-
213
-
214
-
215
-
216
-
217
-
218
-
219
-
220
-
221
-
222
-
223
-
224
-
225
-
226
-
227
-
228
-
229
-
230
-
231
-
232
-
233
-
234
-
235
-
236
-
237
-
238
-
239
-
240
-
241
-
242
-
243
-
244
-
245
-
246
-
247
-
248
-
249
-
250
-
251
-
252
-
253
-
254
-
255
-
256
-
257
-
258
-
259
-
260
-
261
-
262
-
263
-
264
-
265
-
266
-
267
-
268
-
269
-
270
-
271
-
272
-
273
-
274
-
275
-
276
-
277
-
278
-
279
-
280
-
281
-
282
-
283
-
284
-
285
-
286
-
287
-
288
-
289
-
290
-
291
-
292
-
293
-
294
-
295
-
296
-
297
-
298
-
299
-
300
-
301
-
302
-
303
-
304
-
305
-
306
-
307
-
308
-
309
-
310
-
311
-
312
-
313
-
314
-
315
-
316
-
317
-
318
-
319
-
320
-
321
-
322
-
323
-
324
-
325
-
326
-
327
-
328
-
329
-
330
-
331
-
332
-
333
-
334
-
335
-
336
-
337
-
338
-
339
-
340
-
341
-
342
-
343
-
344
-
345
-
346
-
347
-
348
-
349
-
350
-
351
-
352
-
353
-
354
-
355
-
356
-
357
-
358
-
359
-
360
-
361
-
362
-
363
-
364
-
365
-
366
-
367
-
368
-
369
-
370
-
371
-
372
-
373
-
374
-
375
-
376
-
377
-
378
-
379
-
380
-
381
-
382
-
383
-
384
-
385
-
386
-
387
-
388
-
389
-
390
-
391
-
392
-
393
-
394
-
395
-
396
-
397
-
398
-
399
-
400
-
401
-
402
-
403
-
404
-
405
-
406
-
407
-
408
-
409
-
410
-
411
-
412
-
413
-
414
-
415
-
416
-
417
-
418
-
419
-
420
-
421
-
422
-
423
-
424
-
425
-
426
-
427
-
428
-
429
-
430
-
431
-
432
-
433
-
434
-
435
-
436
-
437
-
438
-
439
-
440
-
441
-
442
-
443
-
444
-
445
-
446
-
447
-
448
-
449
-
450
-
451
-
452
-
453
-
454
-
455
-
456
-
457
-
458
-
459
-
460
-
461
-
462
-
463
-
464
-
465
-
466
-
467
-
468
-
469
-
470
-
471
-
472
-
473
-
474
-
475
-
476
-
477
-
478
-
479
-
480
-
481
-
482
-
483
-
484
-
485
-
486
-
487
-
488
-
489
-
490
-
491
-
492
-
493
-
494
-
495
-
496
-
497
-
498
-
499
-
500
-
501
-
502
-
503
-
504
-
505
-
506
-
507
-
508
-
509
-
510
-
511
-
512
-
513
-
514
-
515
-
516
-
517
-
518
-
519
-
520
-
521
-
522
-
523
-
524
-
525
-
526
-
527
-
528
-
529
-
530
-
531
-
532
-
533
-
534
-
535
-
536
-
537
-
538
-
539
-
540
-
541
-
542
-
543
-
544
-
545
-
546
-
547
-
548
-
549
-
550
-
551
-
552
-
553
-
554
-
555
-
556
-
557
-
558
-
559
-
560
-
561
-
562
-
563
-
564
-
565
-
566
-
567
-
568
-
569
-
570
-
571
-
572
-
573
-
574
-
575
-
576
-
577
-
578
-
579
-
580
-
581
-
582
-
583
-
584
-
585
-
586
-
587
-
588
-
589
-
590
-
591
-
592
-
593
-
594
-
595
-
596
-
597
-
598
-
599
-
600
-
601
-
602
-
603
-
604
-
605
-
606
-
607
-
608
-
609
-
610
-
611
-
612
-
613
-
614
-
615
-
616
-
617
-
618
-
619
-
620
-
621
-
622
-
623
-
624
-
625
-
626
-
627
-
628
-
629
-
630
-
631
-
632
-
633
-
634
-
635
-
636
-
637
-
638
-
639
-
640
-
641
-
642
-
643
-
644
-
645
-
646
-
647
-
648
-
649
-
650
-
651
-
652
-
653
-
654
-
655
-
656
-
657
-
658
-
659
-
660
-
661
-
662
-
663
-
664
-
665
-
666
-
667
-
668
-
669
-
670
-
671
-
672
-
673
-
674
-
675
-
676
-
677
-
678
-
679
-
680
-
681
-
682
-
683
-
684
-
685
-
686
-
687
-
688
-
689
-
690
-
691
 |
 |
: Paper
: CD-ROM
: Manuals for Client
: Manuals for Administrator
MANUALS PROVIDED
Printed Manuals
MANUALS FOR THIS PRINTER (this sheet)
Quick Installation Guide
Option Setup Guide
Maintenance Guide
Manuals on CD-ROM
(Labeled “Operating Instructions”)
Manuals for this Printer
Administrator Reference
Client Reference
PostScript 3 Supplement
Option Setup Guide
Maintenance Guide
If the manuals do not open automatically, double-click the following file on the CD-ROM.
Windows
MANUAL.EXE
Macintosh
manua
l
Printed manuals are also included as PDF files on the CD-ROM.
Windows / Macintosh
[Language]
option setup
mainte
Icons
Click to go to the top page where you can select other manuals.
Click to go to the next page.
Click to go to the table of contents of the viewed manual.
If you want to open multiple manuals at the same time, follow the procedure below:
From the
[File]
menu, point to
[Preferences]
and select
[General...]
. Clear the
[Open
Cross-Doc Links in Same Window]
check box in the
[General Preference]
dialog
box that appears.
BEFORE YOU START
Printer Installation
Quick Installation Guide
Provides information about setting up the printer.
This also provides information about installing the software with [Quick Install] and specifying
network settings from the control panel.
The Quick Installation Guide provides all the information you need to connect the printer to a
network with the network interface cable.
PREPARING THE PRINTER
Option Installation
Option Setup Guide
Provides information about setting up the options.
Options
Network Printer Configuration
Administrator Reference
Provides information about setting up the printer as a print server and making printer settings
with the control panel.
Windows 2000 Print Server Configuration
Windows XP Print Server Configuration
Windows NT4.0
Print Server Configuration
NetWare Configuration
Using SmartNetMonitor for Admin
Using a Web Browser
Monitoring and Configuring the Printer
Making Printer Settings with the Control Panel
PREPARING THE CLIENT COMPUTER
Printing from Computers (Operating Systems)
Client Reference
Provides information about setting up and using the printer in Windows, Macintosh or NetWare
environment, and also provides information about the software and utilities provided on the
CD-ROM.
Windows 95/98/Me Configuration
Windows 2000 Configuration
Windows XP Configuration
Windows NT 4.0 Configuration
Macintosh Configuration
NetWare Configuration
Software and Utilities included on the CD-ROM
Setting up the Printer Driver and Canceling a Print Job
Uninstalling the Printer Driver
Sample Print/Locked Print
Troubleshooting
PostScript 3 Supplement
Provides information about the meaning and features for the PostScript 3 printer driver.
Using PostScript 3
Printer Utility for Mac
MAINTENANCE
Maintenance and Troubleshooting
Maintenance Guide 1
Provides information about replacing consumables and cleaning and adjusting the printer.
Getting Started
Paper and Other Media
Replacing Consumables and Maintenace Kit
Cleaning and Adjusting the Printer
Troubleshooting
G081-6500
Printed in the Netherland
Copyright
©
2002
EE
GB
MANUALS FOR THIS PRINTER